Kids 3D Lab lets you build 3D things in your web browser. Then a 3D printer can make them real! You don't need to know anything about 3D design to start. You snap shapes together, like building blocks.
- You don't need an account. You don't need to install anything.
- Your work stays on your computer. Nothing is sent anywhere.
- Every size is in millimetres (mm). 10 mm is 1 centimetre.
The start page
When you open Kids 3D Lab, you see the start page.
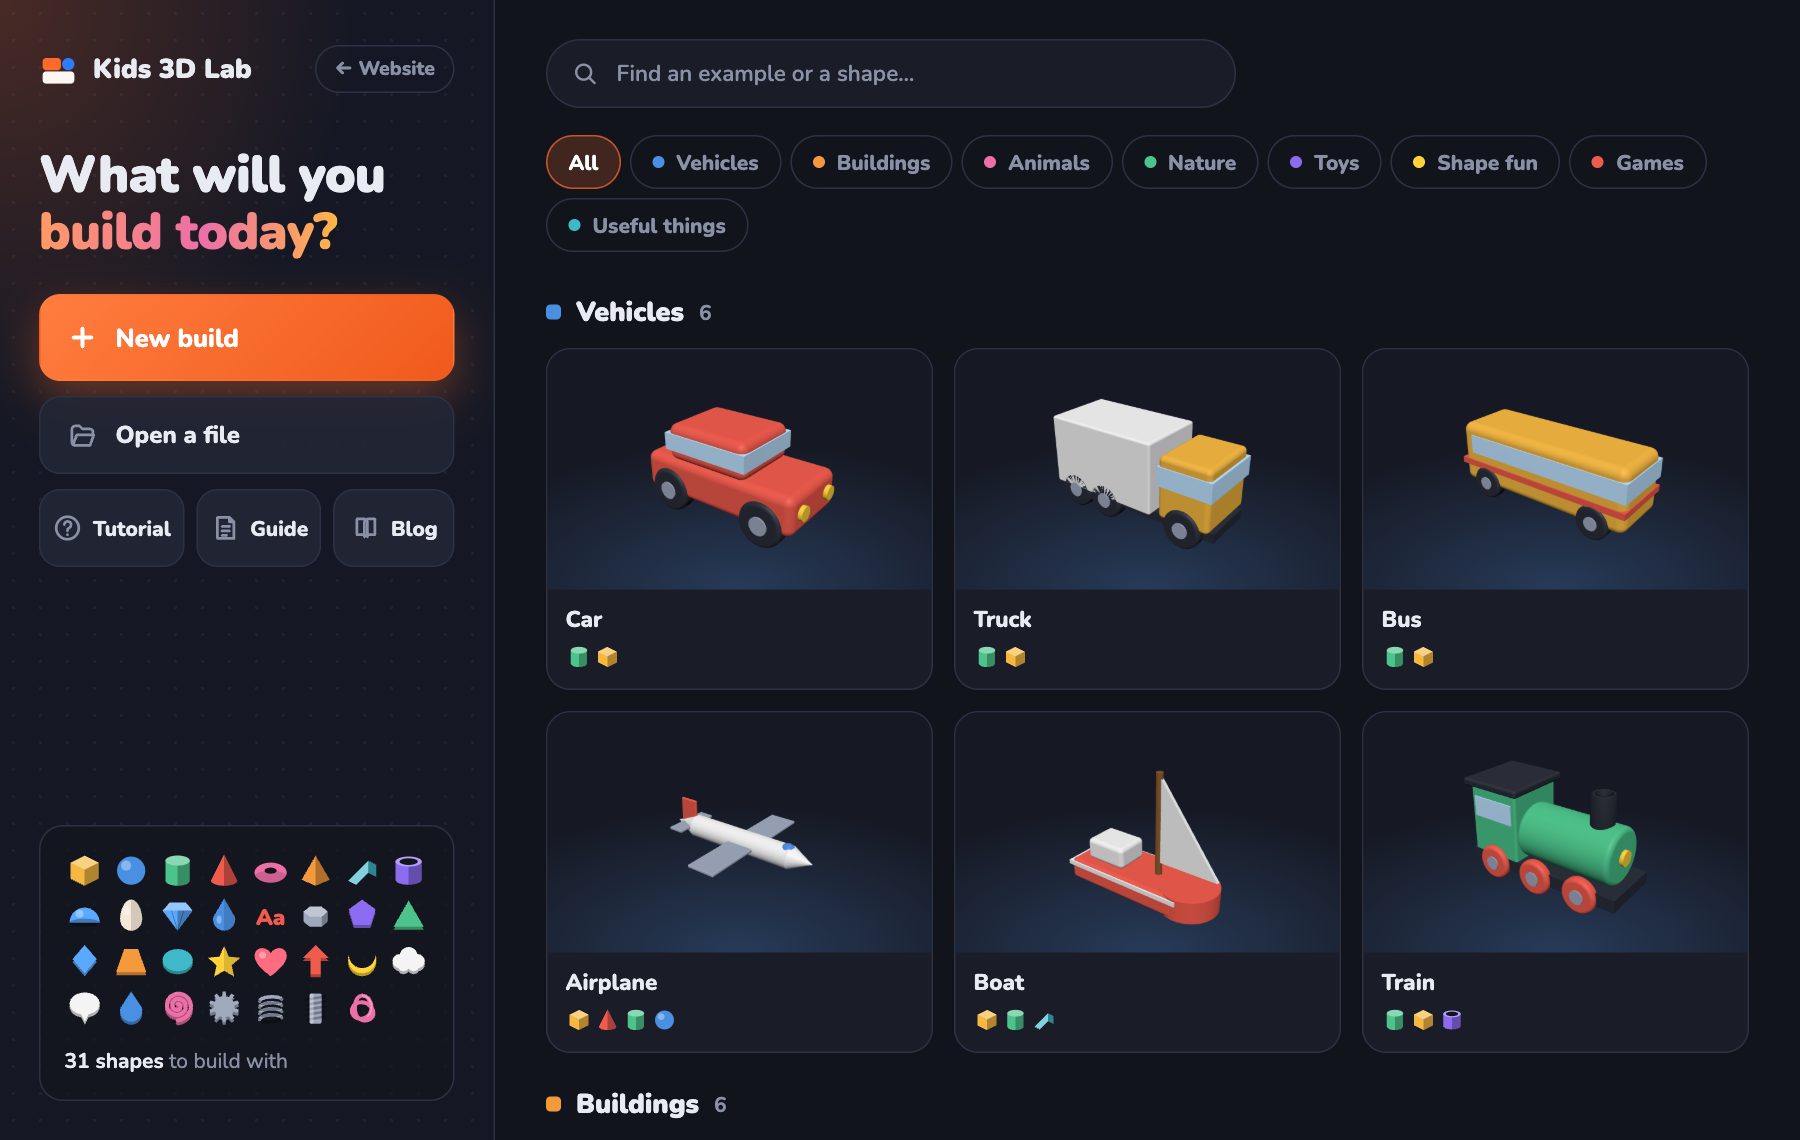
| Button | What it does |
|---|---|
| New build | Starts a new build on an empty plate |
| Open a file | Opens a .kids3d file you saved before |
| Tutorial | Opens the step-by-step lessons |
| Blog | Opens short lessons and ideas |
| Keep going | Takes you back to the build you were working on |
| The search box | Finds an example. Type a name, like "car", or a shape, like "gear" |
On the right there are 80 examples in 8 groups: Vehicles, Buildings, Animals, Nature, Toys, Shape fun, Games and Useful things. Click a group's button to see just that group. Under each picture, little icons show which shapes it is made of. Click a picture to open it and play with it!
Builds you chose to keep are at the top, under My builds.
The tour
The first time you start an empty plate, a little card at the bottom teaches you 6 things, one by one. Just do what it says and it moves on by itself. Click Skip the tour if you don't want it.
The parts of the screen
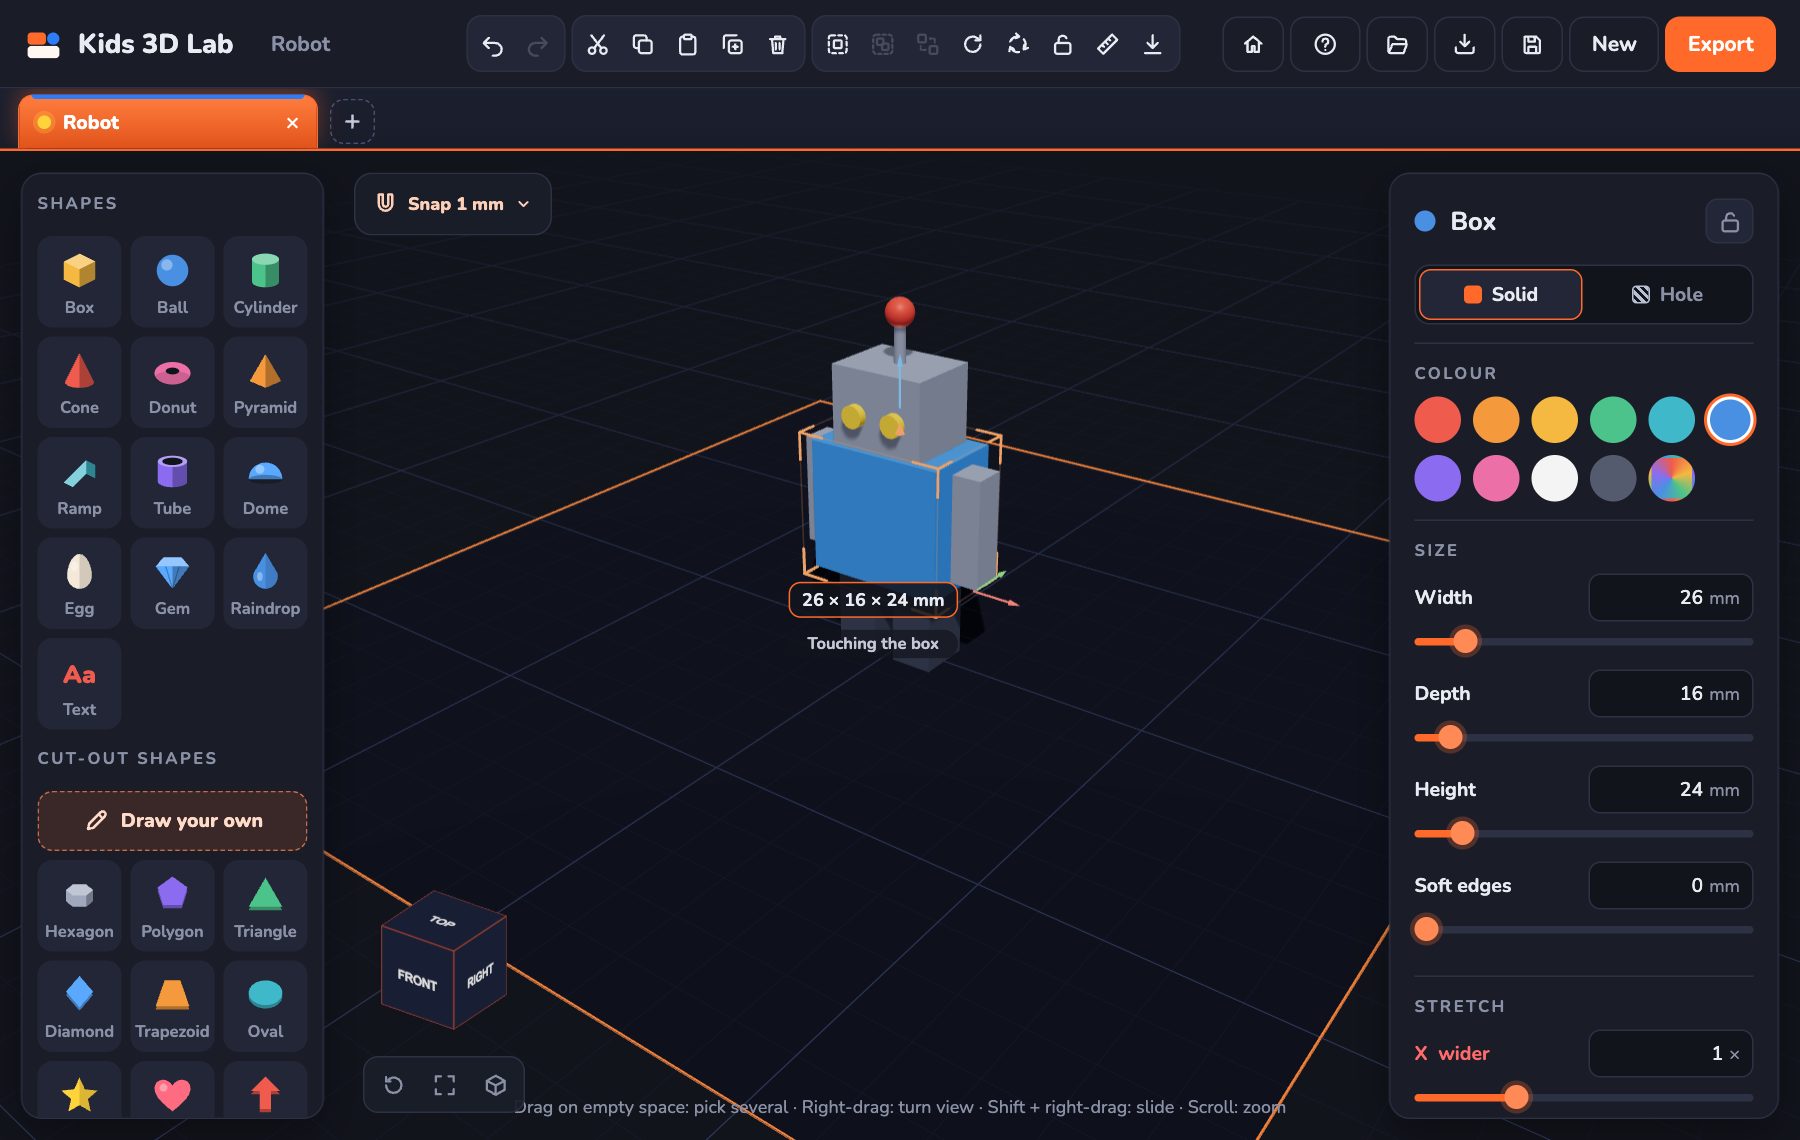
- The top bar. Browse 80 examples, then small buttons for the Website (back to this website), Shortcuts, Help, What's new (a megaphone; an orange dot means something new was added — click it to see what), Open and Import, the Pro switch (see Pro mode), Save (save the build, or save it as a picture), then New and Export. Hold your mouse over a button to see its name. On a phone, or a tablet held upright, Open, Import, Help, What's new and the Website are inside the ⋯ More button.
- Under it: the tabs, one for each build you have open.
- Above the plate: the tool row. It starts right next to the shapes, and stays put when you fold the panels away. Each button has its name under it (on smaller screens, only the picture shows):
- Undo and Redo - Select all - the four modes: Select, Move, Rotate and Scale (see The four modes) - Duplicate, Delete, Hole, Turn 90°, Flip and Lock - Group and Ungroup - On top and Under, to stack shapes (see Stacking and lining up) - Workplane and Measure (see Building on a face: the workplane) - three lists: Snap ▾ (how far a drag jumps), View ▾ (X-ray, Outline, the grid and the view) and Line up ▾ - with Pro switched on: Repeat, Combine and Overlap - Screen too small for all of them? An arrow shows up at the end of the row. Click it (or swipe the row) to see the rest.
- Left: Shapes. Two shapes to a row. Click a shape to put it on the plate.
- Middle: the plate. This is where you build. The orange square is the size of a printer's plate. The red line goes left to right (X), and the green line goes front to back (Y).
- Right: the Properties panel. Its Shape tab shows the picked shape's colour, size and place, to change them. Its Layers tab lists every shape.
- Folding the side panels away: click the small fold button in a panel's corner for more room, and the Shapes or Properties button to bring it back. Ctrl + \ (on a Mac, ⌘ + \) folds both away, or brings them back.
- Bottom left: the view cube. Click a side, like TOP, to look from that side. The buttons next to it bring the view back, fit your build in view, look from the corner, switch on X-ray, Outline and the grid, and go full screen.
- Bottom: the bar. It shows the name and size of the picked shape, and little notes and tips, like "This hole cuts nothing yet".
Tabs: many builds at once
Just under the top bar there are tabs, like in a web browser. Each tab holds one build.
- Click + to start something new in a new tab.
- Click a tab to switch to it.
- Double-click a tab's name to rename it.
- Click × to close a tab. If you changed the build, Kids 3D Lab asks: Keep this build? Click Keep it to put it in My builds, or Don’t keep to throw it away.
- Lots of tabs open? The row slides sideways. Click the arrows at its ends (or scroll with the mouse wheel) to see the others. The + always stays at the right end.
- Opened an example and didn't change it? The next example you open takes its place in the same tab, so tabs don't pile up. Changed it? Then the next one gets a new tab, and your work stays safe.
Looking around
Practice gameLook from every sideAre you looking from the top, the front or the side?Play → Practice gameX-ray: find itFind a marble hiding inside a box.Play →| To do this | Do this with the mouse |
|---|---|
| Turn the view around | Hold the right button and drag |
| Turn the view around, another way | Drag the view cube (bottom left) with the left button |
| Look from the top, the front or a side | Click that side of the view cube, like TOP |
| Go to the next flat view | Click an arrow next to the view cube, like Back or Left |
| Slide the view | Hold Shift and the right button, then drag |
| Zoom in and out | Roll the mouse wheel |
| See everything | Press F |
On a tablet, drag with one finger to turn the view. Use two fingers to zoom and slide.
Turning with the mouse stops just before you look straight down or straight up, so the view never gets stuck. To look exactly from the top, click TOP on the view cube.
Flat views: Top, Front, Left…
Click TOP, FRONT, LEFT, RIGHT, BACK or BOTTOM on the view cube. The view goes flat, like a drawing. Nothing leans, and you can't see the sides of anything, even at the edge of the plate. It's the easiest way to line things up by eye.
- From the front, the back or a side, a grid stands up behind your build. Use it to check heights.
- Little arrows show up around the view cube. Each one names the view next to it. From TOP, Back is above the cube, Front is below, Left is on the left and Right is on the right. Click one to go there.
- Turn the view a little bit, and it goes back to normal 3D.
X-ray and Outline: see inside
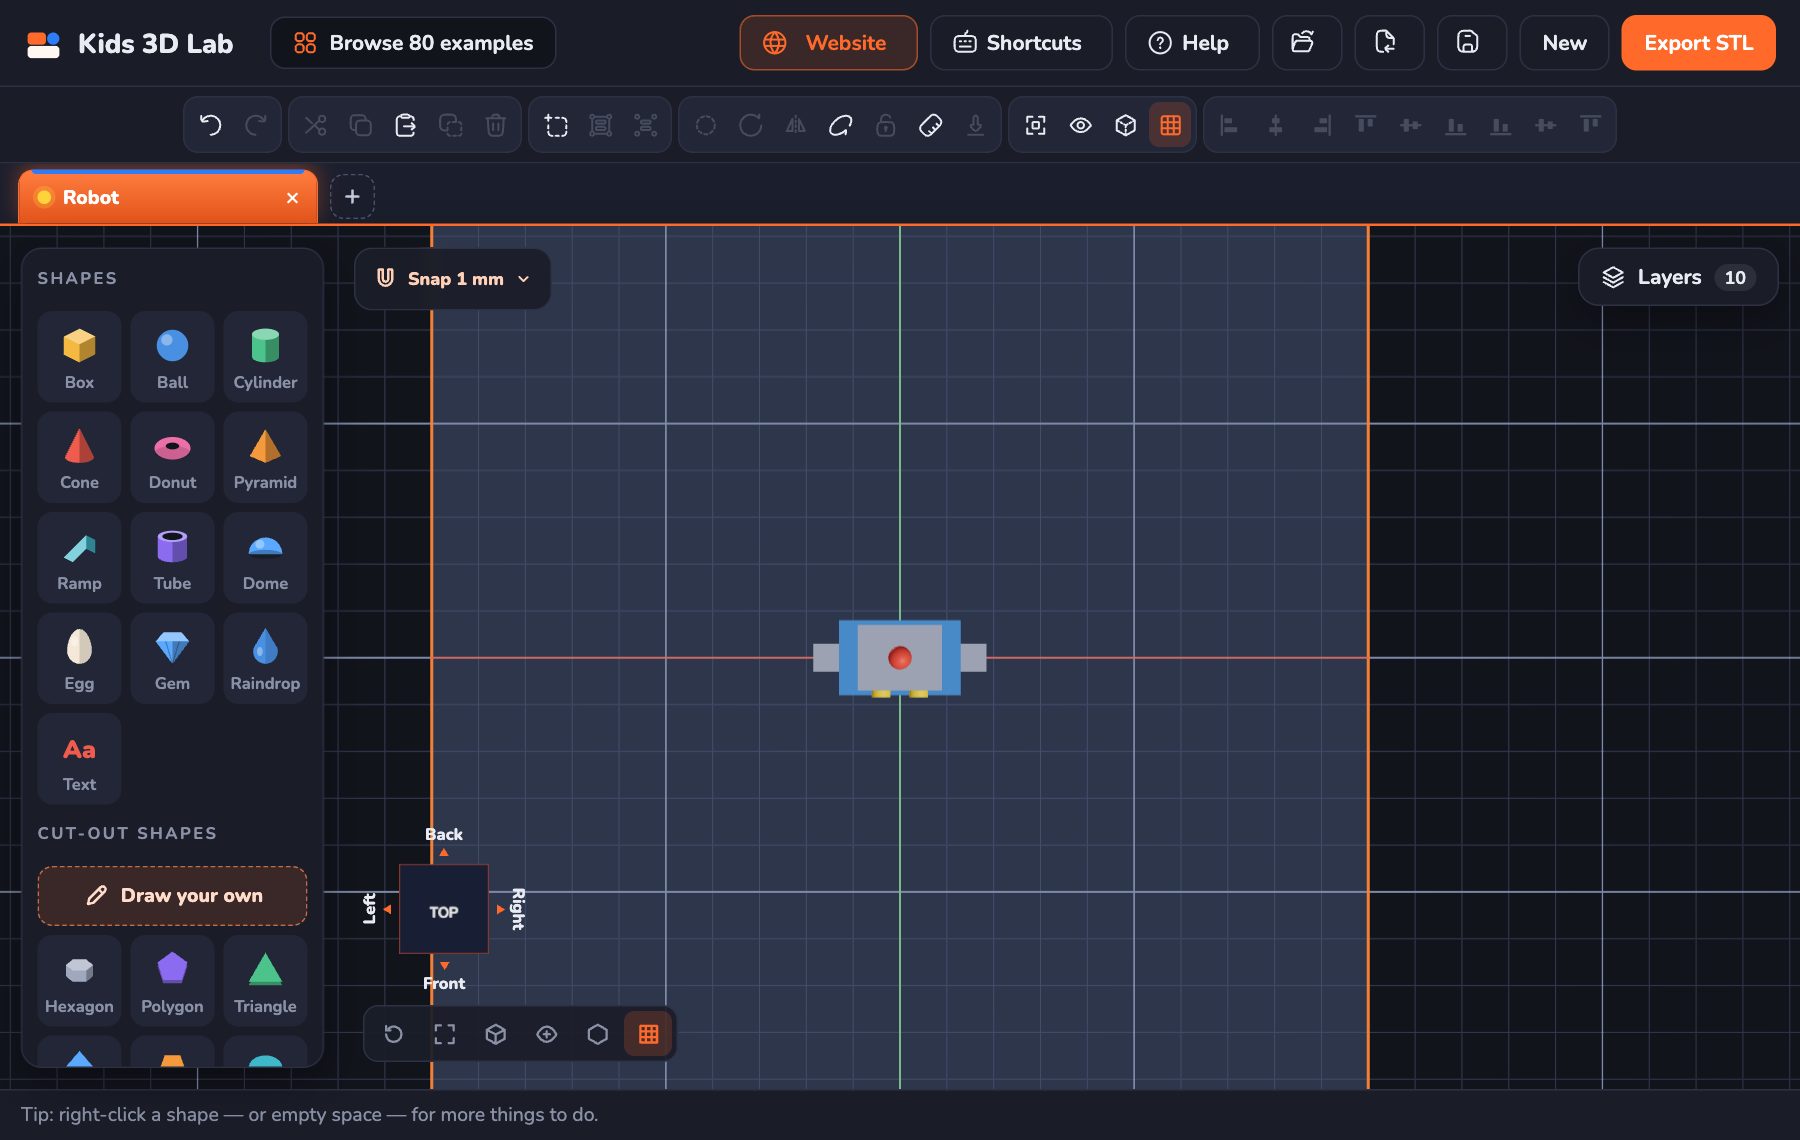
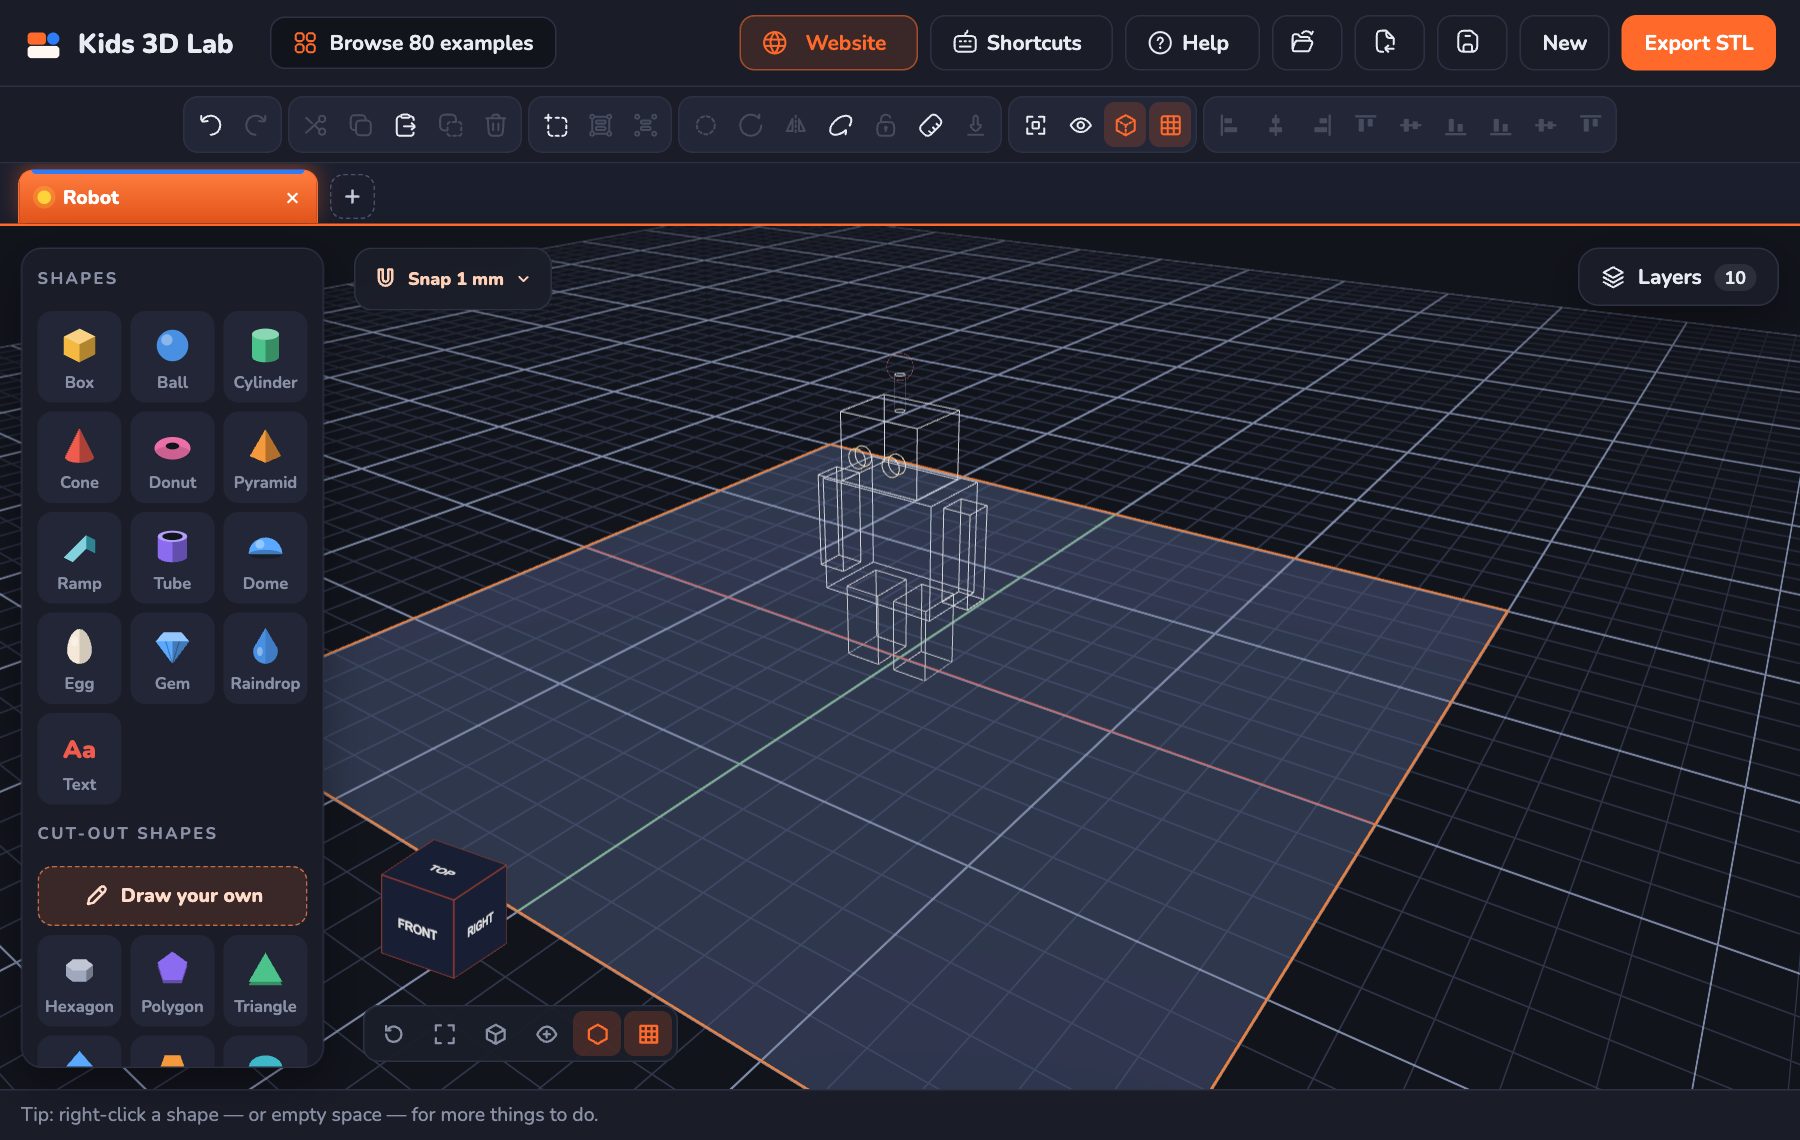
Is a shape hiding inside another one? Switch on X-ray or Outline.
- X-ray (X): every shape turns see-through, and its edges glow. You can see what's inside, and how deep a hole goes.
- Outline (O): no colour at all, only the lines of every shape, like a drawing.
- Picked shapes turn see-through too, but in orange, so you can see which ones they are — and still see inside them.
- Press the same key again to go back. Each tab remembers its own.
The grid
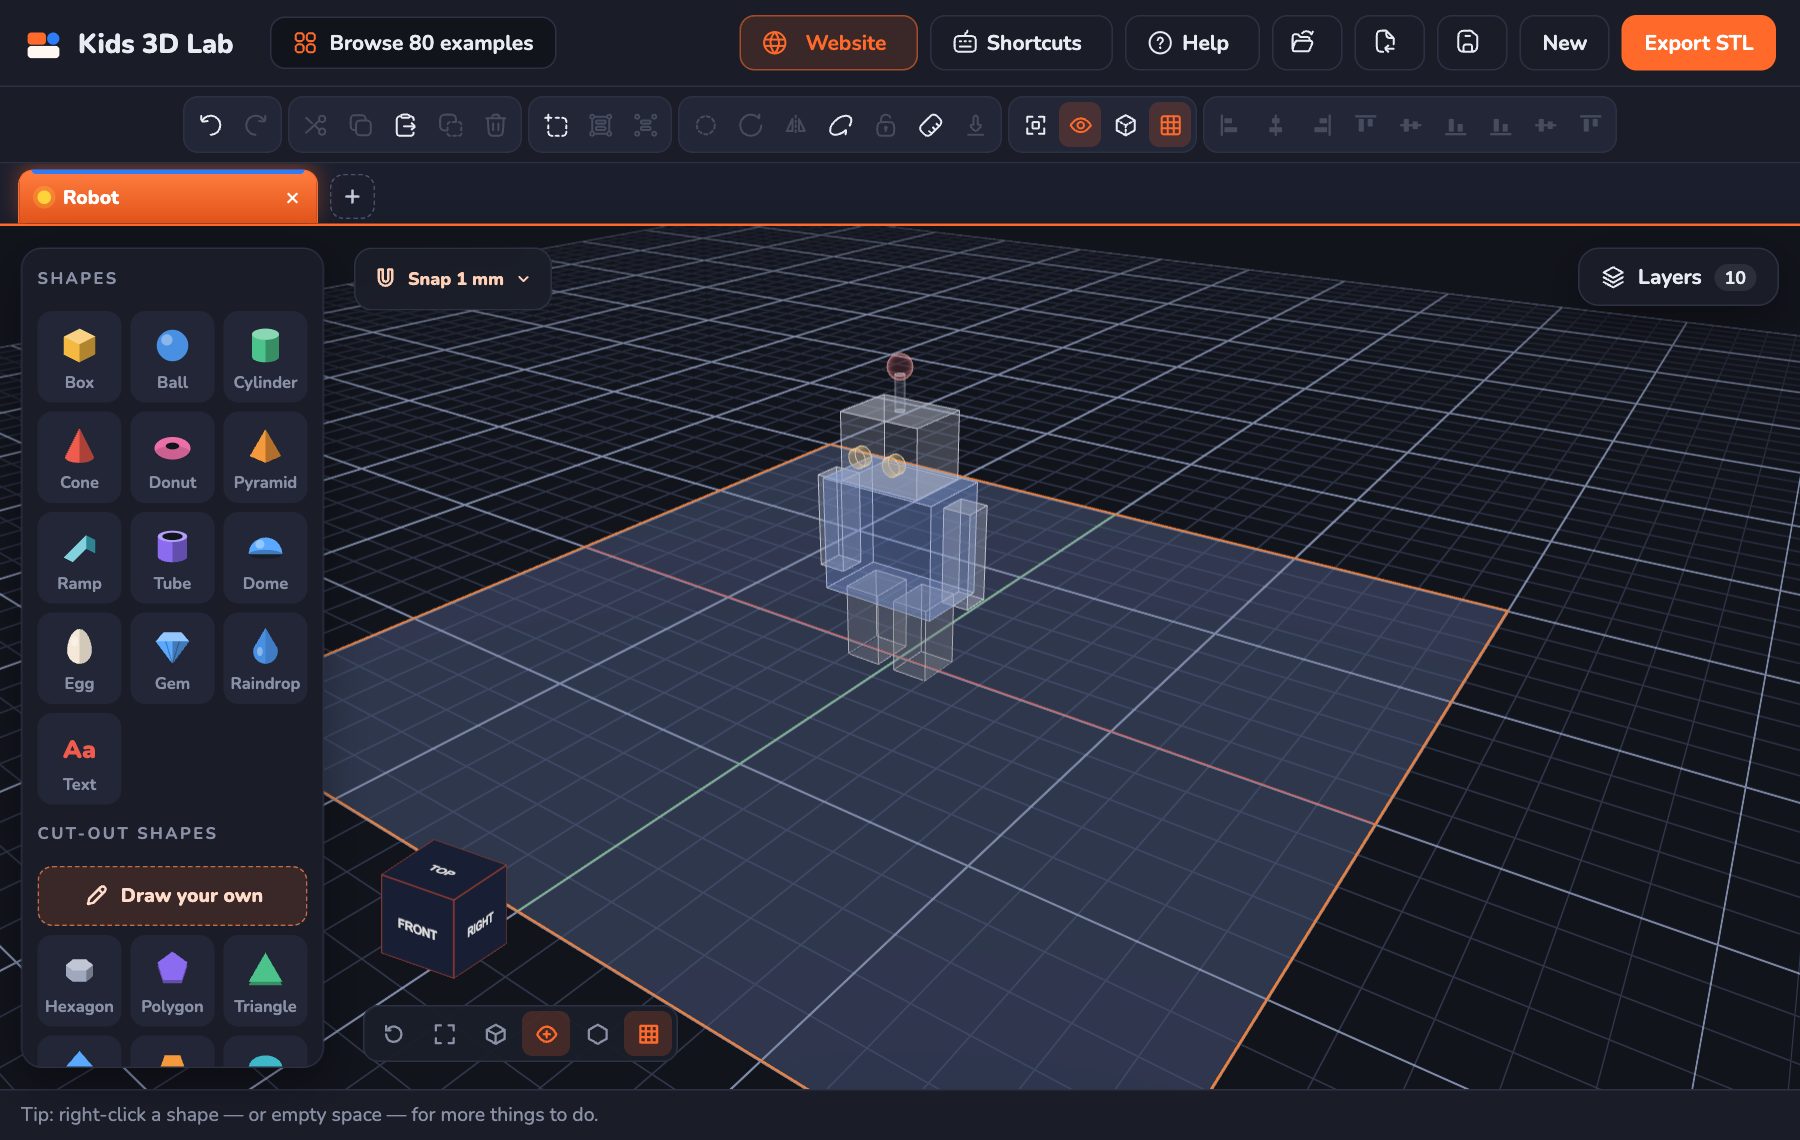
Press G, or click the grid button next to the view cube, to hide the grid on the plate. Press it again to bring it back.
Full screen
Click the last button next to the view cube (two arrows pointing out) to use the whole screen for building, without the browser's bars. Click it again, or press Esc, to come back.
Adding shapes
Practice gameWhich shapes?Spot the shapes a build is made from.Play →Click any shape on the left. It lands in an empty spot on the plate. New shapes never land on top of each other.
Or drag it in. On a computer, you can also hold the mouse on a shape on the left and drag it into the 3D view. Let go on the plate, and it lands right there. Let go on another shape, and it stands on that side of it — on top, or on a wall. A faint orange grid shows where it will go.
There are 31 shapes in three groups.
Shapes
| Shape | What you can change | Good for |
|---|---|---|
| Box | Width, depth, height, soft edges | Almost everything |
| Ball | Diameter | Heads, wheels, snowmen |
| Cylinder | Diameter, top diameter, height, soft edges, sweep | Posts, wheels, cups |
| Cone | Diameter, height, soft edges, sweep | Roofs, noses, party hats |
| Donut | Size, thickness, sweep | Rings, handles |
| Pyramid | Width, depth, height, sides | Roofs |
| Ramp | Width, depth, height, soft edges | Slopes, phone stands |
| Tube | Diameter, wall, height, soft edges, sweep | Pots, pipes, arches |
| Dome | Diameter | Domes, shells |
| Egg | Diameter, height | Eggs, heads |
| Gem | Sides, diameter, height | Jewels for crowns |
| Raindrop | Diameter, height | Drops, onion domes |
| Text | Words, letters, size, thickness | Names and signs |
Cut-out shapes
These are flat shapes, like a cookie cutter, pulled up to any height. Their bottoms are flat, so they print very well.
Hexagon, Polygon, Triangle, Diamond, Trapezoid, Oval, Star, Heart, Arrow, Moon, Cloud, Bubble, Drop and Spiral.
Makers
| Shape | What it is |
|---|---|
| Gear | A gear with teeth. It can have a hole in the middle for an axle |
| Spring | A coil, like the spring in a pen |
| Screw | A rod with a real thread |
| Knot | A twisty loop |
Picking shapes
- One shape: click it. A orange frame goes around it.
- Nothing: click empty space, or press Esc.
- A few shapes: click one, then hold Shift and click the others.
- A few shapes, another way: drag a box across empty space.
- Everything: click Select all in the tool row, or press Ctrl + A (on a Mac, ⌘ + A).
- From a list: open Layers (see below) and click a shape's name.
- Picked a few? Click one of them to make it the one the others line up to. It gets a bold outline. (See Stacking and lining up.)
Layers: every shape in a list
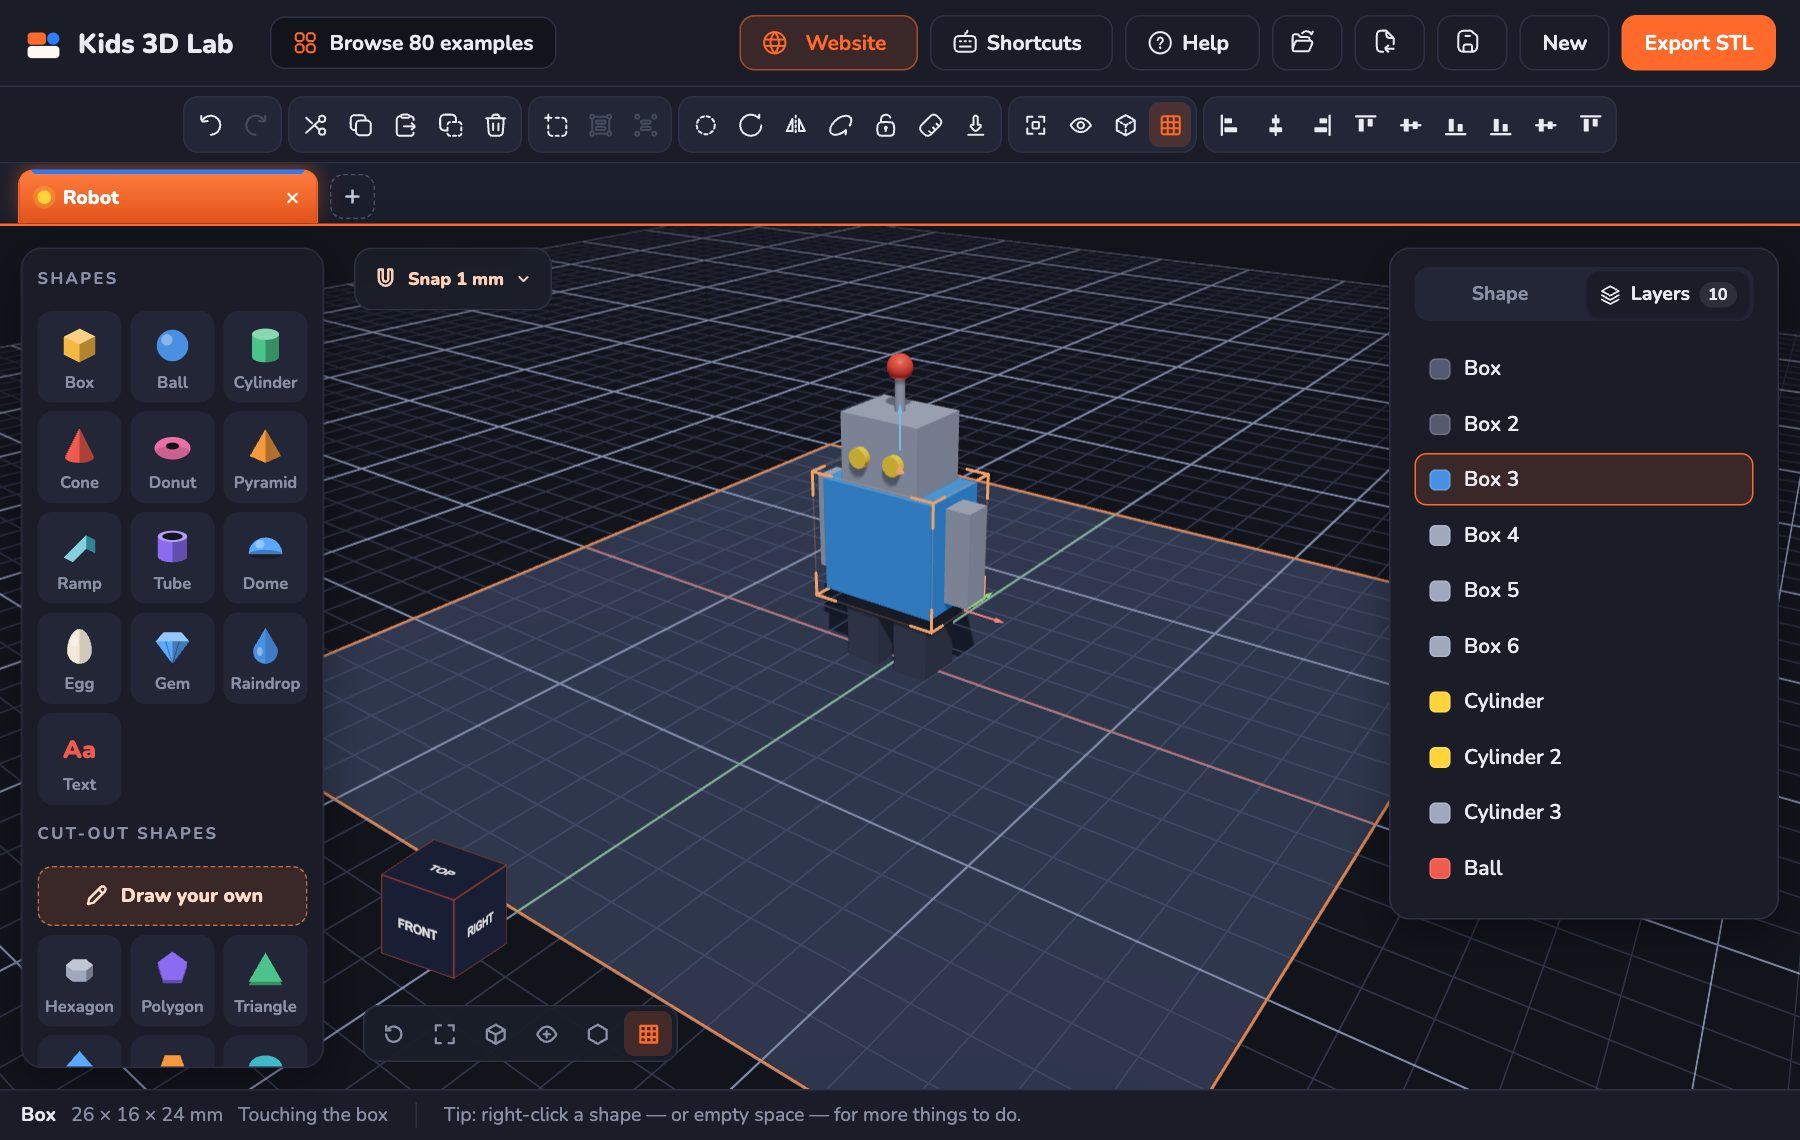
Some shapes are hard to click: a tiny eye, or a shape hidden inside another one. Layers lists every shape in your build, so you can pick it by name.
- Click the Layers tab at the top of the Properties panel on the right. Click Shape to go back to the shape's settings.
- Right-click anywhere and point at Layers ›. The list opens next to the menu.
Click a name to pick that shape. Hold Shift (or Ctrl) and click to pick more than one. A grey striped square means it's a hole, and the padlock means it's locked. Shapes in a group are listed under their group.
The right-click menu
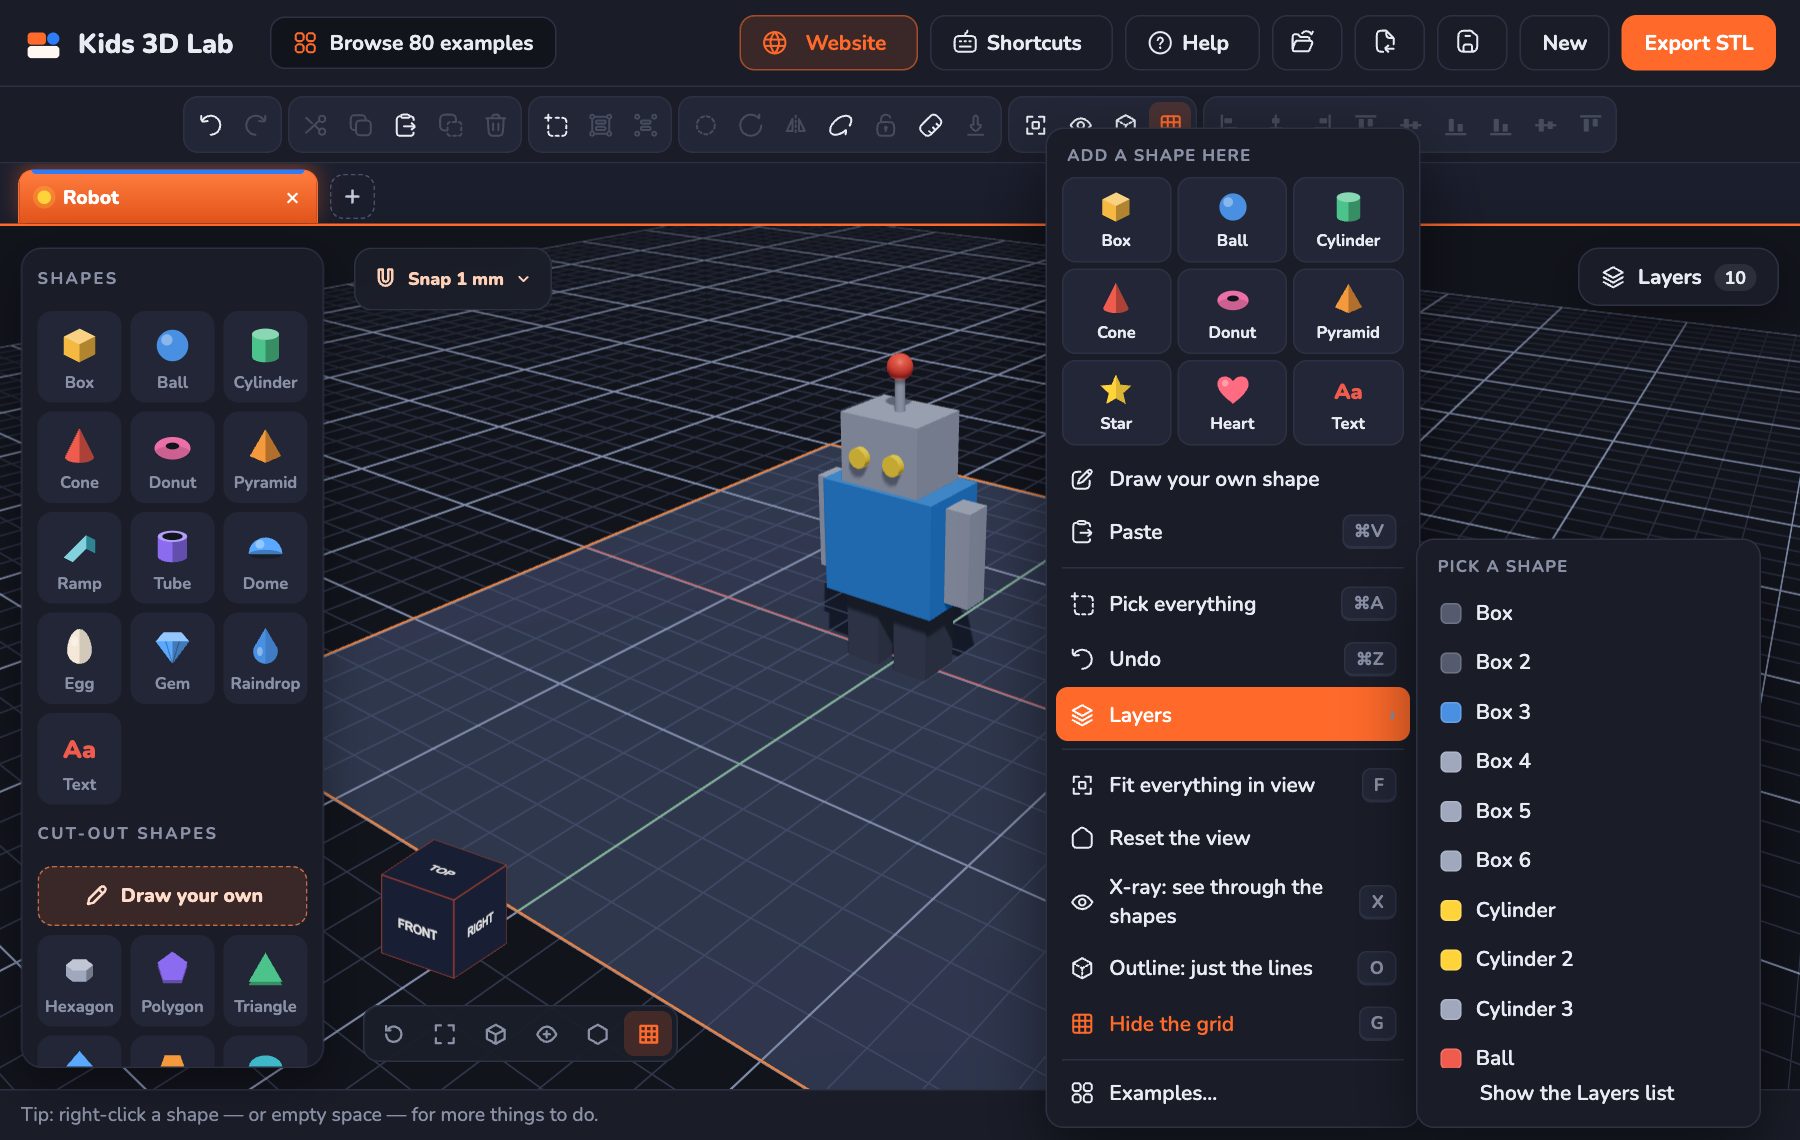
Click the right mouse button (don't drag) to open a menu.
- On a shape: change its colour, copy it, delete it, make it a hole, turn it, flip it, put it back on the plate, group it, lock it, or find it in Layers.
- On empty space: add a shape right where you clicked, draw your own shape, paste, pick everything, undo, find a shape in Layers, and switch on X-ray, Outline or the grid.
The four modes: Select, Move, Rotate and Scale
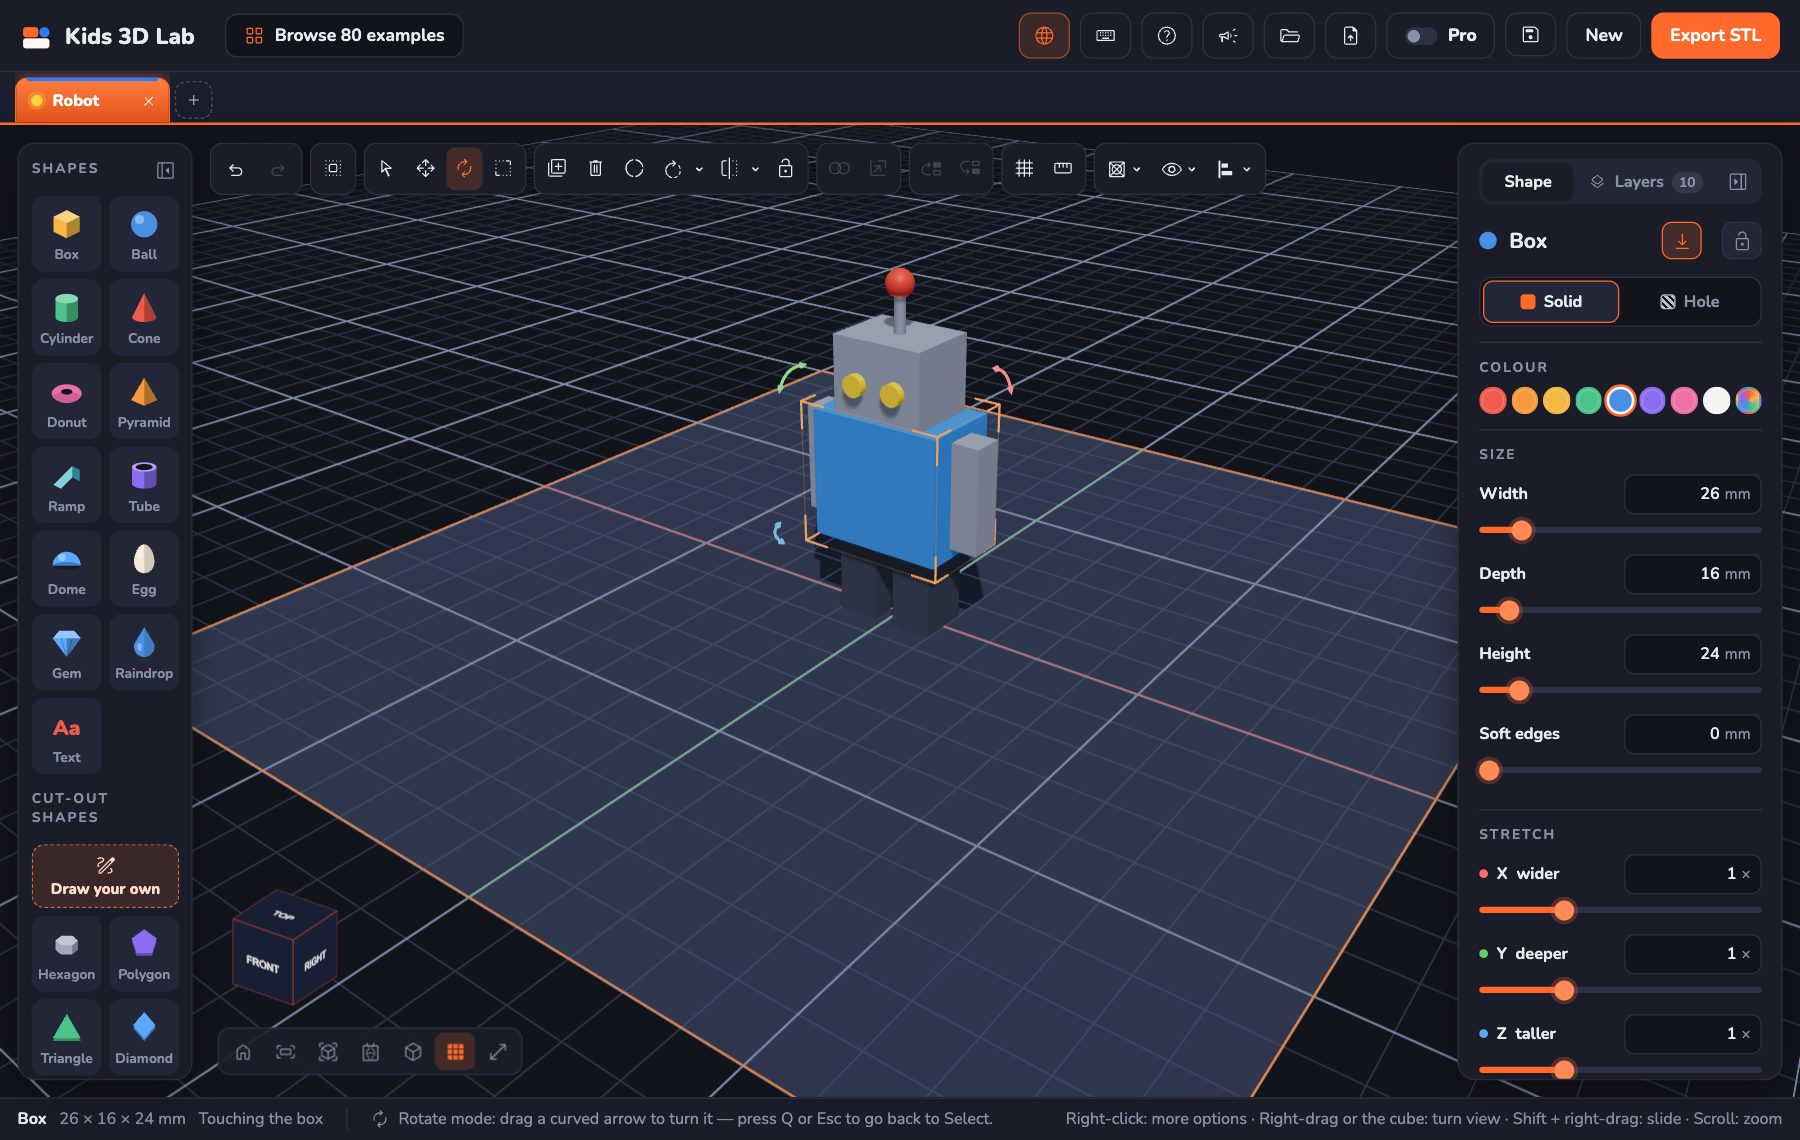
Big 3D programs have modes: they decide which handles a picked shape shows. Kids 3D Lab has four, at the start of the tool row:
| Mode | Key | What the picked shape shows |
|---|---|---|
| Select | Q | Everything: the coloured arrows to move it, and the corners to make it bigger or smaller. It's where you start |
| Move | W | Just the red, green and blue arrows |
| Rotate | E | Just the curved arrows, to turn it any way |
| Scale | T | Just the corners and the arrow on top |
- The mode you're in glows orange, and the bar at the bottom tells you what to drag.
- In every mode, you can still drag the shape itself to move it — nothing gets stuck.
- Press Esc (or Q) to go back to Select.
Moving shapes
Practice gameMove itSlide a ball left and right (X), back and front (Y), and up (Z).Play →| How | What to do |
|---|---|
| Drag it | Drag the shape across the plate |
| Use the arrows | The red arrow moves it left and right. The green arrow moves it back and front. The blue arrow lifts it up |
| Type numbers | Type in Position in the panel: X, Y and Z |
| Use a slider | Drag the orange dot under X, Y or Z. It goes from one side of the plate to the other |
| Drag a number | Press on a number box and drag left or right. Hold Shift to go faster |
| Use the keyboard | Press the arrow keys. Hold Shift to go 10 times as far |
| Go to the edge or the middle of the plate | Use Line up on the plate in the panel |
- Z lift is how high the shape is above the plate. 0 means it sits on the plate.
- Is a shape floating? Click Drop to plate: the button with an arrow pointing down to a line, at the top of the panel (next to the padlock). It's in the right-click menu too.
- A shape can go under the plate. The part under the plate is hidden, and it won't be printed. The same button then shows an arrow pointing up: Up to the plate brings it all back up. When the shape sits on the plate, the button is green.
- While you drag, the bar at the bottom shows where the shape is (X, Y and Z), and how far away the nearest shape is.
- Hold Alt while you drag to move without jumping in steps.
Changing the size
Practice gameMake it matchMake your box the same size as the see-through one.Play →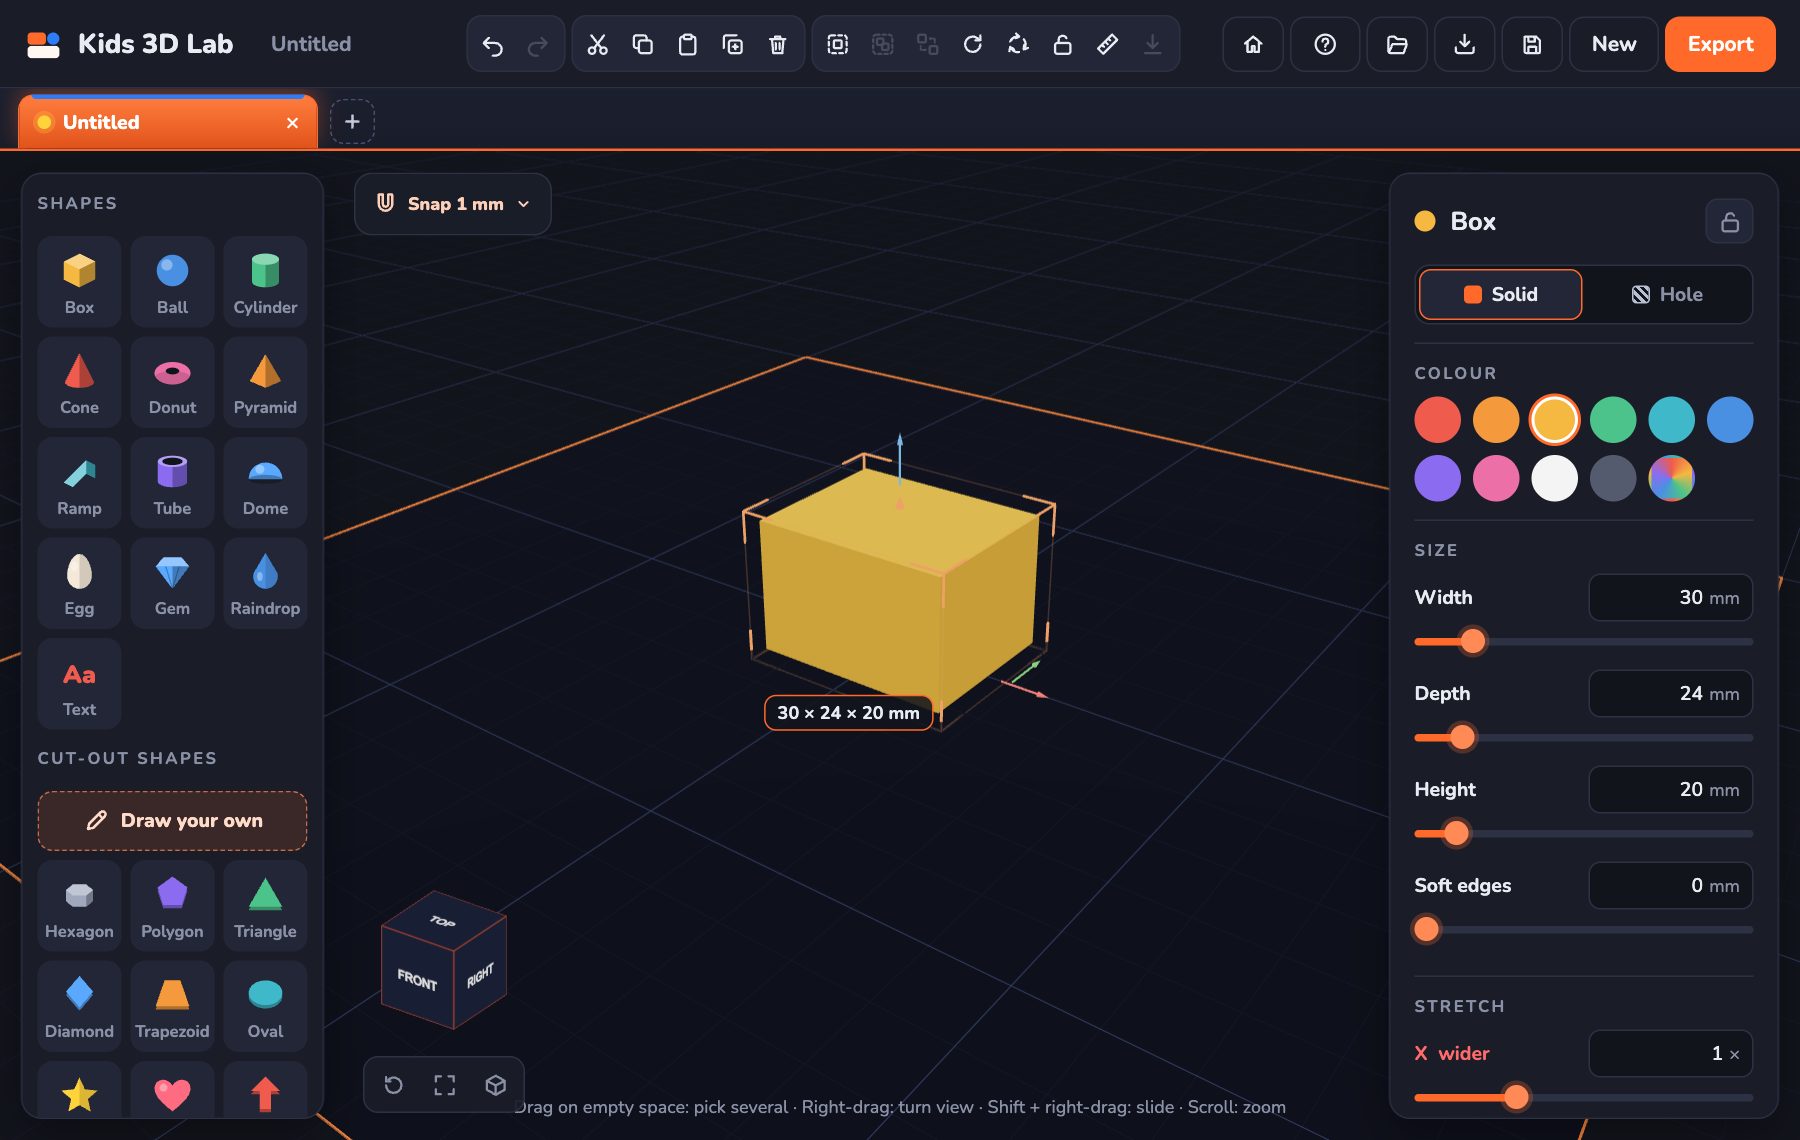
| How | What to do |
|---|---|
| Drag a corner | Drag a orange corner at the bottom. It gets wider or deeper |
| Drag the top | Drag the little orange arrow on top. It gets taller or shorter |
| Type numbers | Type in Size in the panel, then press Enter |
| Drag a number | Press on a number box and drag left or right |
| Use a slider | Drag the orange dot under each number |
The bar at the bottom always shows the picked shape's size, like 40 × 30 × 20 mm.
More ways to change a shape
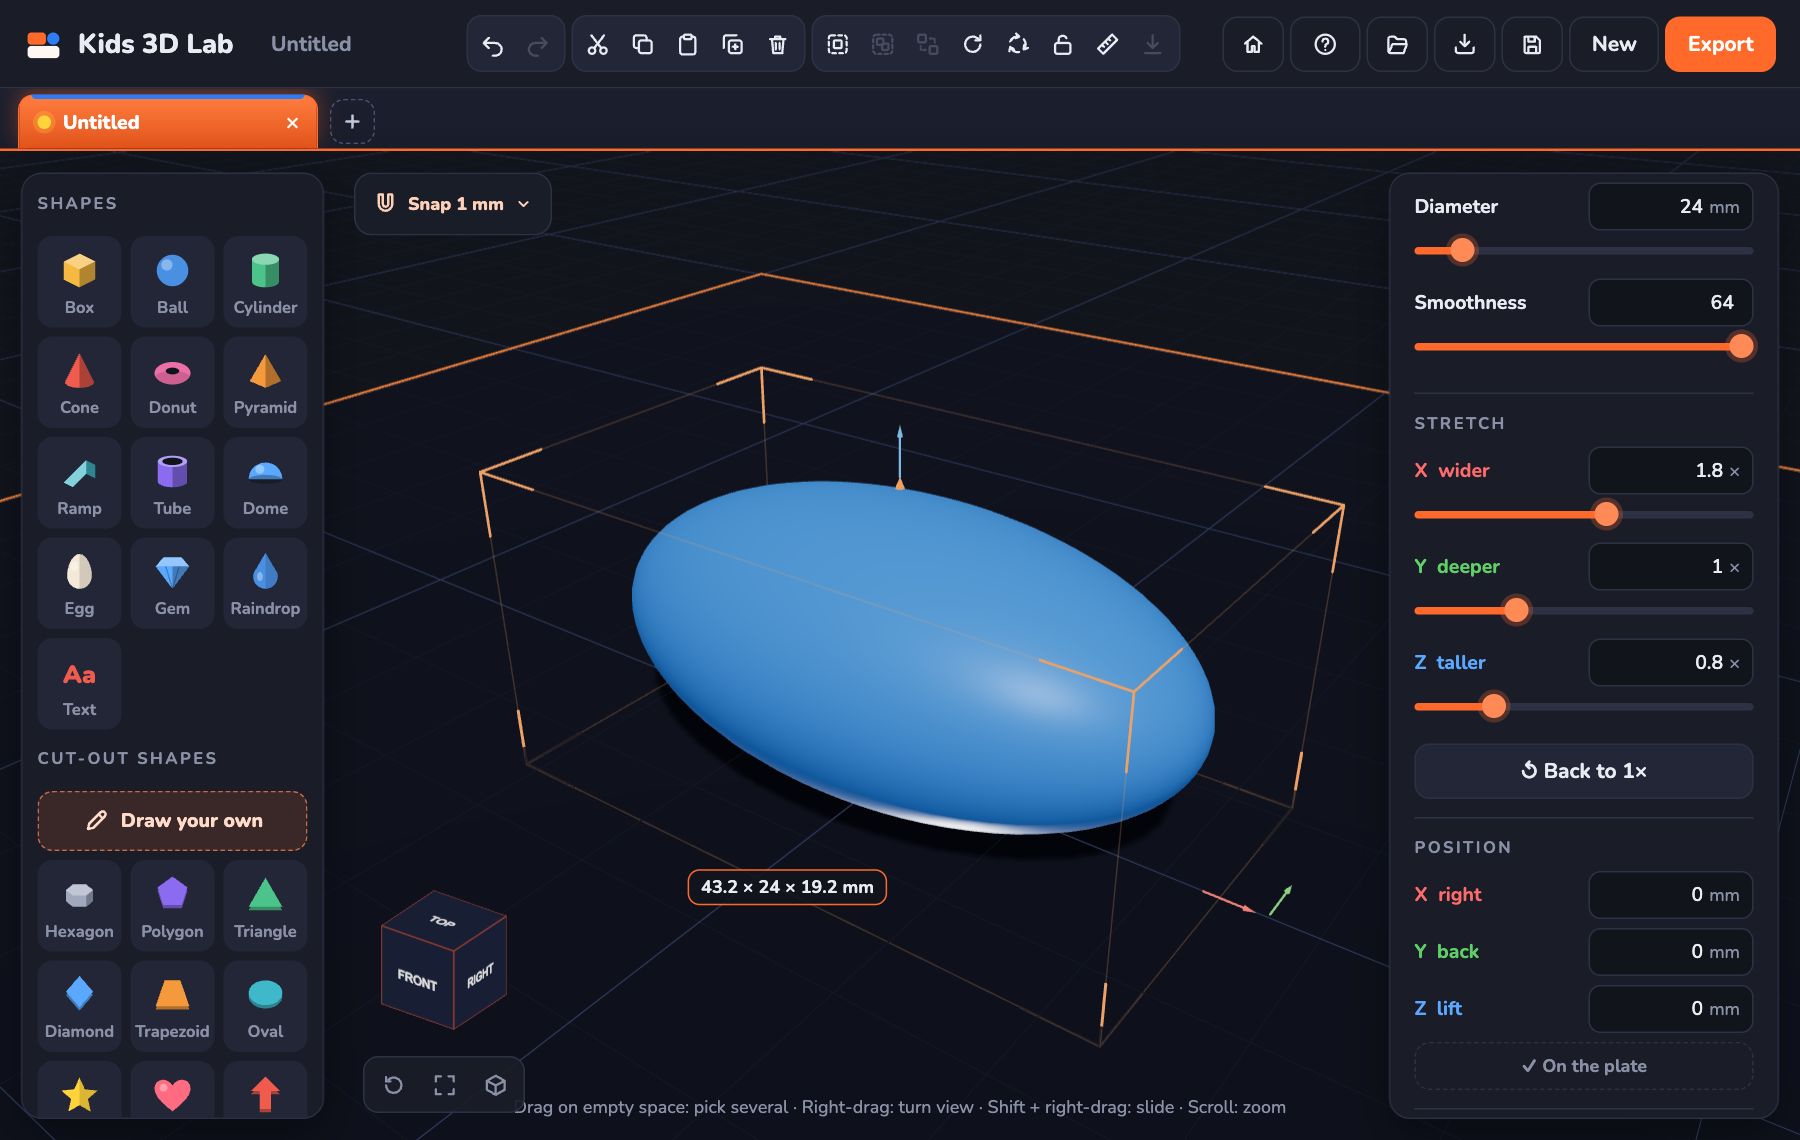
- Stretch makes a shape longer in one direction. 2 means twice as long. A stretched ball becomes an oval pebble!
- Soft edges make the edges smooth, so they are nice to hold. Edge shape can be Round or Slanted.
- Smoothness decides how many flat sides a round shape has. Set a cylinder to 6 and it becomes a hexagon!
- Sweep cuts a round shape like a cake. 180 makes half. 270 makes a Pac-Man.
- Top diameter makes a cylinder narrow at the top, like a flower pot.
Turning and flipping
- A quarter turn: click Turn 90° in the tool row, or press R. It spins the shape on the plate.
- Other turns: click the little ▾ next to Turn 90°: spin the other way, tip it forward (X) or roll it sideways (Y). The pictures are in the axes' colours: red X, green Y, blue Z. The panel's ↻ 90° buttons next to X, Y and Z do the same.
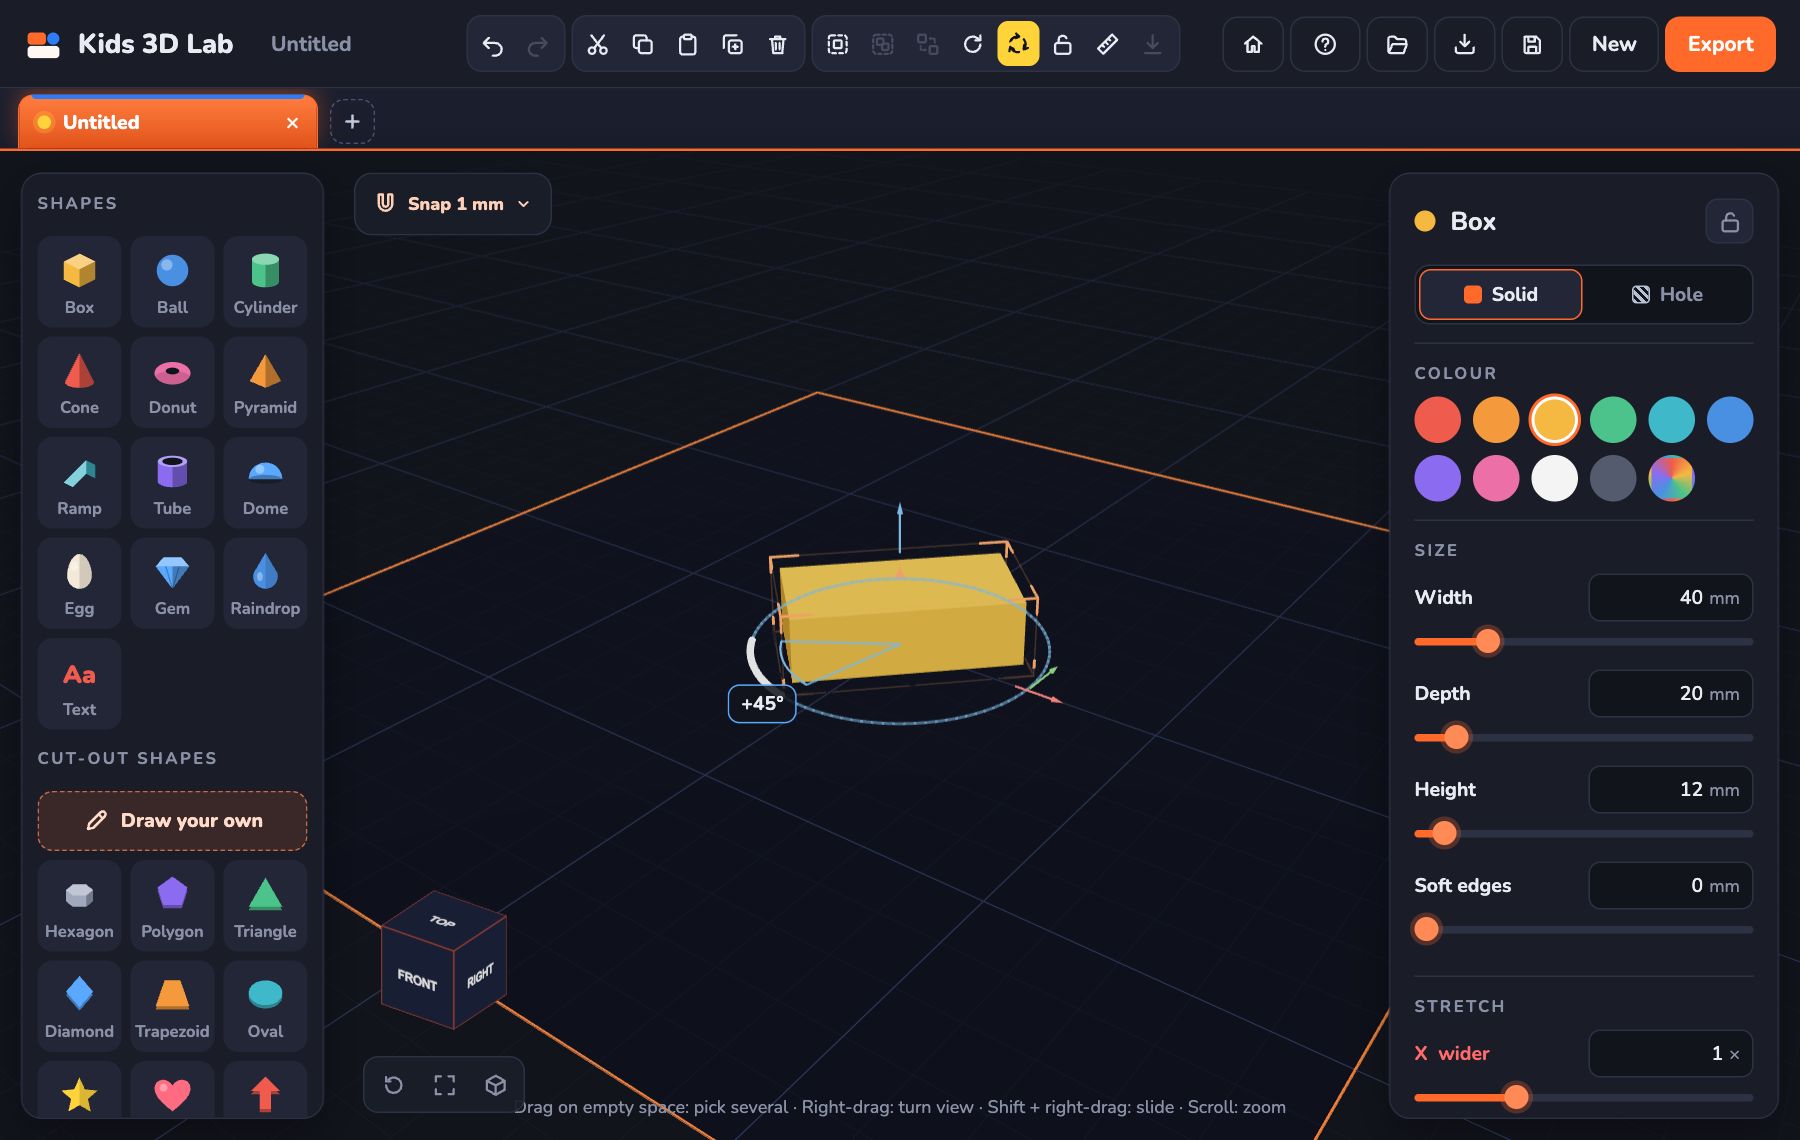
- Any angle: type a number under Turn, like 45.
- Turn arrows: switch on Rotate mode (press E). Curved arrows show up on your shape. Drag one round! A label shows the angle. Press Q or Esc to go back.
- Flip: click Flip in the tool row to turn a shape upside down, like a pancake. The ▾ next to it mirrors it left to right (X) or front to back (Y) instead.
- Words, drawings, spirals and models can only be turned upside down. They can't be mirrored, so those two are greyed out for them.
- A shape turns around its middle. If part of it goes under the plate, that part is hidden and won't be printed. Click Drop to plate to sit it back on top.
Colours
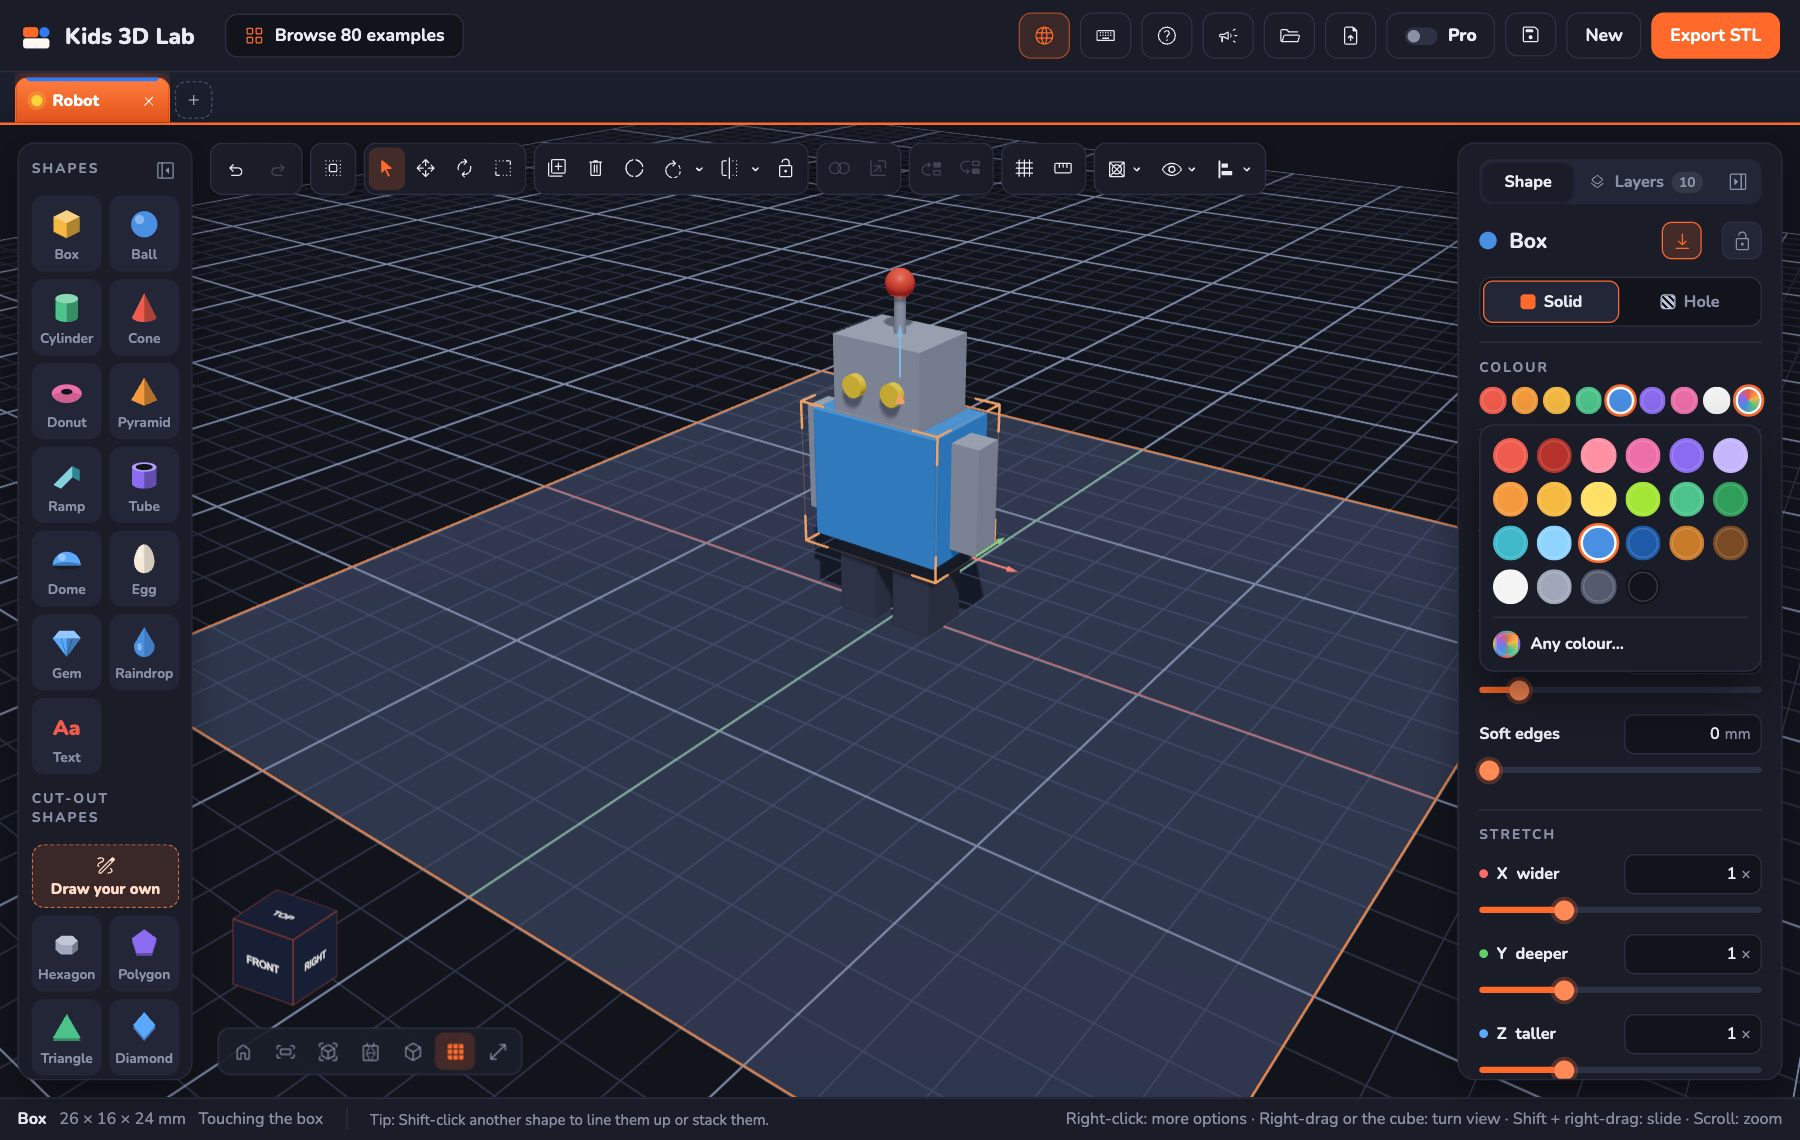
Click a colour in Colour. There's one row of favourites; click the rainbow circle at the end for lots more colours, and Any colour… at the bottom to pick any colour you like. The right-click menu has the same row of colours.
Holes
This is the best trick! Any shape can become a hole. A hole cuts its shape out of any solid shape it goes into.
- Add a Box. Make it 40 wide, 40 deep and 10 tall.
- Add a Cylinder. Make it 10 wide and 20 tall.
- With the cylinder picked, click Hole at the top of the panel. Or press H. It turns grey.
- Click the box. Hold Shift and click the cylinder.
- Click Cut through the box.
- There is a round hole in your box!
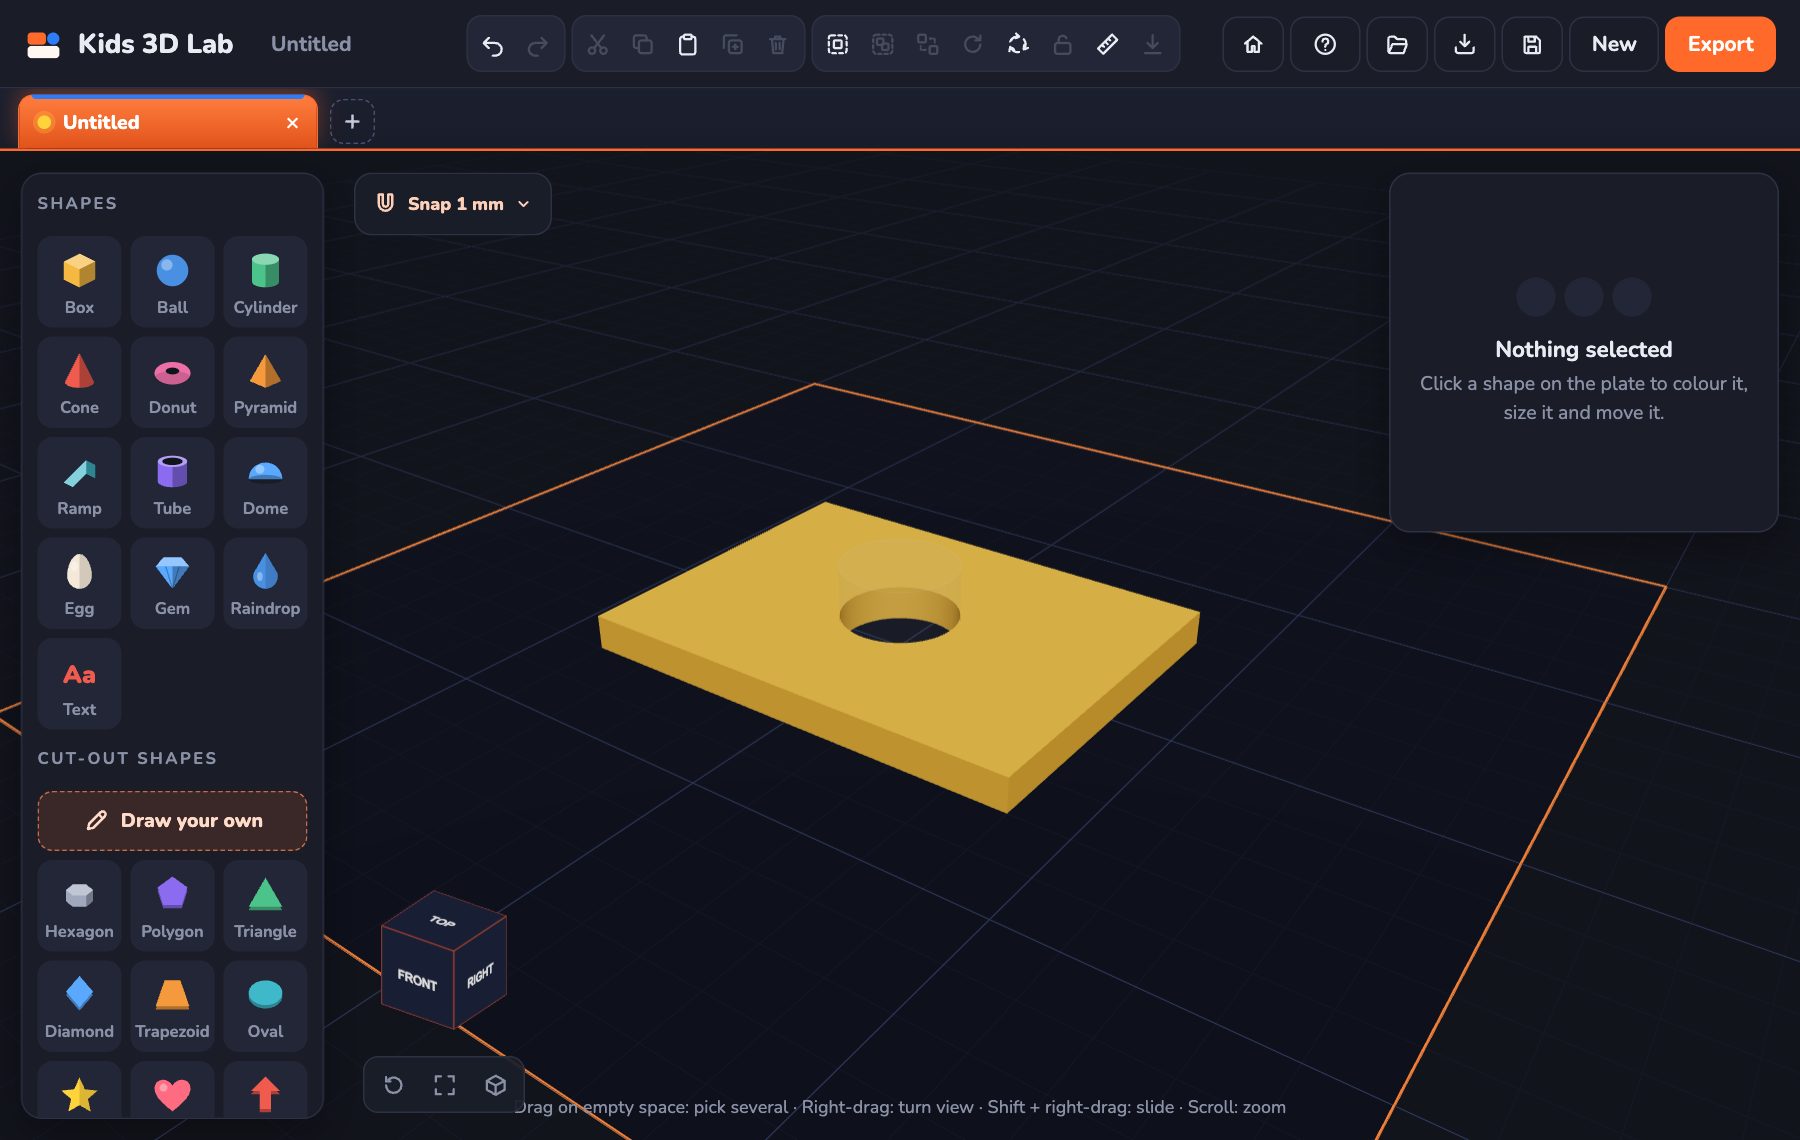
- A hole must go into a shape. Sitting on top cuts nothing. If a hole cuts nothing, the bar at the bottom tells you.
- Can't see how deep a hole goes? Switch on X-ray (X).
- Any shape can be a hole: a star, a heart, even your name!
- Click Solid (or press H) to change it back.
- A hole inside a group only cuts the shapes in that group.
Words (Text)
Practice gameYour name in 3DType your name and see it on a 3D key tag.Play →- Click Text in the Shapes list. The word "Hello" appears.
- Type your own words in Words.
- Pick the Letters. There are 19 kinds, from Clean and Classic to round Fredoka, comic Luckiest Guy, blocky Bungee, video-game Press Start 2P and joined-up Pacifico. Each button shows your own words in those letters, so you can see them before you pick.
- Change Letter size and Thickness.
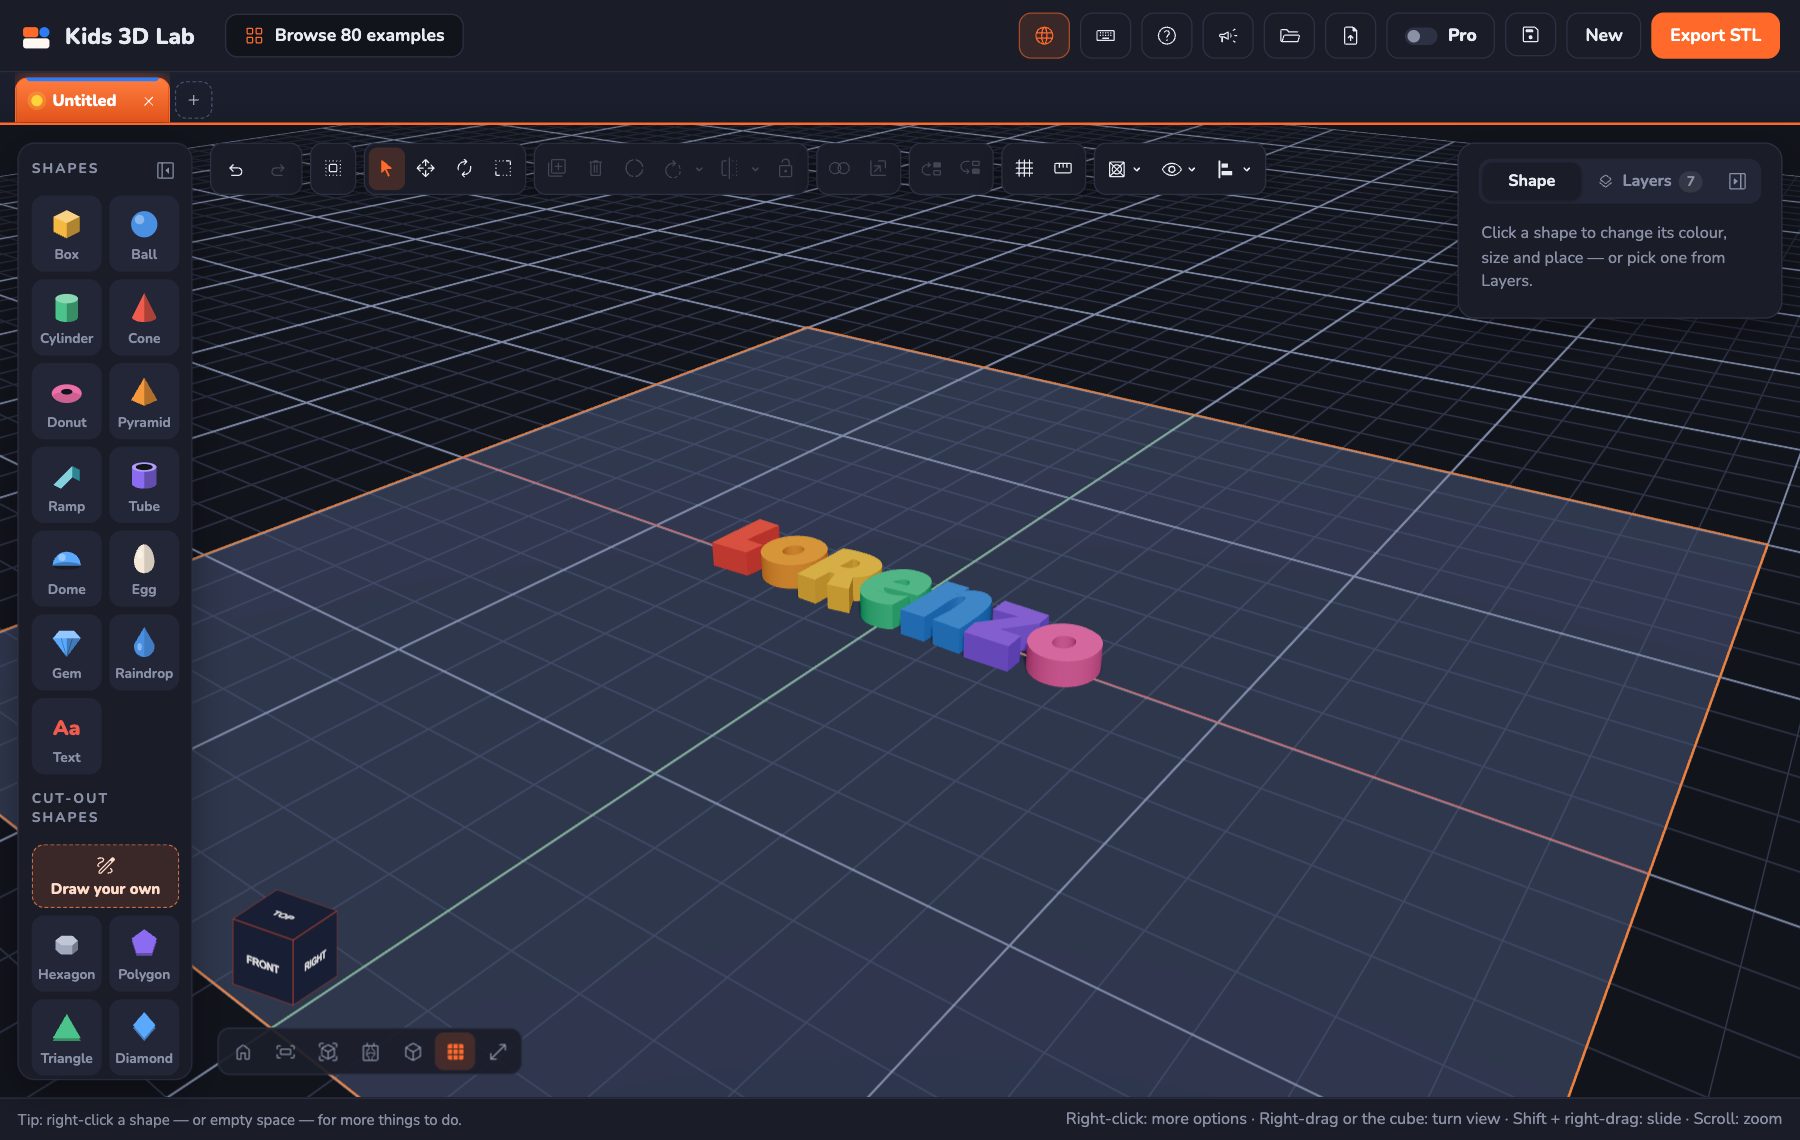
- Want each letter in its own colour? Click Split into letters. Every letter becomes a shape of its own, in rainbow colours. Click a letter and pick a new colour for it. (Changed your mind? Undo puts the word back together.)
Stacking and lining up
Pick two or more shapes, and the panel shows ways to arrange them.
- One shape stays put. It has a bold outline, and the bar at the bottom says which one it is. The others move to it.
- At first, it's the shape you picked first. To choose another one, just click it. (A locked shape always stays put.)
- Put on top of… (or On top in the tool row) puts the others on top of the one that stays put, in the middle. Picked three or more? They make a tower, in the order you picked them.
- Put under… (or Under in the tool row) does the opposite: the others go underneath it, in the order you picked them. If that would push them under the plate, the whole tower rises so the lowest one sits on the plate.
- Cut through… pushes holes all the way through it.
- Line up lines them up on their left, right, front, back, top or bottom sides, or their middles.
- Drop all to plate (the arrow-down button at the top of the panel) puts them all back down on the plate.
- A group counts as one piece: it lines up, stacks and drops all together.
- Lining up goes by the part you can see. A part a hole cut away, or a part under the plate, doesn't count.
Just one shape (or one group) picked? Then Line up on the plate moves it to the plate's left, right, front or back edge, or to its middle.
The Line up buttons are in the Line up ▾ list above the plate too, and the stacking ones in the tool row and the right-click menu.
Changing several shapes at once. With a few shapes picked, the panel looks just like it does for one shape: Size (drag the sliders, and everything grows or shrinks together), Turn (a ↻ 90° button for X, Y and Z), Flip and Colour.
Practice gameLine things upPick the shape that stays put, and line the others up with it.Play →Building on a face: the workplane
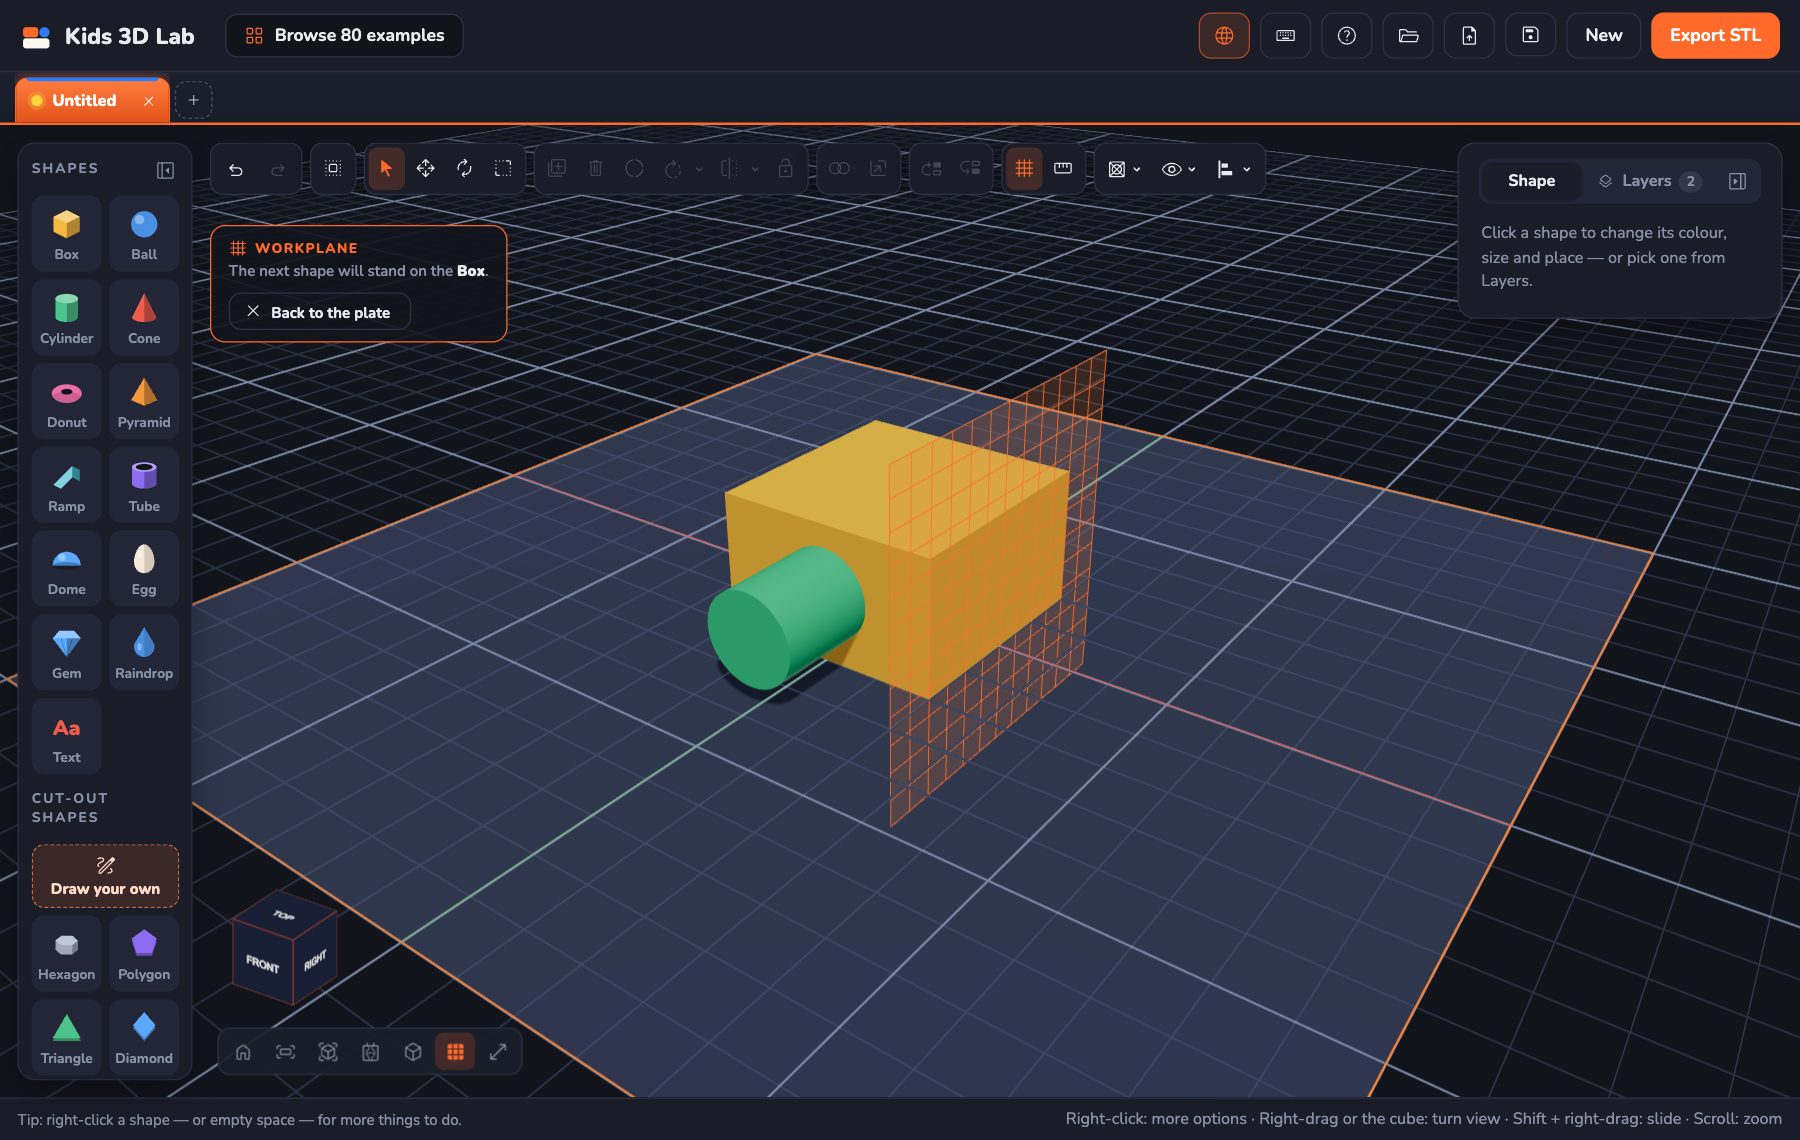
Practice gameBuild on topPut a hat on top of a head and eyes on its front.Play →Usually, new shapes stand on the plate. The workplane lets the next shape stand on a face of another shape instead: on top of a box, or on its side, like a wall.
- Click Workplane in the tool row (the orange grid button), or press P.
- Move the mouse over your shapes. An orange grid shows up on the face under it, in the middle of the shape.
- Click the face you want. The card at the top left says: The next shape will stand on the Box.
- Add a shape. It stands right in the middle of that face, turned to face out. Words read the right way up, even on a wall.
The workplane is used once: after one shape, new shapes go back to the plate. Want another shape on the same face? Click Workplane again.
- Changed your mind? Click Back to the plate on the card, click the plate, or press Esc.
- The new shape sits a tiny bit (0.1 mm) inside the face, so the two print as one piece.
- Faces that point down, at the plate, can't be a workplane: the shape would hang underneath.
- Low on a wall, a shape never pokes under the plate: it moves up to sit on it.
- On a computer, dragging a shape onto a face (see Adding shapes) does the same thing in one go, right where you let go.
Groups and locks
Group: pick some shapes and click Group them (Ctrl + G). Now they pick and move together. Click Ungroup to split them again.
Lock: click the padlock at the top of the panel, or press L. A locked shape can't move, change size or be deleted. You can still change its colour.
Practice gameGroup themMake the parts of a car move as one.Play →Measuring
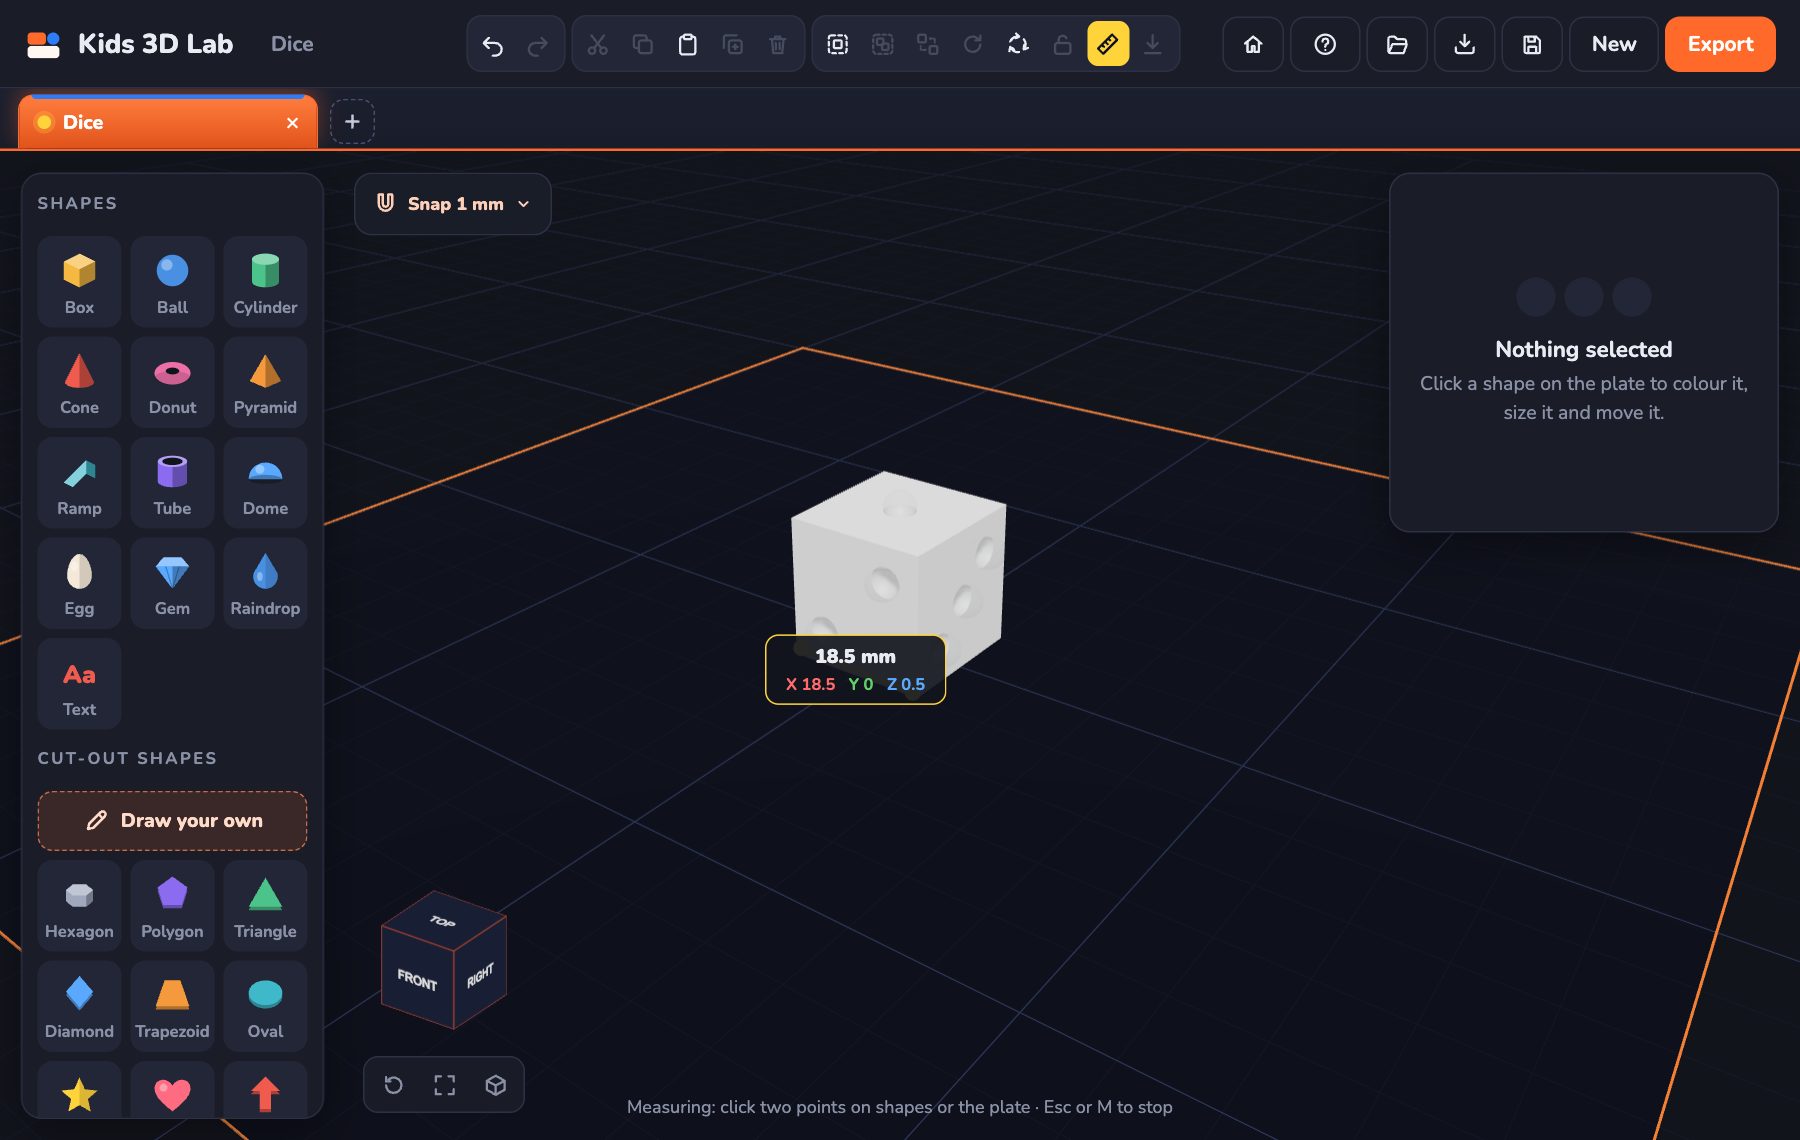
Practice gameMeasure itCount 10 mm blocks to find how long a pencil is.Play →- Click Measure in the tool row, or press M.
- Click two points, on a shape or on the plate.
- A card at the top left of the 3D view shows how far apart they are, and how far along X, Y and Z.
- Press M or Esc to stop.
Pro mode: for older makers
Pro mode is for older kids and teens (about 12 and up) who want exact sizes and the tools real designers use. Turn it on with the Pro switch in the top bar. It turns orange, and Kids 3D Lab remembers it next time. Click it again to go back to the simple tools.
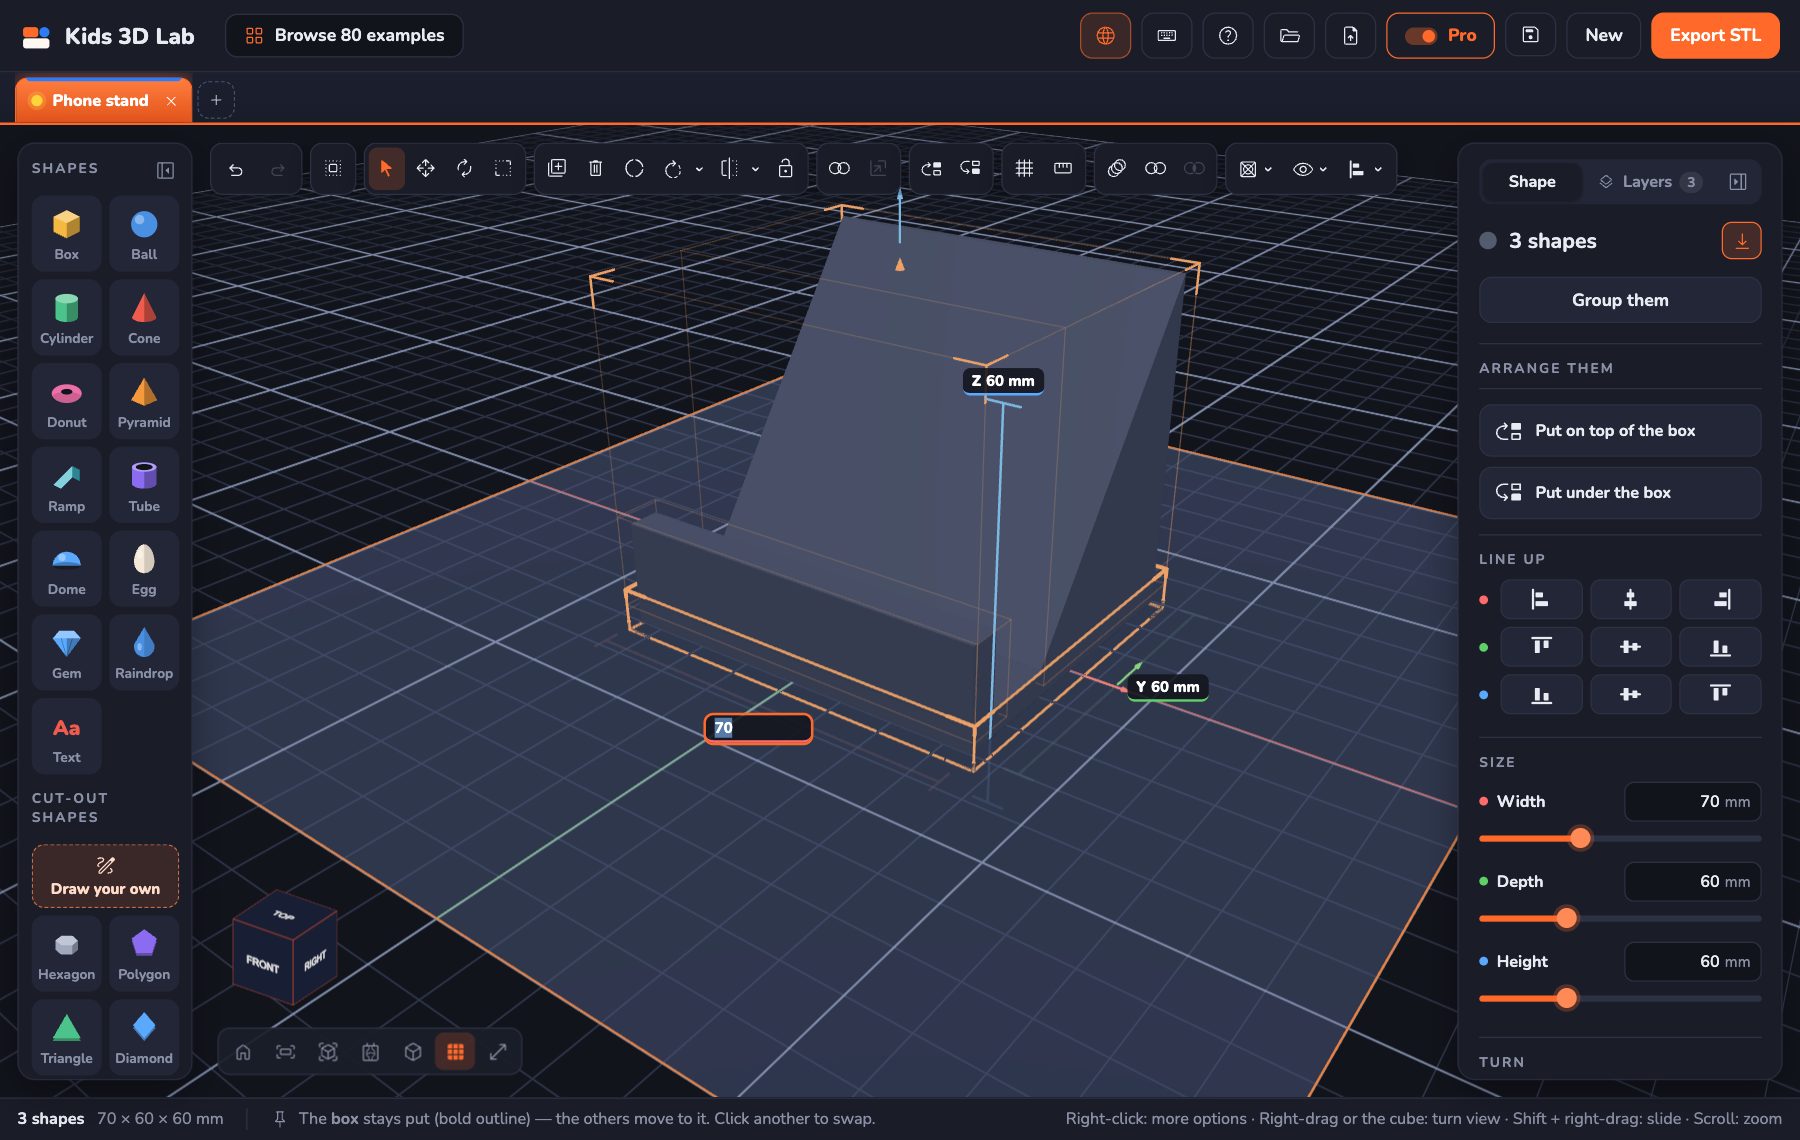
With Pro mode on:
- Measurement lines. Pick a shape (or several) and coloured lines show how big it is: X (red) along the front, Y (green) along the side and Z (blue) going up. Holes don't count.
- Type an exact size. Click a number on a measurement line, type the size you want and press Enter. One shape changes just that size. Several shapes (or a turned one) grow or shrink together, keeping their shape. Esc cancels.
- Two decimals. Sizes show to a hundredth of a millimetre, like 12.25 mm.
- Repeat. Pick something and click Repeat in the tool row. Choose:
- In a row: how many, which way (X, Y or Z) and the gap between them. Great for fences, teeth and buttons. - Round a ring: how many and how big the ring is. Each copy can turn to face out, like petals or the spokes of a wheel. - Mirror copy: a mirrored copy on the right or at the back, for the other half of a face, a car or a pair of wings. (Words, drawings, spirals and imported models can't be mirrored.)
- Combine. Pick two or more shapes and click Combine. They join into one solid, with their holes cut out. It's called "Combined" in Layers.
- Overlap. Pick two or more shapes that overlap and click Overlap. Only the part they all share is kept. A box and a slightly bigger ball make a dice with round corners!
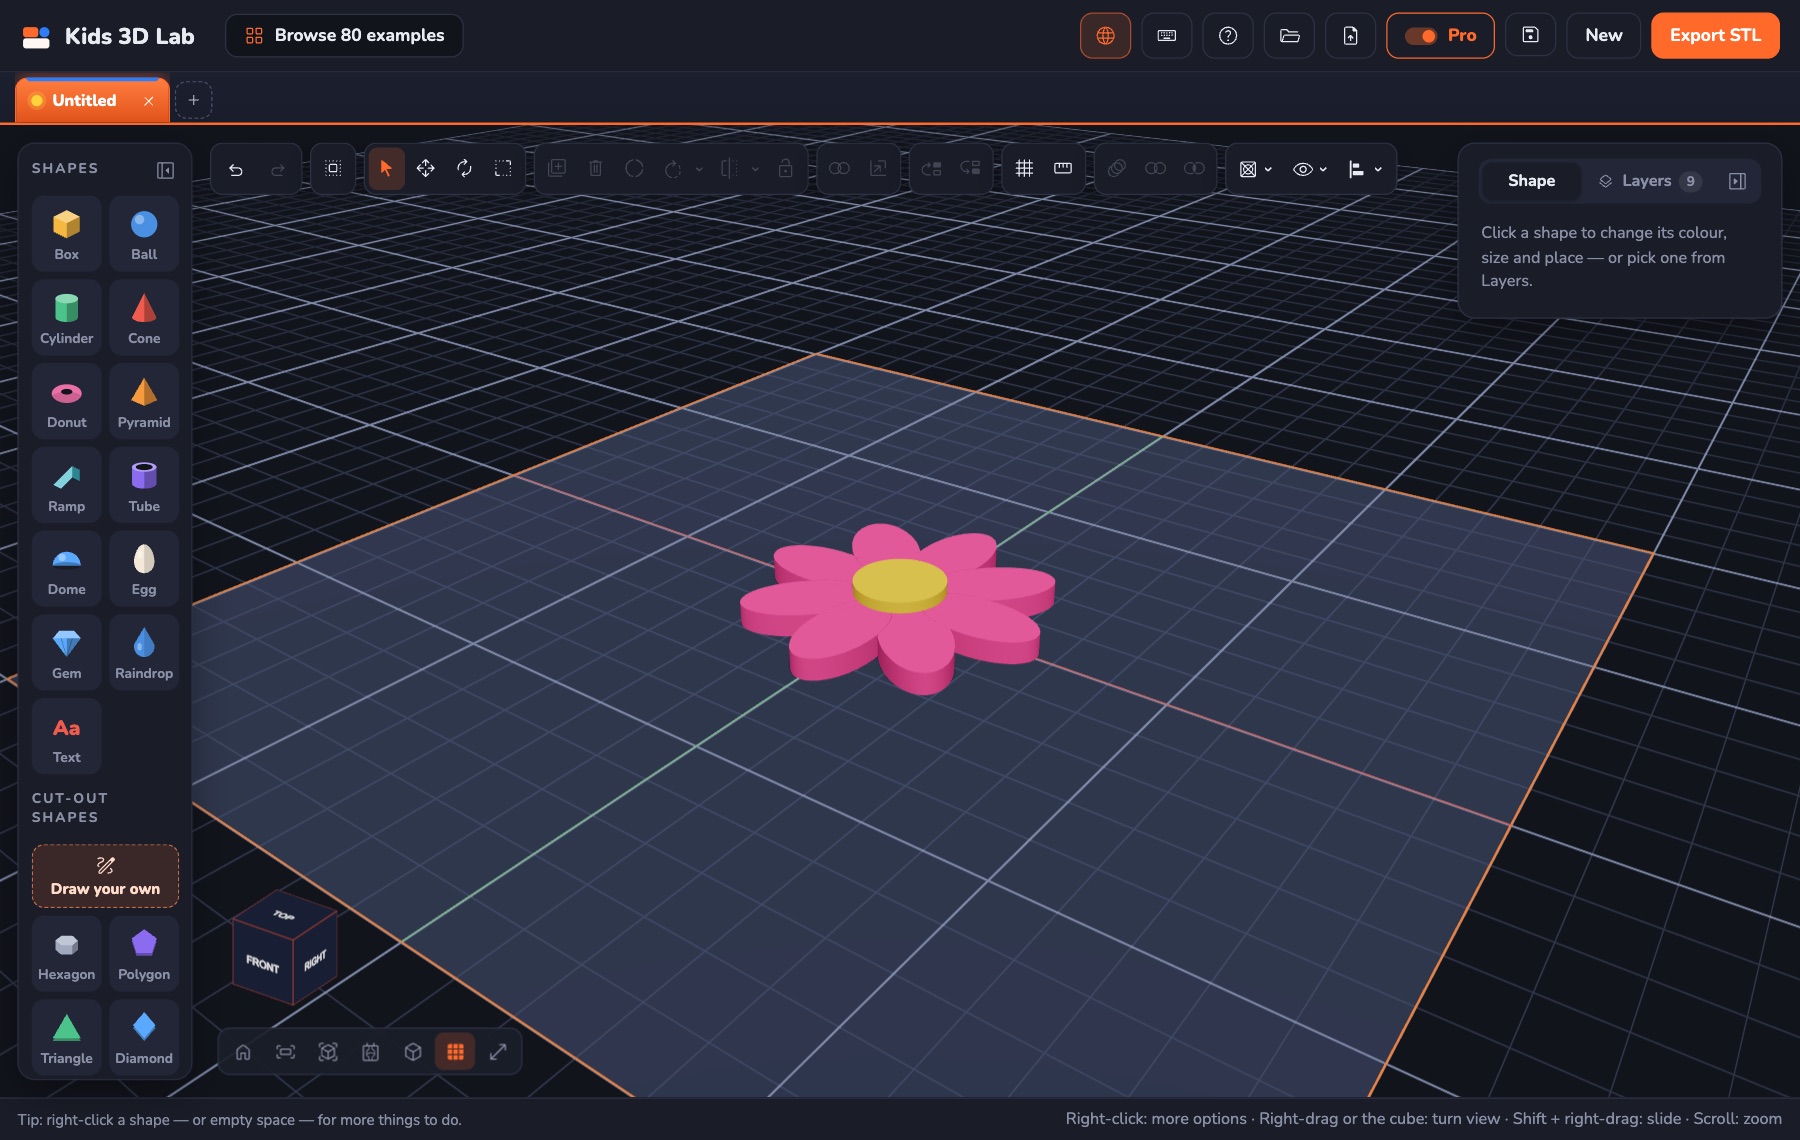
Every Pro tool can be undone with one Undo. Combine and Overlap can't be split apart again later, so save a copy first if you might want to change the parts.
Draw your own shape
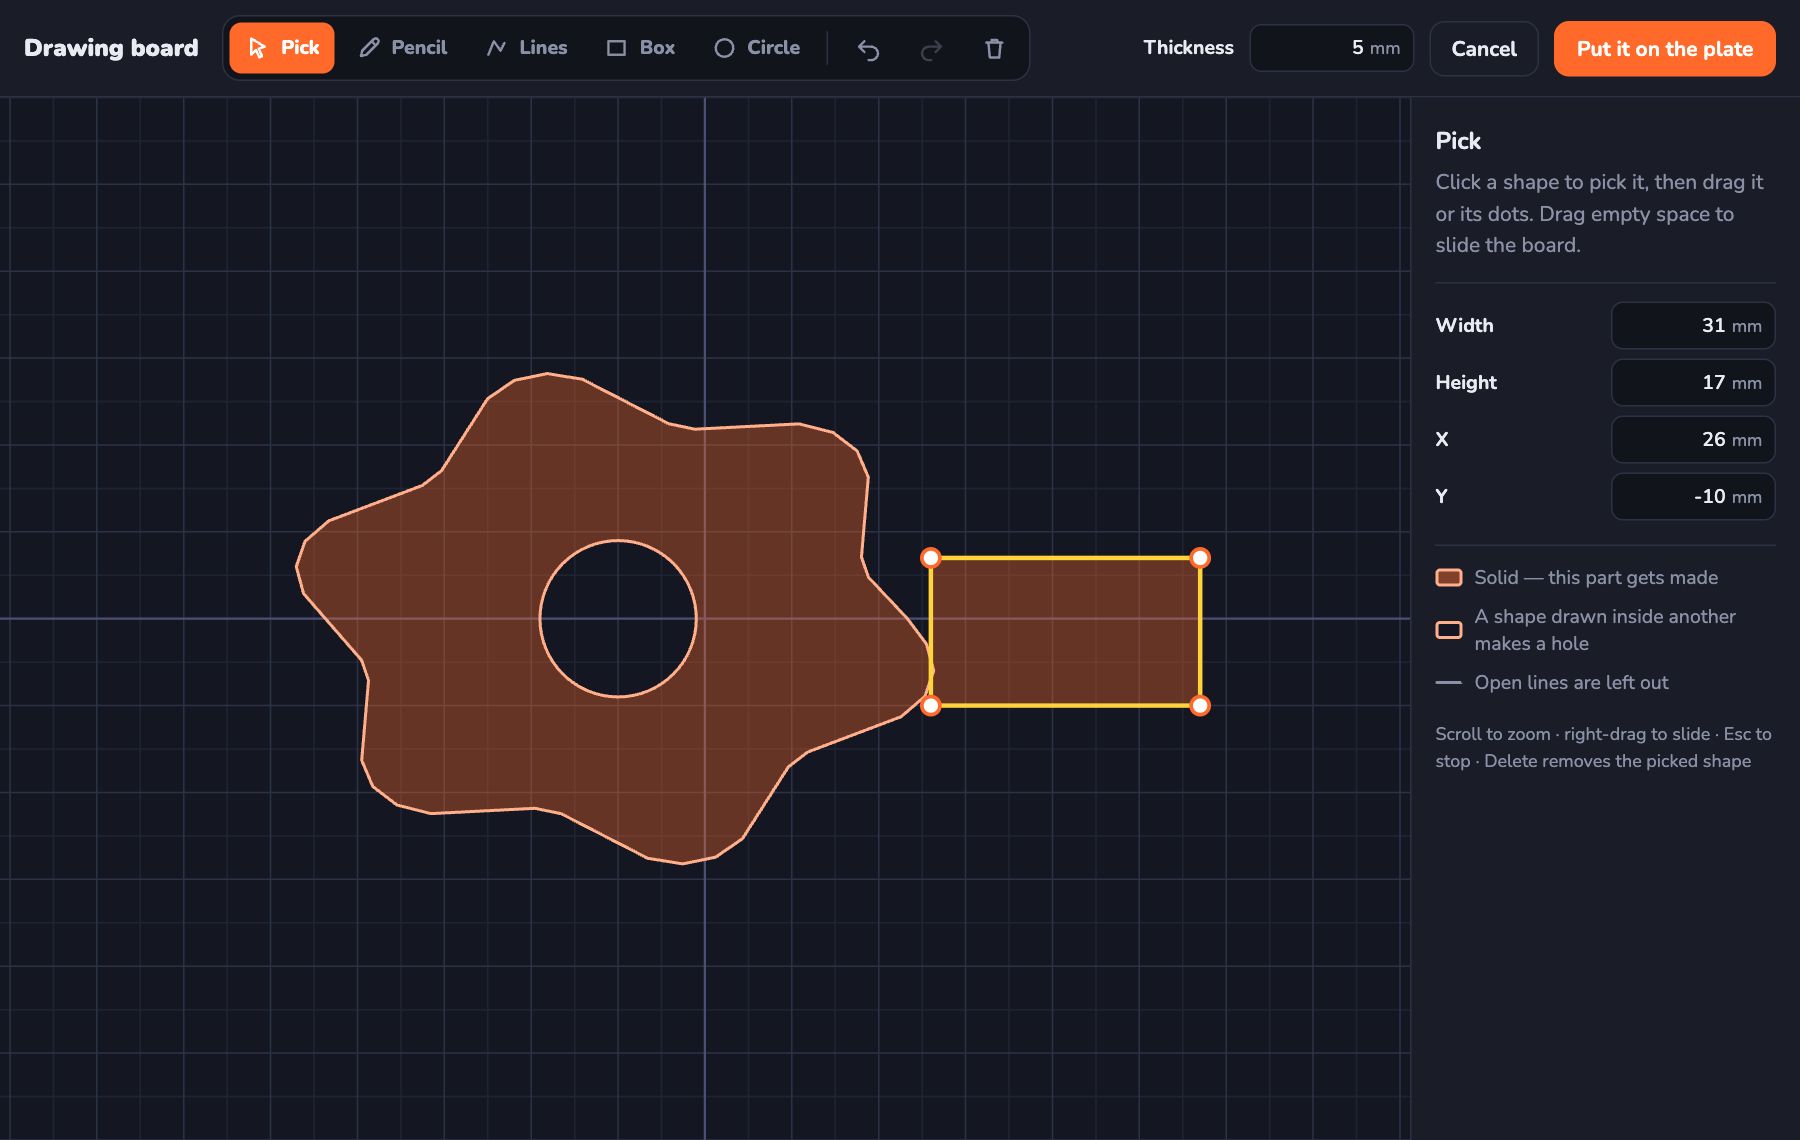
Click Draw your own in the Shapes list. A drawing board opens.
| Tool | How to use it |
|---|---|
| Pencil (P) | Hold the mouse down and draw. Let go and the ends join up |
| Lines (L) | Click for each corner. Click the first dot again to finish |
| Box (B) | Drag from one corner to the other |
| Circle (C) | Drag out from the middle |
| Pick (V) | Click a shape to move it or change it. Press Delete to remove it |
- Shapes that overlap join into one piece.
- A shape drawn inside another one becomes a hole.
- The orange part is what will be made.
- Type the Thickness, then click Put it on the plate.
- To change it later, pick it and click Change the drawing.
On a phone or tablet
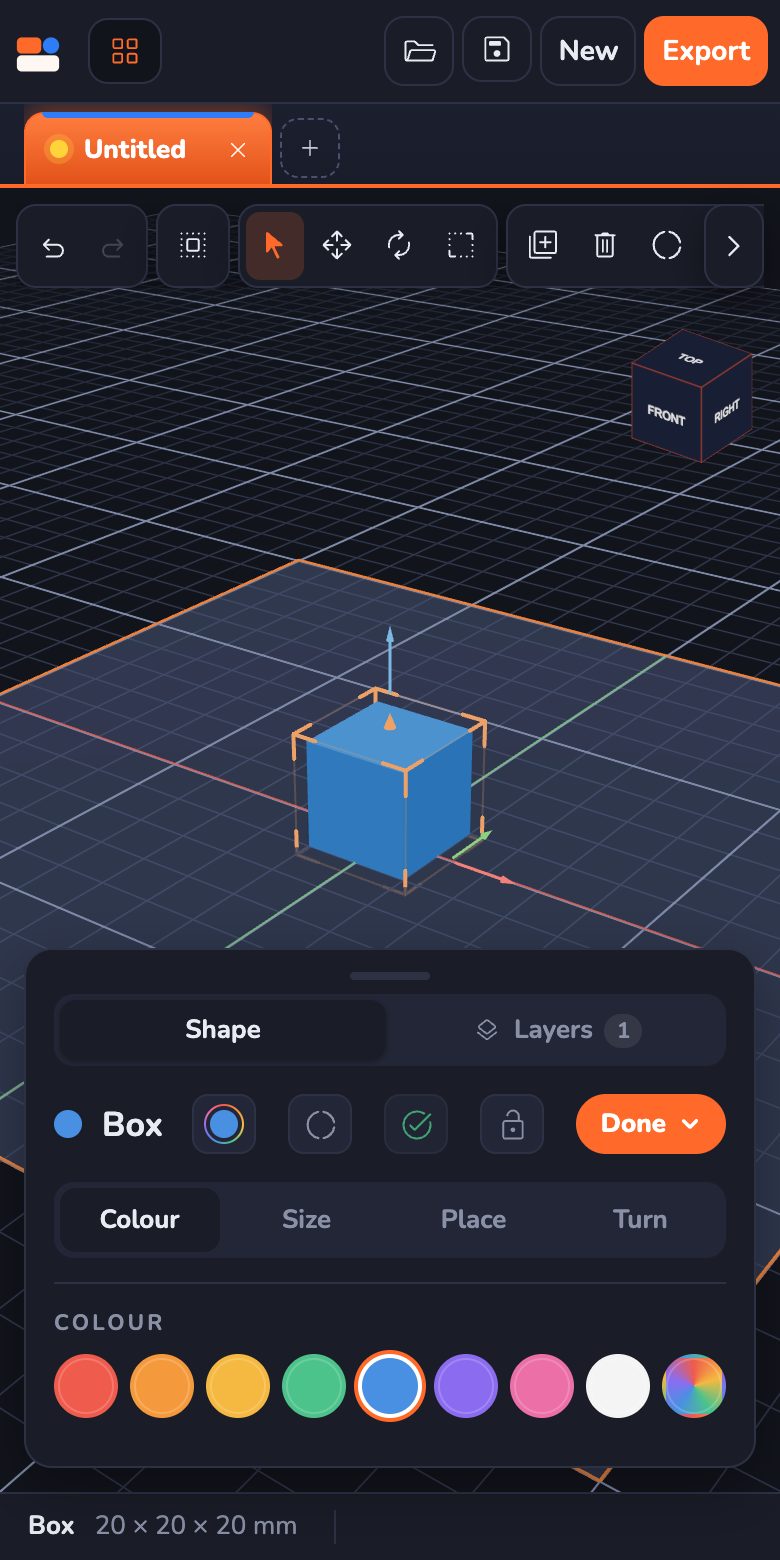
Kids 3D Lab works on phones and tablets too. Things move around a little to make room:
- The shapes are a row along the bottom. Swipe it, or tap the arrows at its ends, to see them all.
- The tool row is at the top. Swipe it, or tap its arrow, for more buttons.
- Tap a shape on the plate to pick it. A small bar shows up at the bottom, with its name and a few buttons: its colour, Hole, Drop to plate, Lock and Edit.
- Tap Edit to open the shape's settings. They're split into four tabs: Colour, Size, Place and Turn. Drag the sliders instead of typing, so the keyboard doesn't cover the screen.
- Drag the little handle at the top of the settings to make them taller, or shorter. Tap Done to close them.
- Picked a few shapes? Place has Group, On top and Under side by side.
- One finger turns the view. Two fingers zoom and slide.
- Pick more (in the tool row, on a tablet or phone): switch it on, then tap shapes to add them to the picked ones, or tap again to take one out. It does what Shift-click does with a mouse.
- Touch and hold a shape, or an empty spot, to open the same menu a right-click opens.
- The buttons are bigger, so they're easy to tap with a finger.
- Add to Home Screen: in the ⋯ menu. Kids 3D Lab then opens from its own icon, full screen, like an app. (On an iPad or iPhone: tap Share, then Add to Home Screen.)
Undo and copy
Practice gameCopy itCopy one fence post until the fence is finished.Play →- Undo: Ctrl + Z (on a Mac, ⌘ + Z). It takes back the last thing you did.
- Redo: Ctrl + Y (on a Mac, ⌘ + Shift + Z).
- Copy, cut and paste: Ctrl + C, Ctrl + X, Ctrl + V. You can paste into another tab too.
- Make a copy right here: Ctrl + D.
Saving and opening
| Button | What it does |
|---|---|
| The tab's name | Double-click it and type a name for your build |
| Save | Opens a little menu. Save the build saves it as a .kids3d file, so you can change it later. Save as a picture makes a picture to keep or share (see below) |
| Open | Opens a .kids3d file |
| Import | Brings in a 3D model (STL, OBJ or 3MF) or a drawing (SVG) |
| New | Starts a new build in a new tab |
- You can also drag a file onto the window to open it.
- An SVG drawing comes in as a flat shape 5 mm thick. A drawing in several colours comes in as one part per colour, grouped together, so you can print it in colours with 3MF with colours. Want a name in your own font? Write it in a drawing program, turn the words into outlines (in Inkscape: Path → Object to Path), save it as SVG and import it. Words still saved as text are left out, because the file doesn't carry the font.
- Kids 3D Lab keeps your open tabs safe in the browser, so a refresh doesn't lose them. Still, Save important builds as files, just in case.
Save as a picture
Made something great? Show it off! Click Save, then Save as a picture.
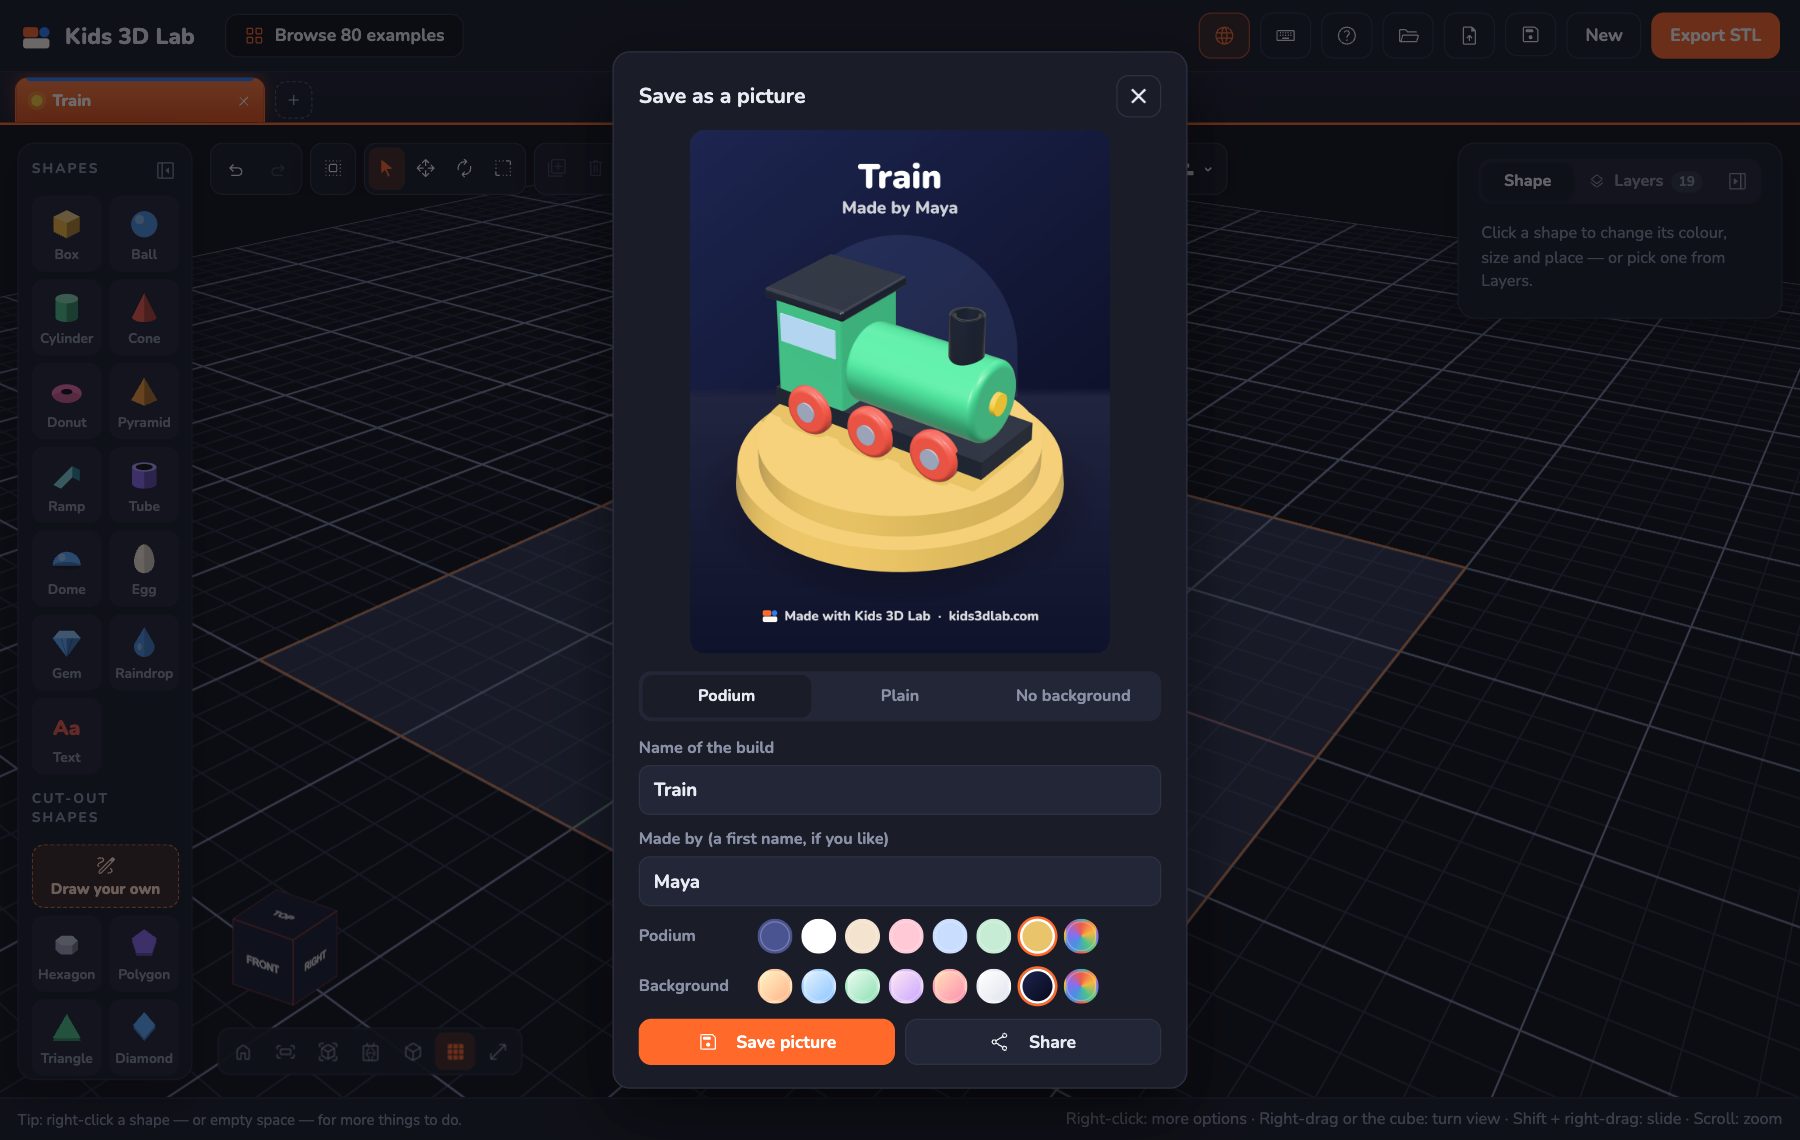
- Pick a look:
- Podium: your build stands on a round stand, like a prize in a shop window. - Plain: just a bright background. - No background: only your build, see-through all around, to put on anything.
- Type the name of the build. Made by is for a first name, if you like. Leave it empty to skip it.
- Pick the Podium and Background colours. The rainbow circle at the end gives you any colour.
- Click Save picture. On a phone or tablet, Share sends it straight to a message or an app.
- The picture shows your build the way your screen shows it. Turn the view first to show its best side.
- It's a big, sharp picture (2160 × 2700), the right shape for social media.
- The picture is made on your computer. Nothing is uploaded.
Getting ready to print
Click Export at the top right. A box called Ready to print? opens.
- Pick your printer.
- Read the checks. Does it fit? Is anything floating? How many pieces is it? Does any hole cut nothing? Click Show me to find a problem.
- See how much plastic it needs.
- Click Download STL. Or click Download 3MF to keep your colours, for a printer that prints in many colours.
- A grown-up opens the file in the printer's slicer app, like Cura, PrusaSlicer or Bambu Studio, and prints it.
Tips for good prints:
- Give your model a flat bottom that sits on the plate.
- Make walls at least 2 mm thick.
- Every part must touch another part. Nothing can float in the air.
- Anything under the plate is cut off, and only the part above the plate is printed.
- To join two parts, push one a little bit (about 1 mm) into the other.
Your first project: a key tag
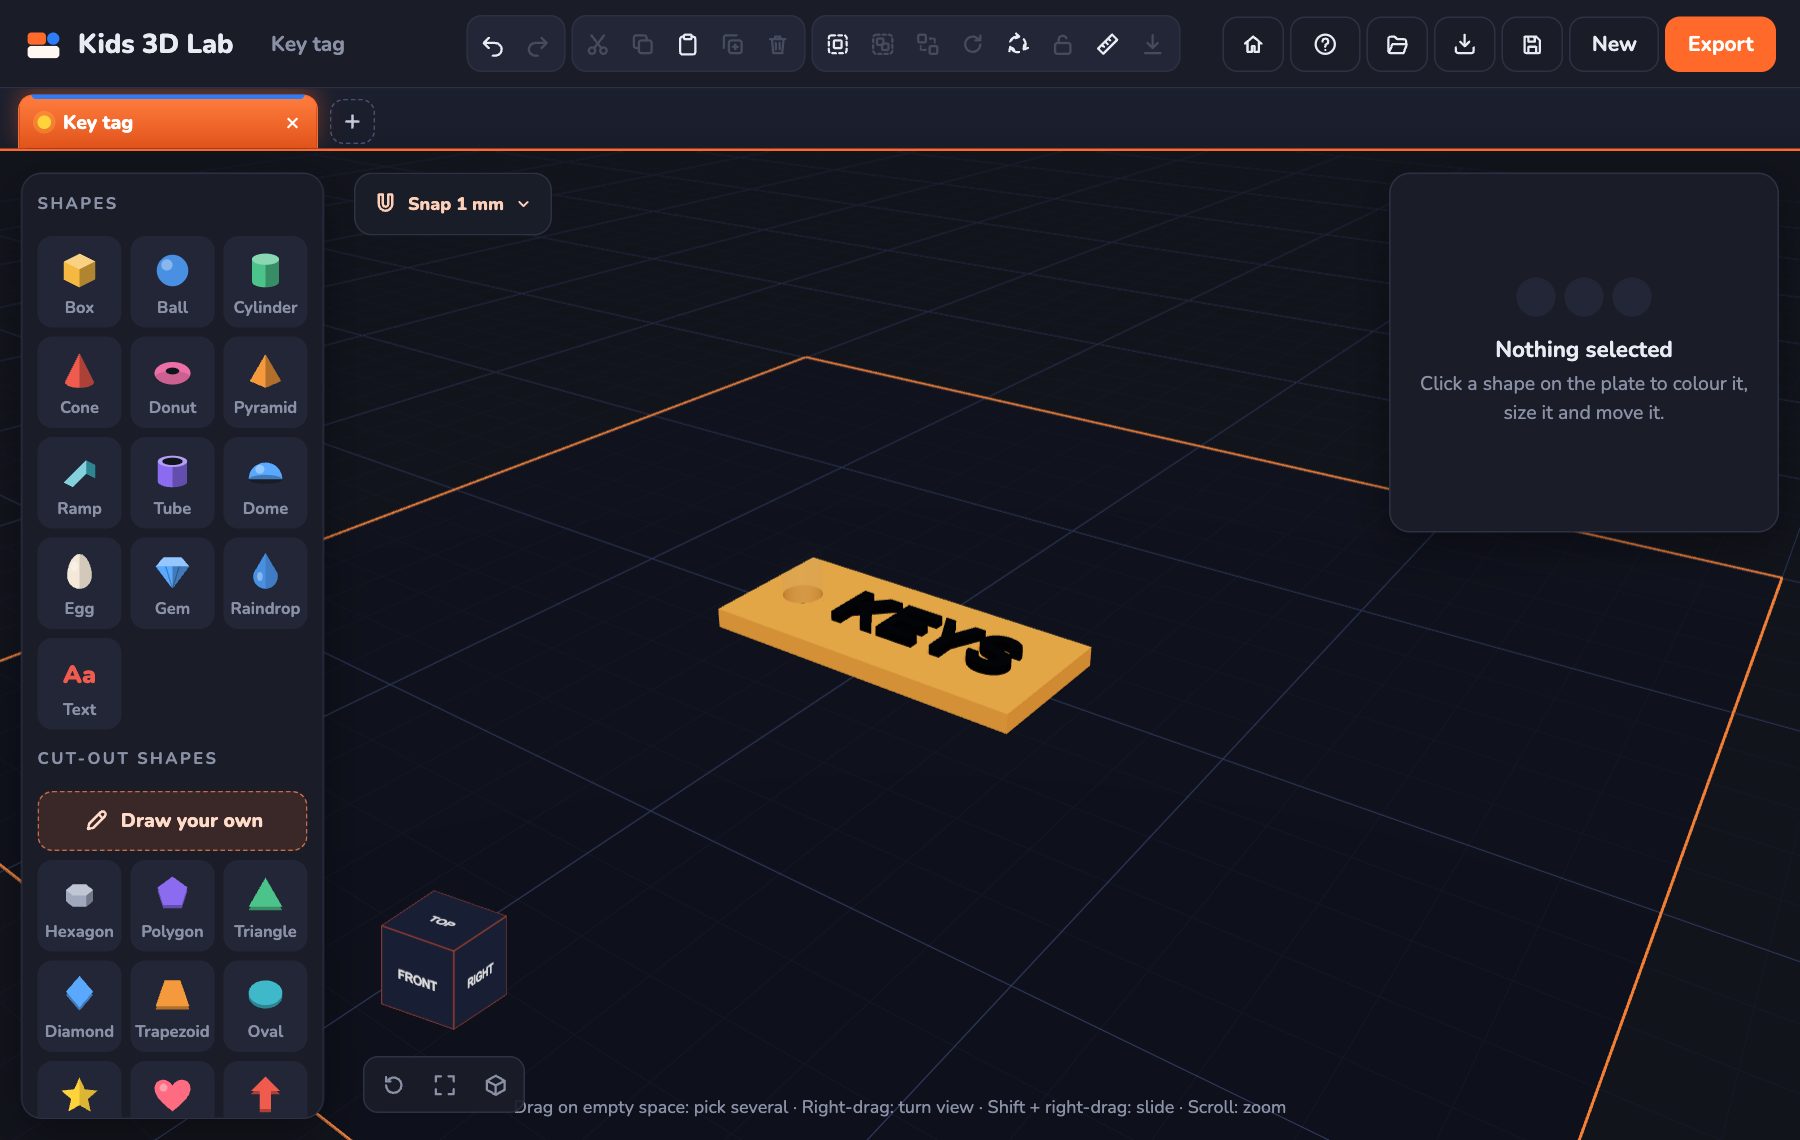
- Click New build.
- Add a Box: Width 50, Depth 20, Height 3, Soft edges 1.
- Add Text: type your name, Letter size 8, Thickness 1.5.
- Click the box, Shift-click the name, then click Put on top of the box.
- Press the right arrow key a few times to slide the name to the right.
- Add a Cylinder: Diameter 5, Height 10. Click Hole.
- Click the box, Shift-click the cylinder, then click Cut through the box.
- Press Shift and the left arrow key to slide the hole to the left end.
- Double-click the tab's name and call it "Key tag". Click Save, then Export. Ready to print!
Keyboard shortcuts
On a Mac, use ⌘ instead of Ctrl. Press ? in Kids 3D Lab to see this list.
| Keys | What they do |
|---|---|
| Ctrl + S / Ctrl + O | Save / open |
| Ctrl + Z / Ctrl + Y | Undo / redo |
| Ctrl + C / X / V | Copy / cut / paste |
| Ctrl + D | Make a copy |
| Ctrl + A | Pick everything |
| Ctrl + G | Group |
| Ctrl + \ | Fold the side panels away, or bring them back |
| Delete | Delete |
| Esc | Pick nothing |
| Arrow keys | Move (Shift: move 10 times as far) |
| Ctrl + up / down arrow | Lift up / put down |
| R | Quarter turn |
| H | Solid or hole |
| L | Lock or unlock |
| M | Tape measure |
| P | Workplane: the next shape stands on the face you click |
| Q / W / E / T | Select, Move, Rotate or Scale mode |
| F | Fit everything in view |
| X | X-ray: see through the shapes |
| O | Outline: just the lines |
| G | Grid on or off |
| ? | Show all shortcuts |
Fix it!
| Problem | What to do |
|---|---|
| My hole cuts nothing | The hole must go into the shape. Pick the solid, Shift-click the hole, then click Cut through |
| My shape won't move | It may be locked. Press L to unlock it |
| Clicking one shape picks lots | They are grouped. Click Ungroup |
| My shape is floating | Click Drop to plate |
| My new shape went on top of another shape | A workplane was on. Press Ctrl + Z, or drag the shape where you want it |
| Part of my shape is gone | It went under the plate. Click Up to the plate or Drop to plate |
| The wrong shape stays put when I line up | Click the shape you want to stay put. It gets the bold outline |
| I lost my build in the view | Press F, or click TOP on the view cube |
| I can't see the arrows (or the corners) on my shape | You're in another mode. Press Q for Select |
| I can't click a shape: it's tiny, or inside another | Pick it from Layers, or press X for X-ray |
| My build looks squashed flat | You're in a flat view, like TOP. Turn the view a little, or click the corner button next to the view cube |
| I deleted something by mistake | Press Ctrl + Z |
| Flip left to right is greyed out | Words, drawings, spirals and models can only be turned upside down |
| My picture shows the wrong side | The picture uses your view. Close it, turn the view, then save the picture again |
Have fun building!