Kids 3D Lab lets you build 3D things in your web browser. Then a 3D printer can make them real! You don't need to know anything about 3D design to start. You snap shapes together, like building blocks.
- You don't need an account. You don't need to install anything.
- Your work stays on your computer. Nothing is sent anywhere.
- Every size is in millimetres (mm). 10 mm is 1 centimetre.
The start page
When you open Kids 3D Lab, you see the start page.
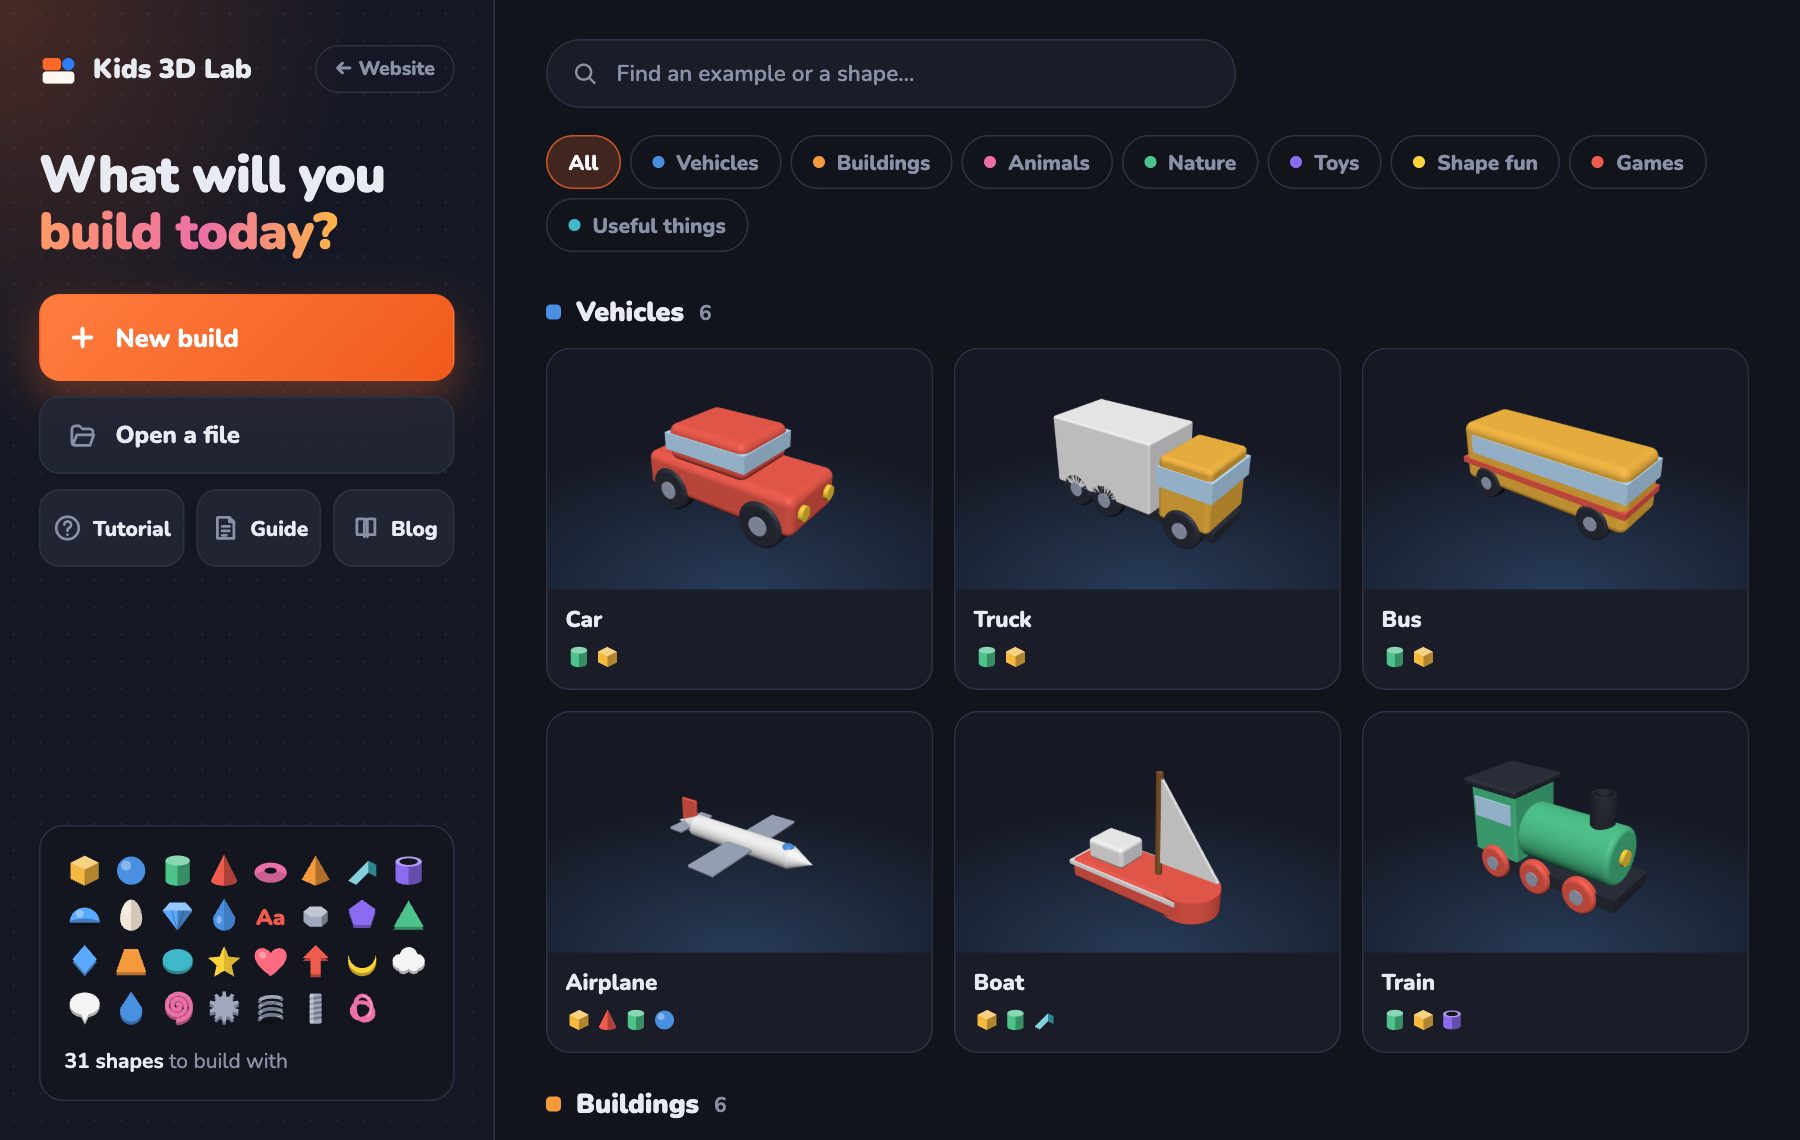
| Button | What it does |
|---|---|
| New build | Starts a new build on an empty plate |
| Open a file | Opens a .kids3d file you saved before |
| Tutorial | Opens the step-by-step lessons |
| Blog | Opens short lessons and ideas |
| Keep going | Takes you back to the build you were working on |
| The search box | Finds an example. Type a name, like "car", or a shape, like "gear" |
On the right there are 60 examples in 8 groups: Vehicles, Buildings, Animals, Nature, Toys, Shape fun, Games and Useful things. Click a group's button to see just that group. Under each picture, little icons show which shapes it is made of. Click a picture to open it and play with it!
Builds you chose to keep are at the top, under My builds.
The tour
The first time you start an empty plate, a little card at the bottom teaches you 6 things, one by one. Just do what it says and it moves on by itself. Click Skip the tour if you don't want it.
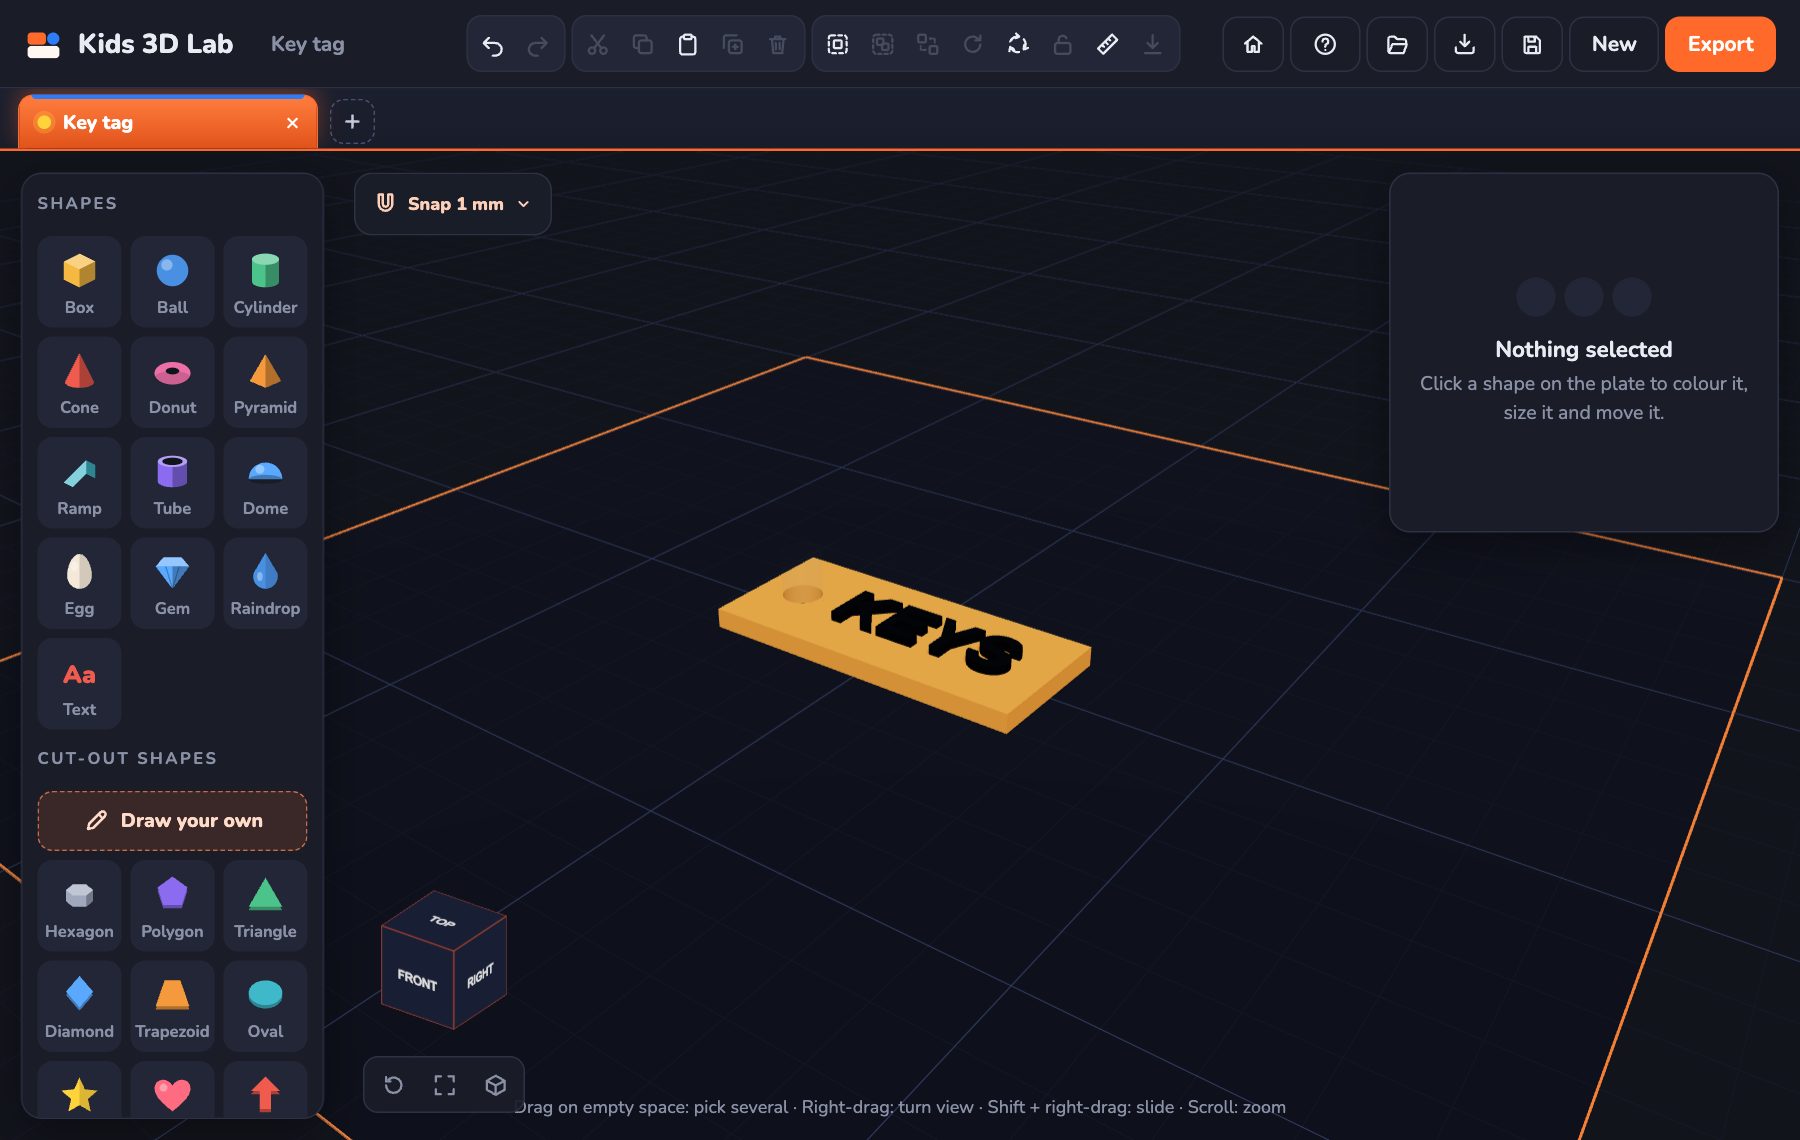
The parts of the screen
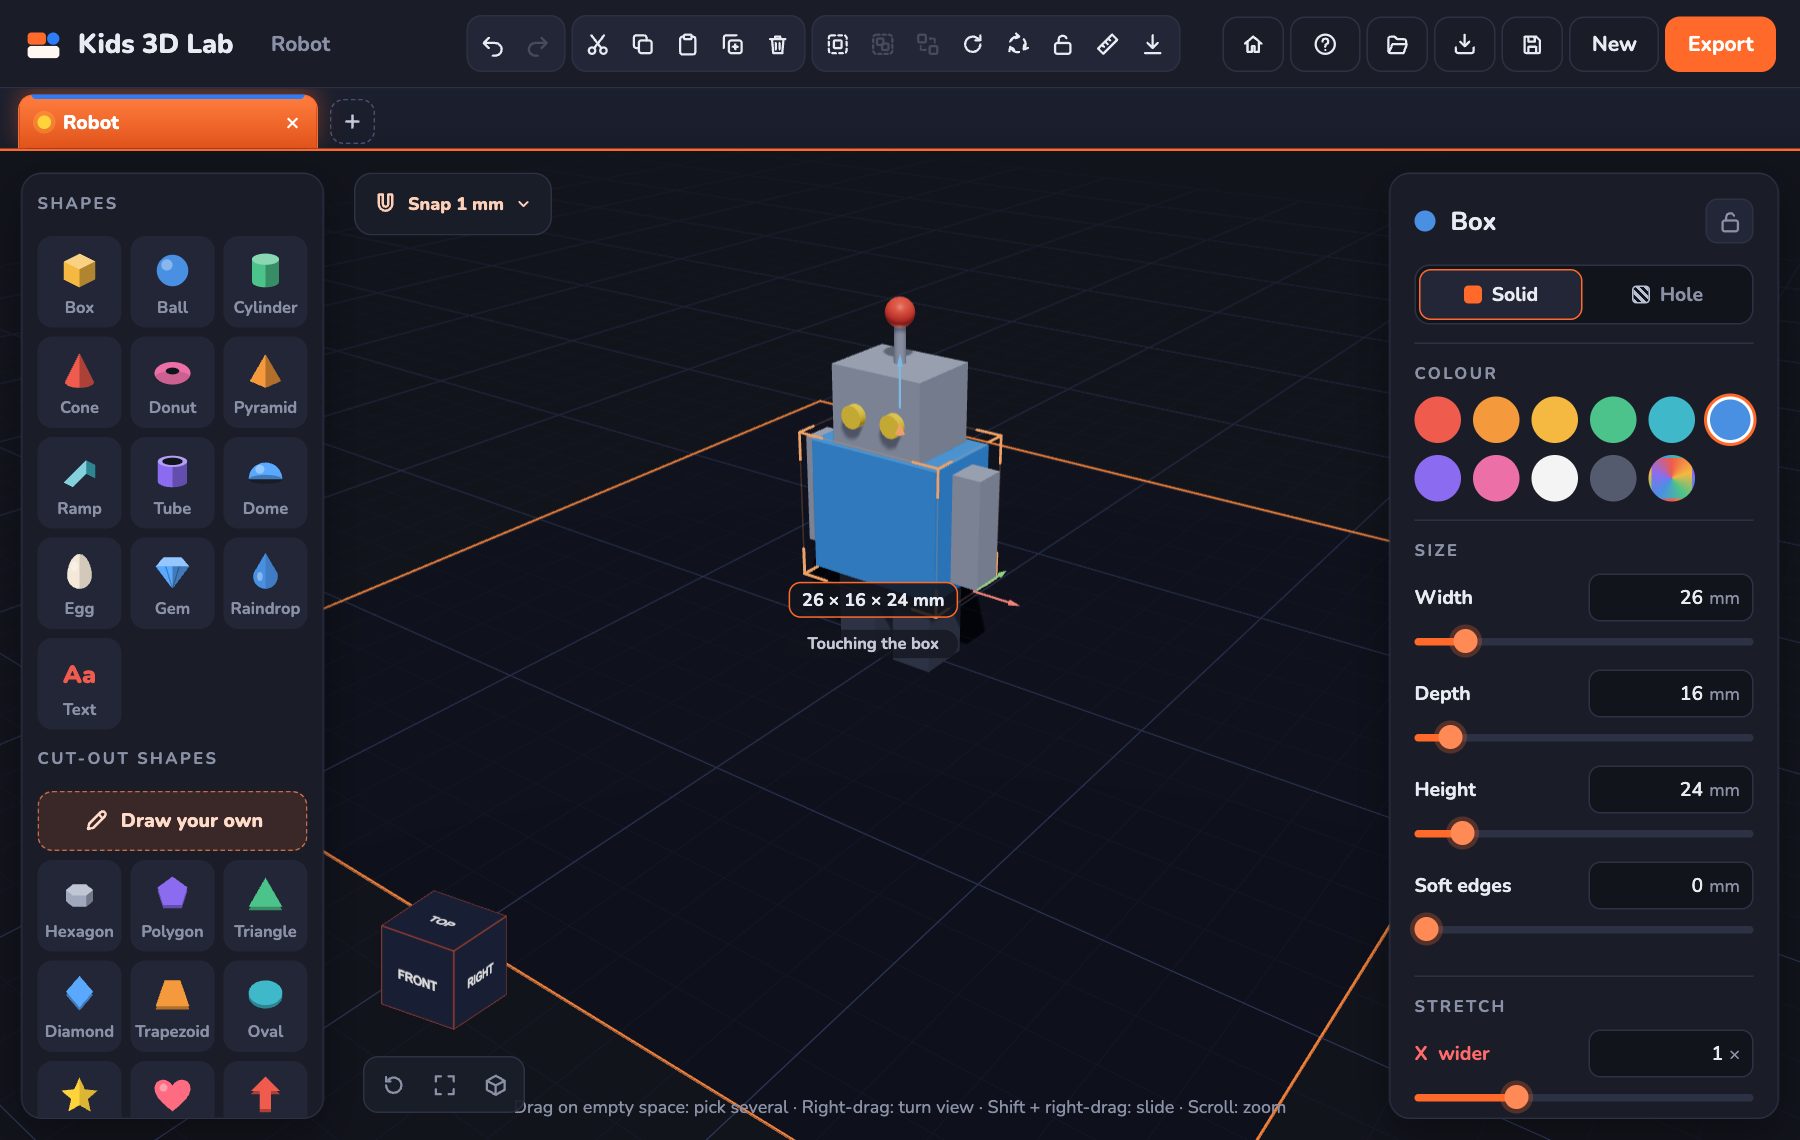
- Left: Shapes. Click a shape to put it on the plate.
- Middle: the plate. This is where you build. The purple square is the size of a printer's plate.
- Right: the panel. It shows the picked shape's colour, size and place. You can change them here.
- Top: the toolbar. Undo, copy, paste, delete, measure and more. Hold your mouse over a button to see its name.
- Top left of the plate: Snap. It decides how far a shape jumps each time you drag it.
- Bottom left: the view cube. Click a side, like TOP, to look from that side. The three buttons under it bring the view back, fit your build in view, and look from the corner.
Tabs: many builds at once
Just under the toolbar there are tabs, like in a web browser. Each tab holds one build.
- Click + to start something new in a new tab.
- Click a tab to switch to it.
- Double-click a tab's name to rename it.
- Click × to close a tab. If you changed the build, Kids 3D Lab asks: Keep this build? Click Keep it to put it in My builds, or Don’t keep to throw it away.
Looking around
| To do this | Do this with the mouse |
|---|---|
| Turn the view around | Hold the right button and drag |
| Slide the view | Hold Shift and the right button, then drag |
| Zoom in and out | Roll the mouse wheel |
| See everything | Press F |
On a tablet, drag with one finger to turn the view. Use two fingers to zoom and slide.
Adding shapes
Click any shape on the left. It lands in an empty spot on the plate. New shapes never land on top of each other.
There are 31 shapes in three groups.
Shapes
| Shape | What you can change | Good for |
|---|---|---|
| Box | Width, depth, height, soft edges | Almost everything |
| Ball | Diameter | Heads, wheels, snowmen |
| Cylinder | Diameter, top diameter, height, soft edges, sweep | Posts, wheels, cups |
| Cone | Diameter, height, soft edges, sweep | Roofs, noses, party hats |
| Donut | Size, thickness, sweep | Rings, handles |
| Pyramid | Width, depth, height, sides | Roofs |
| Ramp | Width, depth, height, soft edges | Slopes, phone stands |
| Tube | Diameter, wall, height, soft edges, sweep | Pots, pipes, arches |
| Dome | Diameter | Domes, shells |
| Egg | Diameter, height | Eggs, heads |
| Gem | Sides, diameter, height | Jewels for crowns |
| Raindrop | Diameter, height | Drops, onion domes |
| Text | Words, letters, size, thickness | Names and signs |
Cut-out shapes
These are flat shapes, like a cookie cutter, pulled up to any height. Their bottoms are flat, so they print very well.
Hexagon, Polygon, Triangle, Diamond, Trapezoid, Oval, Star, Heart, Arrow, Moon, Cloud, Bubble, Drop and Spiral.
Makers
| Shape | What it is |
|---|---|
| Gear | A gear with teeth. It can have a hole in the middle for an axle |
| Spring | A coil, like the spring in a pen |
| Screw | A rod with a real thread |
| Knot | A twisty loop |
Picking shapes
- One shape: click it. A purple frame goes around it.
- Nothing: click empty space, or press Esc.
- A few shapes: click one, then hold Shift and click the others.
- A few shapes, another way: drag a box across empty space.
- Everything: press Ctrl + A (on a Mac, ⌘ + A).
Moving shapes
| How | What to do |
|---|---|
| Drag it | Drag the shape across the plate |
| Use the arrows | The red arrow moves it left and right. The green arrow moves it back and front. The blue arrow lifts it up |
| Type numbers | Type in Position in the panel: X, Y and Z |
| Use the keyboard | Press the arrow keys. Hold Shift to go 10 times as far |
- Z lift is how high the shape is above the plate. 0 means it sits on the plate.
- Is a shape floating? Click Drop to plate.
- While you drag, a label shows where the shape is, and how far away the nearest shape is.
- Hold Alt while you drag to move without jumping in steps.
Changing the size
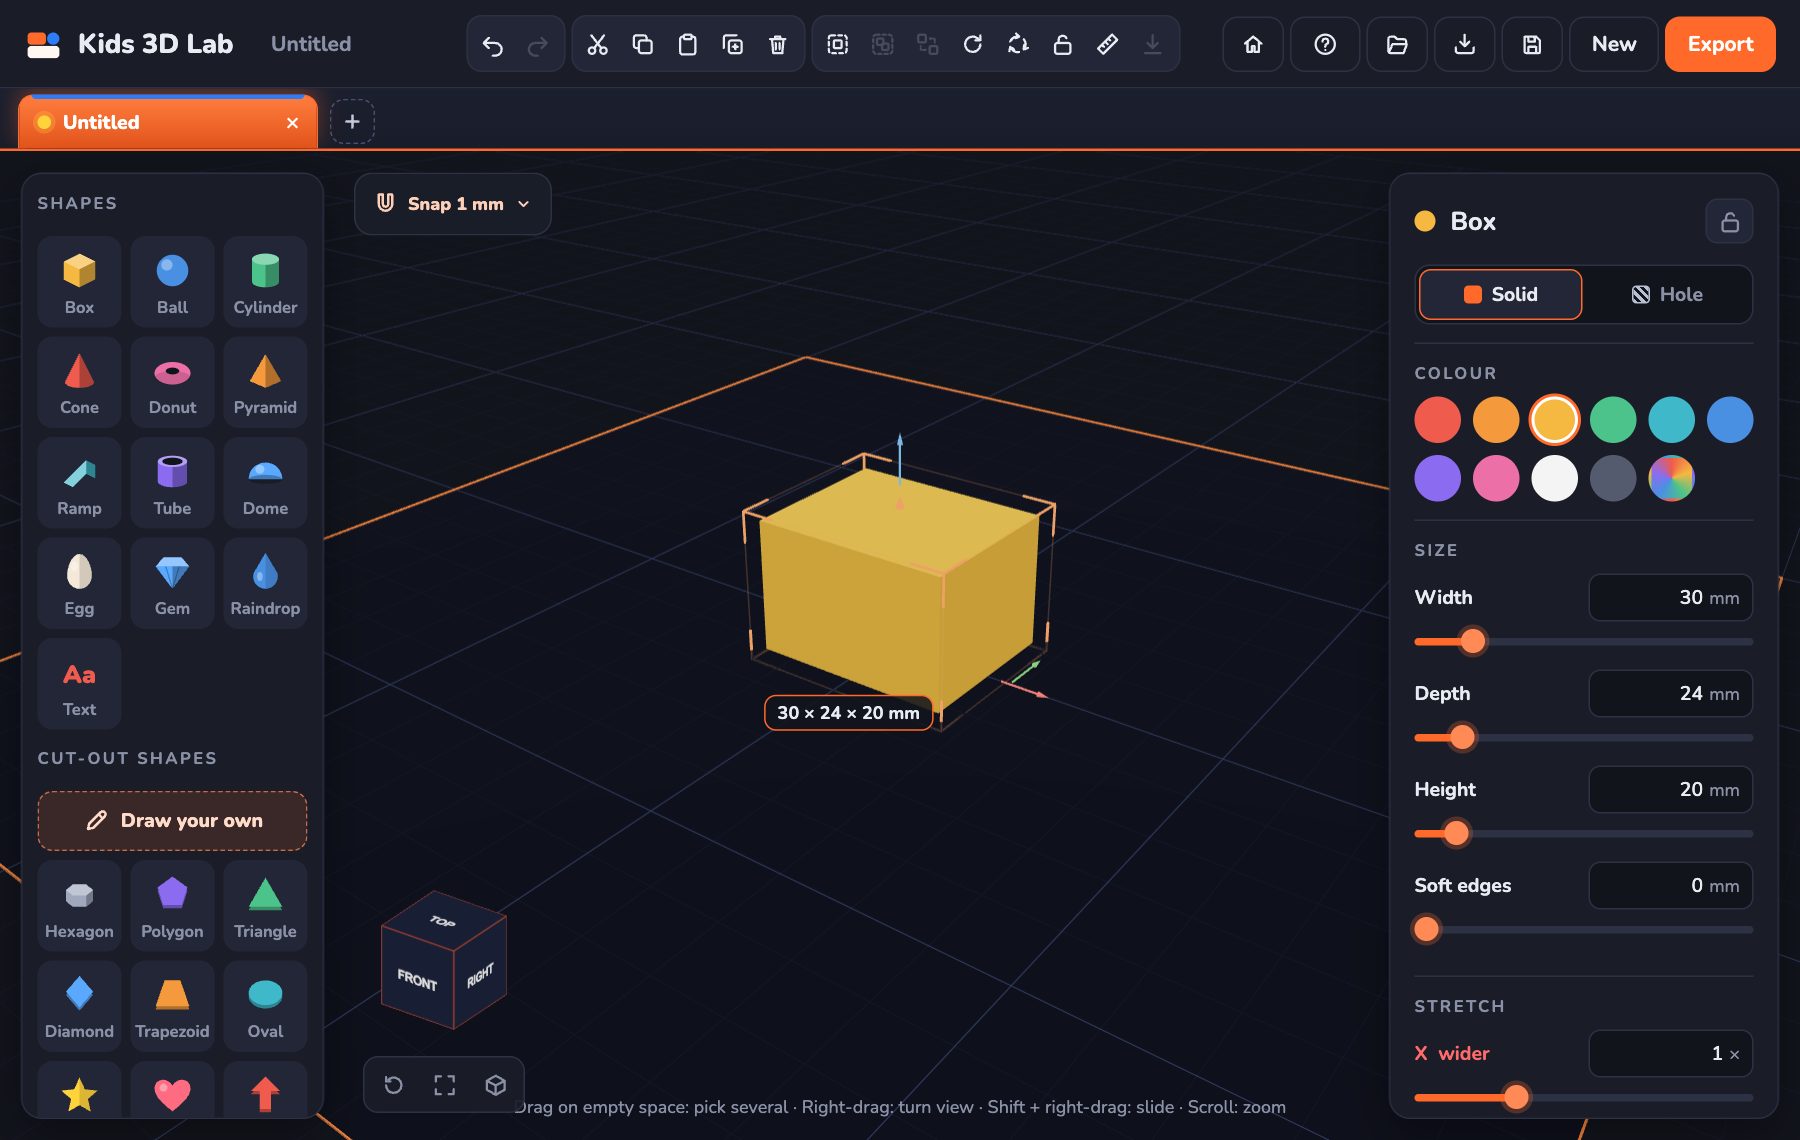
| How | What to do |
|---|---|
| Drag a corner | Drag a purple corner at the bottom. It gets wider or deeper |
| Drag the top | Drag the little purple arrow on top. It gets taller or shorter |
| Type numbers | Type in Size in the panel, then press Enter |
| Use a slider | Drag the purple dot under each number |
A label under the shape always shows its size, like 40 × 30 × 20 mm.
More ways to change a shape
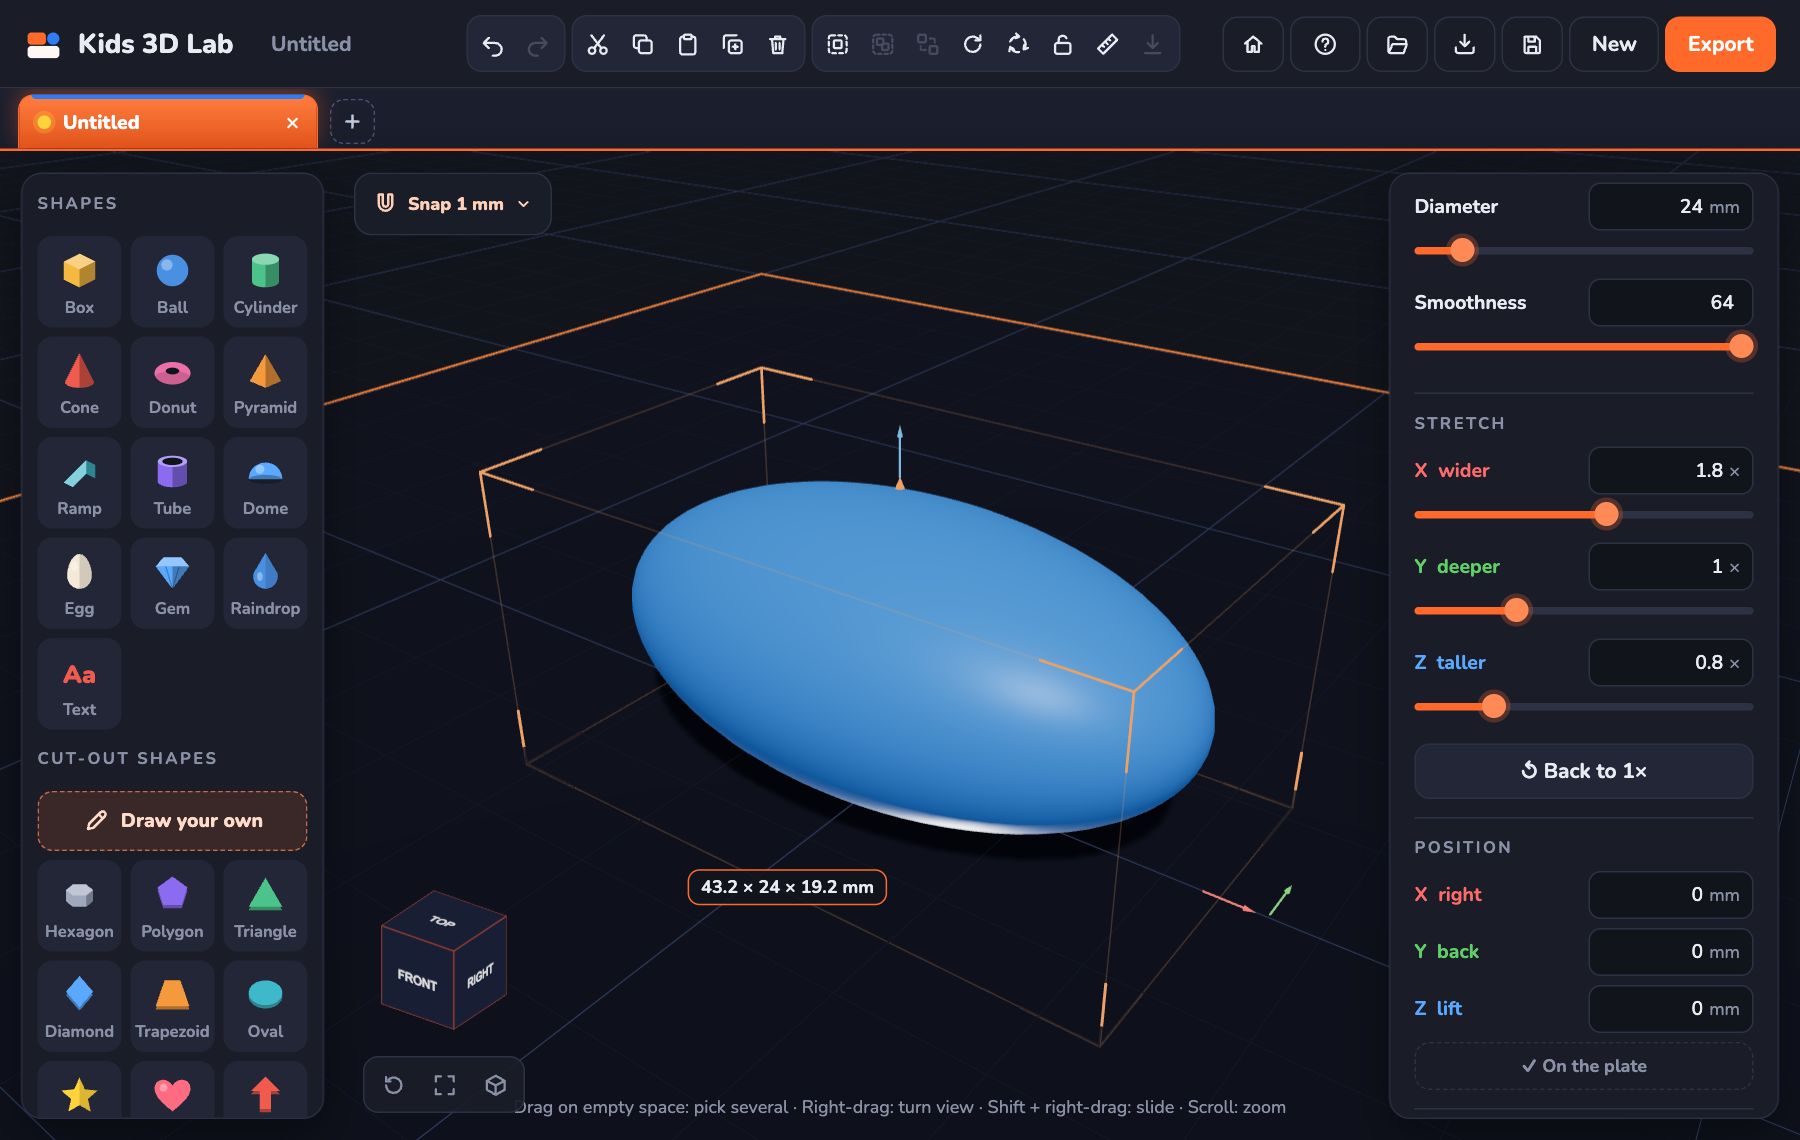
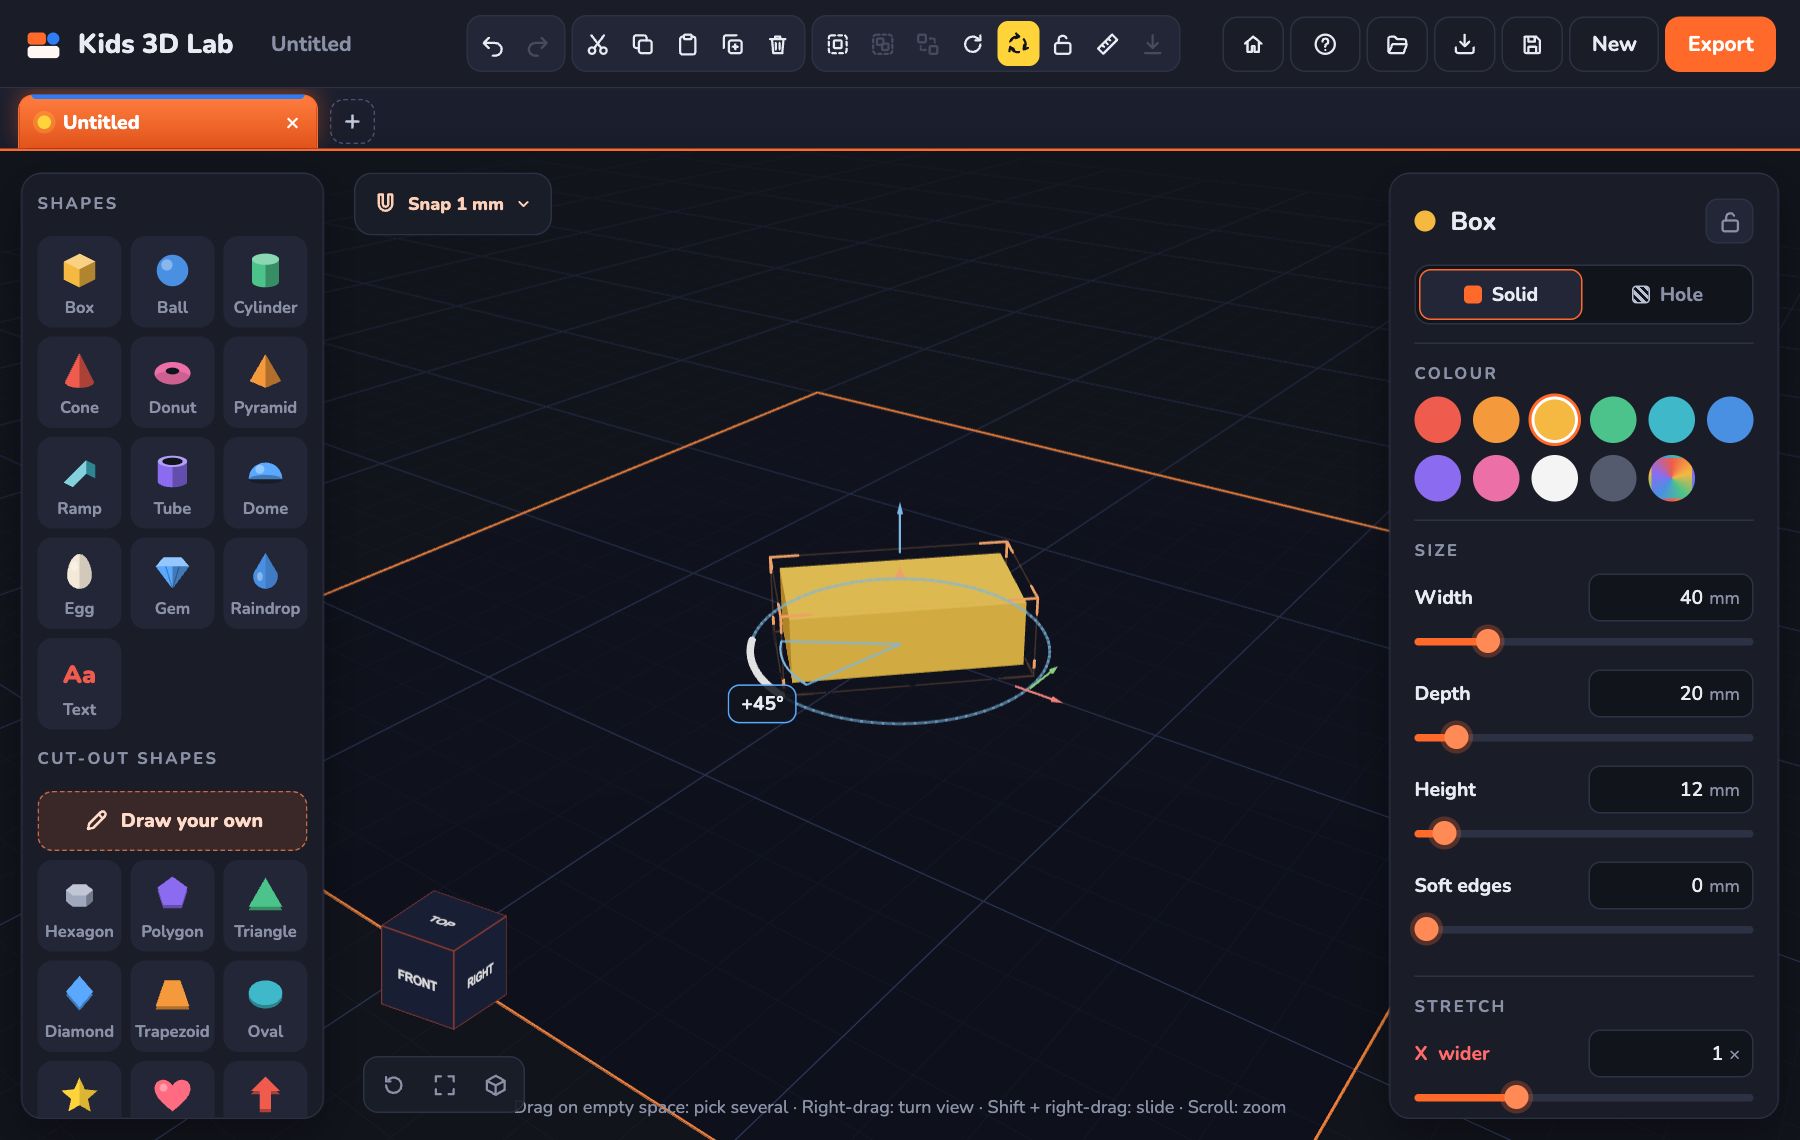
- Stretch makes a shape longer in one direction. 2 means twice as long. A stretched ball becomes an oval pebble!
- Soft edges make the edges smooth, so they are nice to hold. Edge shape can be Round or Slanted.
- Smoothness decides how many flat sides a round shape has. Set a cylinder to 6 and it becomes a hexagon!
- Sweep cuts a round shape like a cake. 180 makes half. 270 makes a Pac-Man.
- Top diameter makes a cylinder narrow at the top, like a flower pot.
Turning and flipping
- A quarter turn: click ↻ 90° next to X, Y or Z in the panel. Or press R.
- Any angle: type a number under Turn, like 45.
- Turn arrows: click the button with three arrows in a circle in the top toolbar. Curved arrows show up on your shape. Drag one round! A label shows the angle. Click the button again to hide them.
- Flip: the Flip buttons turn a shape over like a pancake.
Colours
Click a colour in Colour. Click the rainbow circle to pick any colour you like.
Holes
This is the best trick! Any shape can become a hole. A hole cuts its shape out of any solid shape it goes into.
- Add a Box. Make it 40 wide, 40 deep and 10 tall.
- Add a Cylinder. Make it 10 wide and 20 tall.
- With the cylinder picked, click Hole at the top of the panel. Or press H. It turns grey.
- Click the box. Hold Shift and click the cylinder.
- Click Cut through the box.
- There is a round hole in your box!
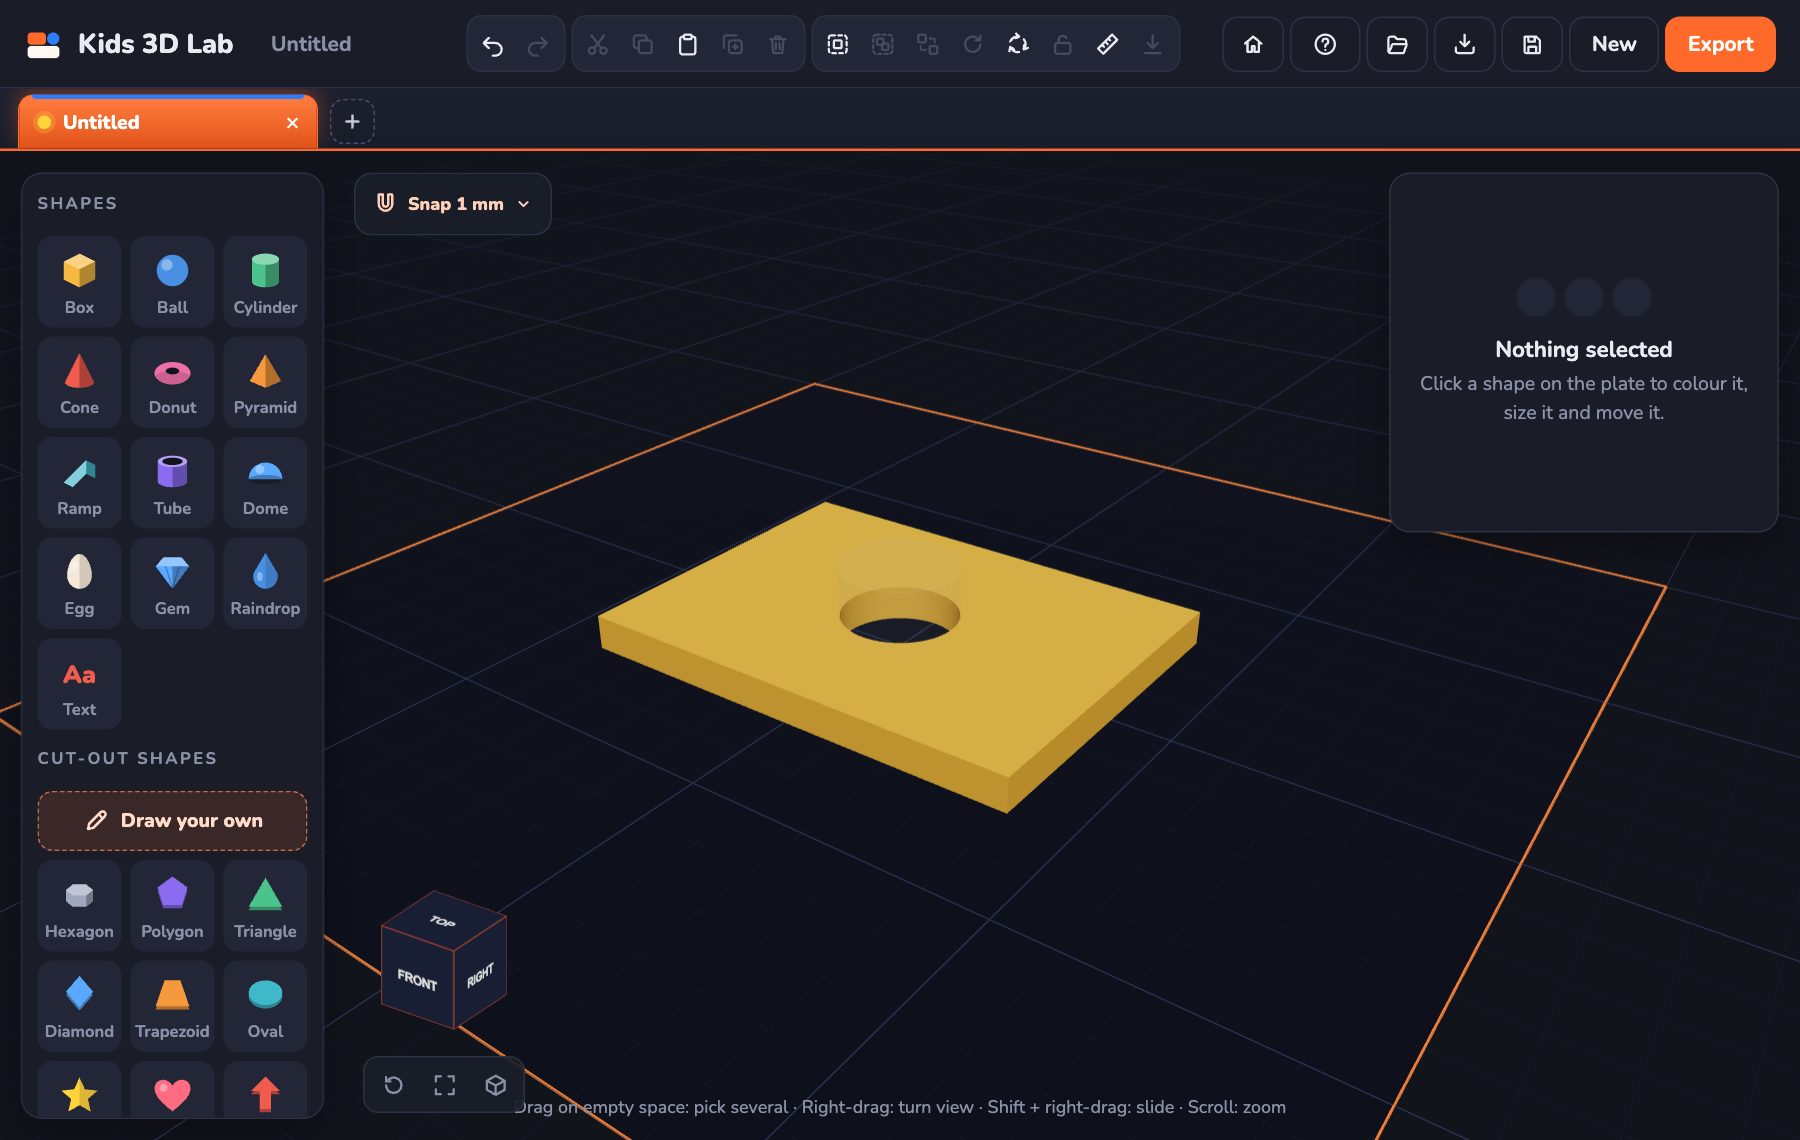
- A hole must go into a shape. Sitting on top cuts nothing. Kids 3D Lab shows a warning if a hole cuts nothing.
- Any shape can be a hole: a star, a heart, even your name!
- Click Solid (or press H) to change it back.
- A hole inside a group only cuts the shapes in that group.
Words (Text)
- Click Text in the Shapes list. The word "Hello" appears.
- Type your own words in Words.
- Pick the Letters: Clean or Classic.
- Change Letter size and Thickness.
Stacking and lining up
Pick two or more shapes, and the panel shows ways to arrange them.
- The shape you pick first stays still. It shows a Stays put label. The others move to it.
- Put on top of… puts the others on top of the first one, in the middle.
- Cut through… pushes holes all the way through the first shape.
- Line up lines them up on their left, right, front, back, top or bottom sides, or their middles.
- Drop all to plate puts them all back down on the plate.
Groups and locks
Group: pick some shapes and click Group them (Ctrl + G). Now they pick and move together. Click Ungroup to split them again.
Lock: click the padlock at the top of the panel, or press L. A locked shape can't move, change size or be deleted. You can still change its colour.
Measuring
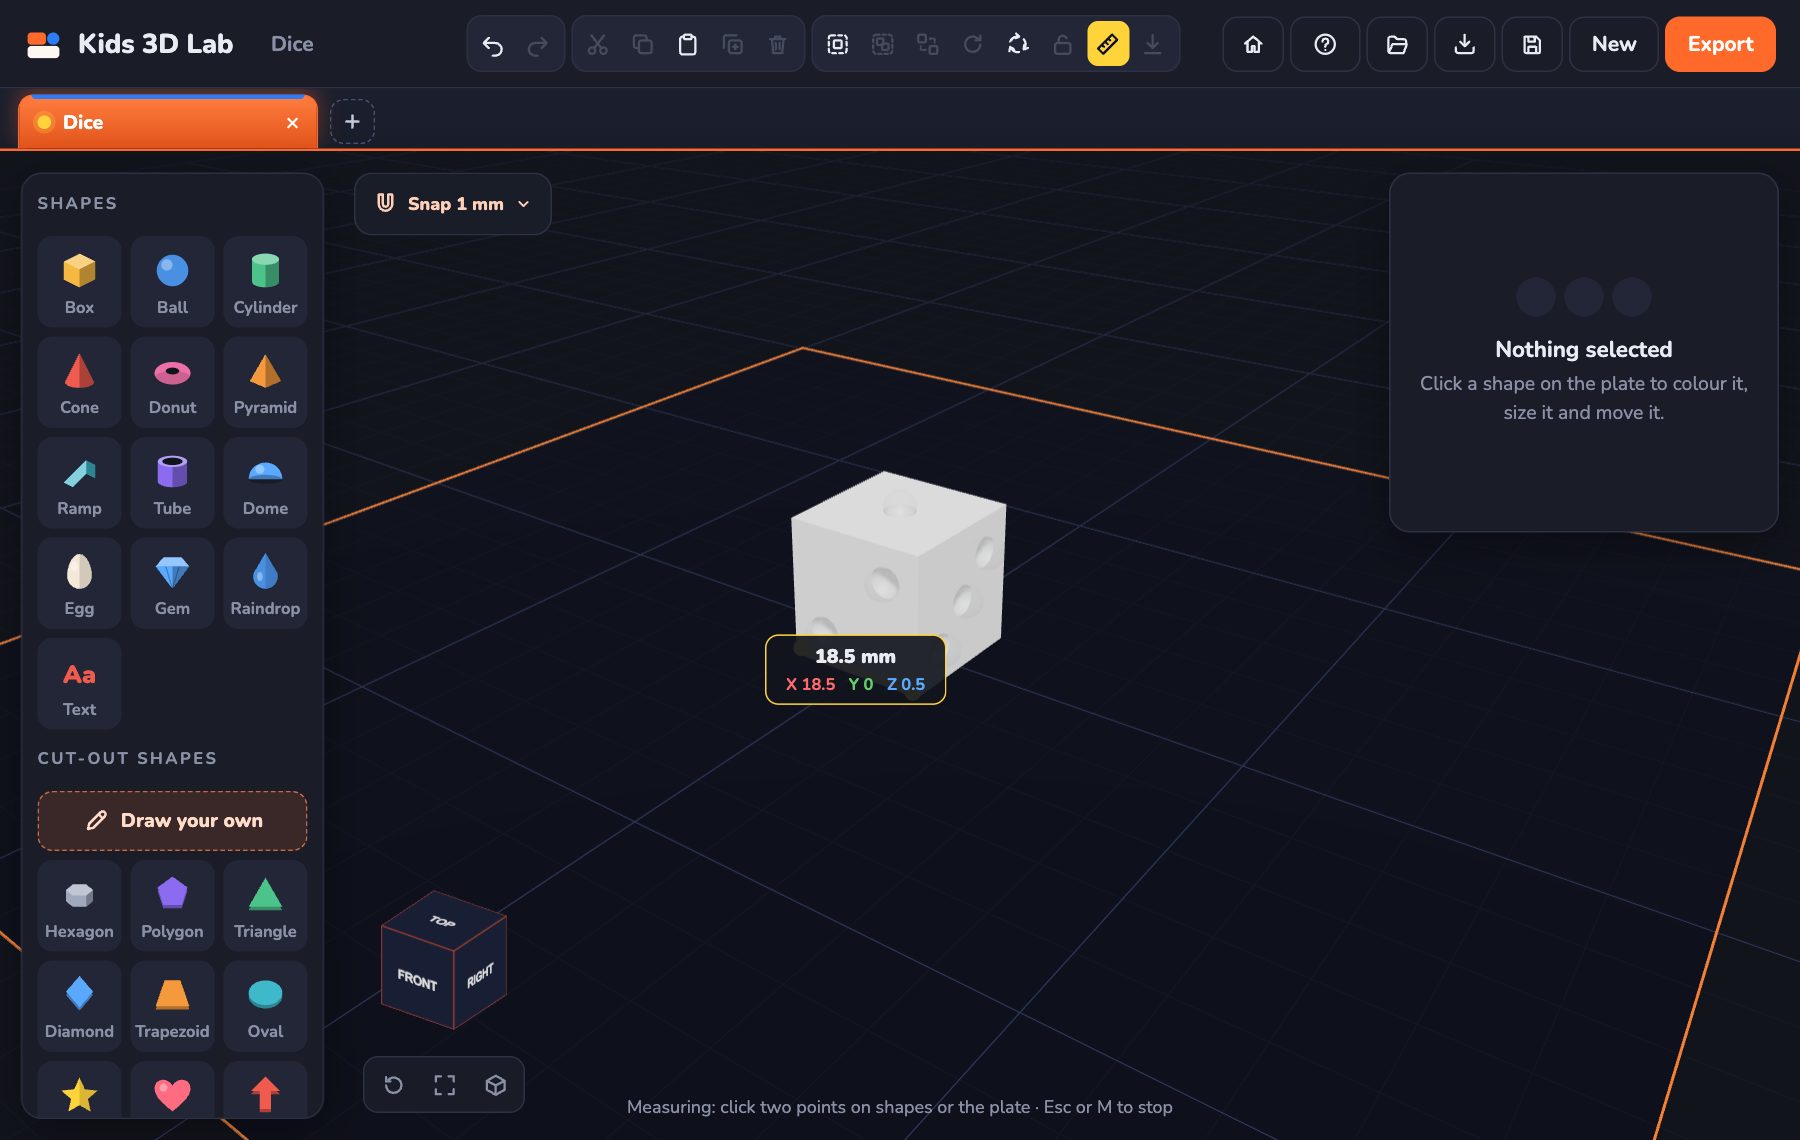
- Click the ruler in the toolbar, or press M.
- Click two points, on a shape or on the plate.
- Kids 3D Lab shows how far apart they are.
- Press M or Esc to stop.
Draw your own shape
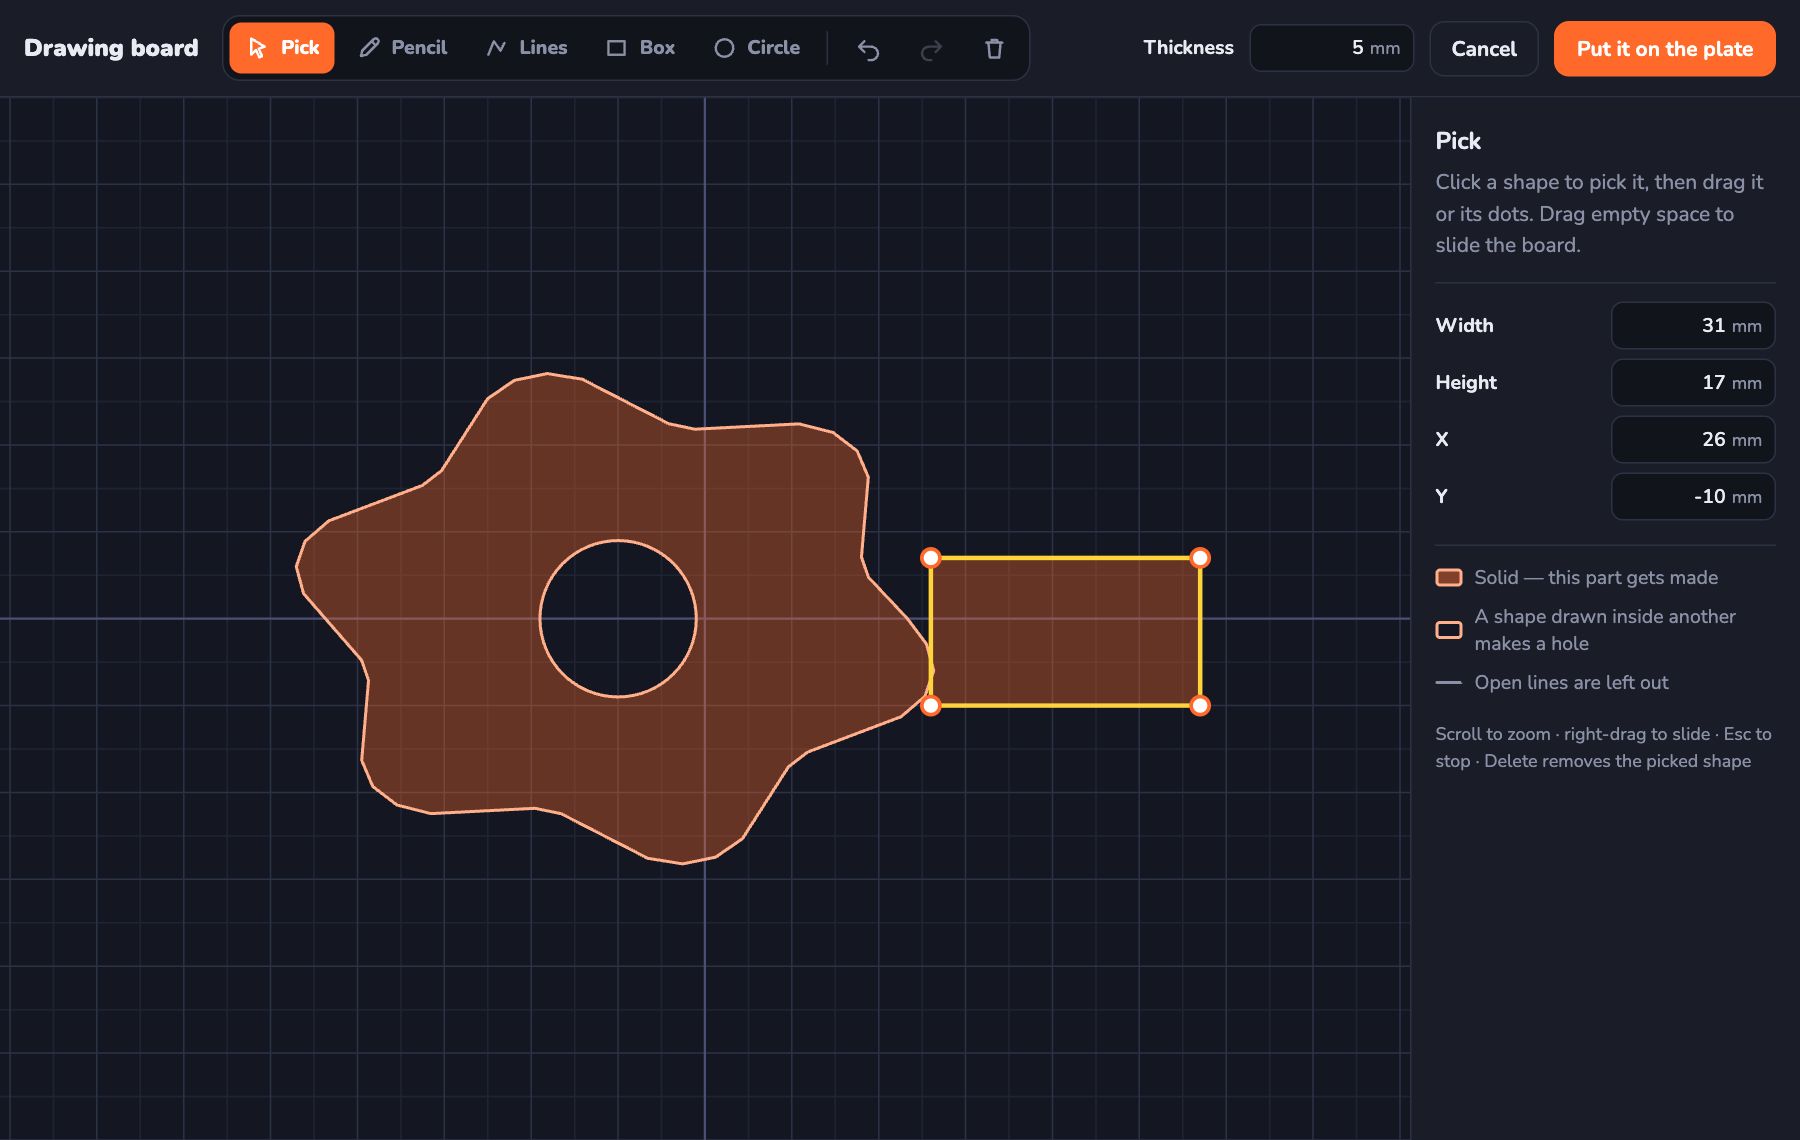
Click Draw your own in the Shapes list. A drawing board opens.
| Tool | How to use it |
|---|---|
| Pencil (P) | Hold the mouse down and draw. Let go and the ends join up |
| Lines (L) | Click for each corner. Click the first dot again to finish |
| Box (B) | Drag from one corner to the other |
| Circle (C) | Drag out from the middle |
| Pick (V) | Click a shape to move it or change it. Press Delete to remove it |
- Shapes that overlap join into one piece.
- A shape drawn inside another one becomes a hole.
- The purple part is what will be made.
- Type the Thickness, then click Put it on the plate.
- To change it later, pick it and click Change the drawing.
Undo and copy
- Undo: Ctrl + Z (on a Mac, ⌘ + Z). It takes back the last thing you did.
- Redo: Ctrl + Y (on a Mac, ⌘ + Shift + Z).
- Copy, cut and paste: Ctrl + C, Ctrl + X, Ctrl + V. You can paste into another tab too.
- Make a copy right here: Ctrl + D.
Saving and opening
| Button | What it does |
|---|---|
| The name at the top | Click "Untitled" and type a name for your build |
| Save | Saves your build as a .kids3d file, so you can change it later |
| Open | Opens a .kids3d file |
| Import | Brings in a 3D model (STL, OBJ or 3MF) or a drawing (SVG) |
| New | Starts a new build in a new tab |
- You can also drag a file onto the window to open it.
- Kids 3D Lab keeps your open tabs safe in the browser, so a refresh doesn't lose them. Still, Save important builds as files, just in case.
Getting ready to print
Click Export at the top right. A box called Ready to print? opens.
- Pick your printer.
- Read the checks. Does it fit? Is anything floating? How many pieces is it? Does any hole cut nothing? Click Show me to find a problem.
- See how much plastic it needs.
- Click Download STL. Or click Download 3MF to keep your colours, for a printer that prints in many colours.
- A grown-up opens the file in the printer's slicer app, like Cura, PrusaSlicer or Bambu Studio, and prints it.
Tips for good prints:
- Give your model a flat bottom that sits on the plate.
- Make walls at least 2 mm thick.
- Every part must touch another part. Nothing can float in the air.
- To join two parts, push one a little bit (about 1 mm) into the other.
Your first project: a key tag
- Click New build.
- Add a Box: Width 50, Depth 20, Height 3, Soft edges 1.
- Add Text: type your name, Letter size 8, Thickness 1.5.
- Click the box, Shift-click the name, then click Put on top of the box.
- Press the right arrow key a few times to slide the name to the right.
- Add a Cylinder: Diameter 5, Height 10. Click Hole.
- Click the box, Shift-click the cylinder, then click Cut through the box.
- Press Shift and the left arrow key to slide the hole to the left end.
- Give it a name, click Save, then Export. Ready to print!
Keyboard shortcuts
On a Mac, use ⌘ instead of Ctrl. Press ? in Kids 3D Lab to see this list.
| Keys | What they do |
|---|---|
| Ctrl + S / Ctrl + O | Save / open |
| Ctrl + Z / Ctrl + Y | Undo / redo |
| Ctrl + C / X / V | Copy / cut / paste |
| Ctrl + D | Make a copy |
| Ctrl + A | Pick everything |
| Ctrl + G | Group |
| Delete | Delete |
| Esc | Pick nothing |
| Arrow keys | Move (Shift: move 10 times as far) |
| Ctrl + up / down arrow | Lift up / put down |
| R | Quarter turn |
| H | Solid or hole |
| L | Lock or unlock |
| M | Tape measure |
| F | Fit everything in view |
| ? | Show all shortcuts |
Fix it!
| Problem | What to do |
|---|---|
| My hole cuts nothing | The hole must go into the shape. Pick the solid, Shift-click the hole, then click Cut through |
| My shape won't move | It may be locked. Press L to unlock it |
| Clicking one shape picks lots | They are grouped. Click Ungroup |
| My shape is floating | Click Drop to plate |
| I lost my build in the view | Press F, or click TOP on the view cube |
| I deleted something by mistake | Press Ctrl + Z |
Have fun building!