Blog ›
Make a Pencil Holder for Your Desk
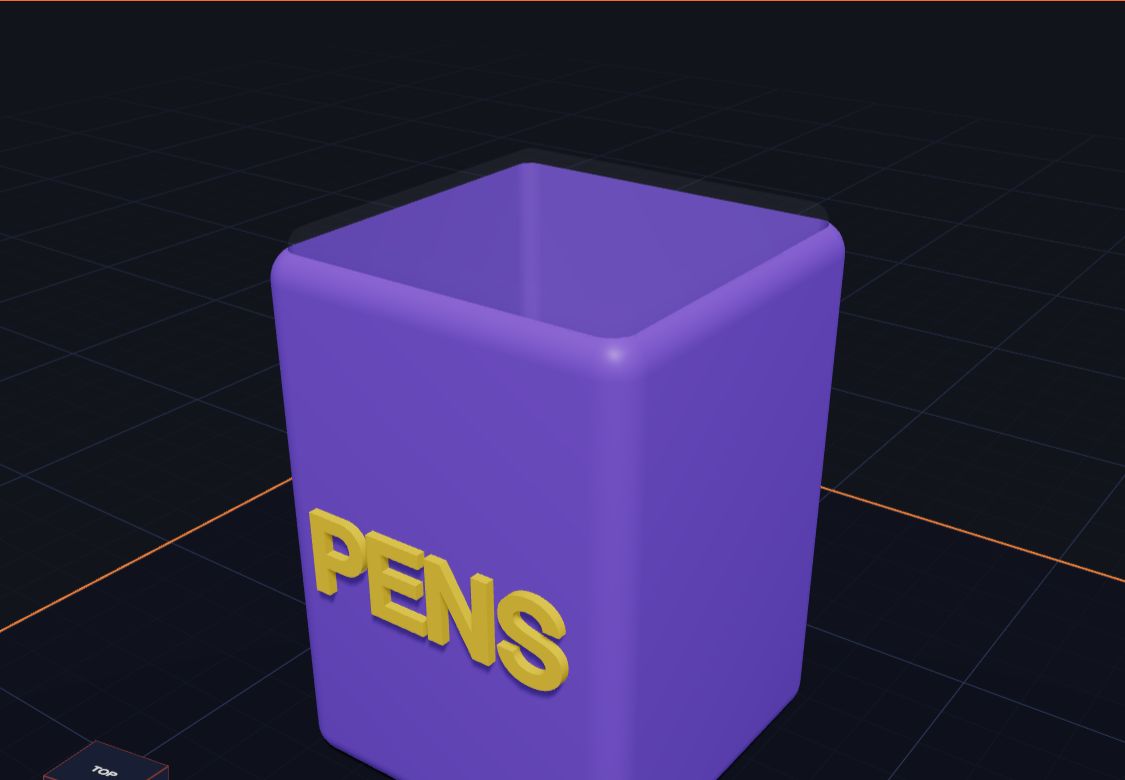
Are your pencils always rolling off the desk? Let's fix that! In this lesson you will design a pencil holder, also called a pen pot. It's a tall box with a big hole inside, and your name on the front.
You will learn how to make something hollow, and why walls and floors need to be the right thickness.
First, measure your pencils
A pen pot has to fit real pencils. Grab your longest pencil and a ruler.
- A new pencil is about 175 mm long.
- A pen pot about half as tall holds them well. So 85 mm is a good height.
- Your pencils need room to go in. A hole 55 mm across fits a whole handful.
Measuring first is what real designers do. It saves plastic and time!
Step 1: The outside
- Click New build.
- Add a Box. Make it 60 wide, 60 deep and 85 high.
- Set Soft edges to 5. Now it has smooth, round corners.
- Pick your favourite colour.
This is the outside of your pen pot.
Step 2: The hole inside
Now we need to scoop out the inside. We do that with a hole.
- Add another Box. Make it 55 wide, 55 deep and 85 high.
- Set Soft edges to 3.
- Click Hole at the top of the panel, or press H. It turns grey and see-through.
Now put the hole in the middle of the pot:
- Click the big box first. Then hold Shift and click the hole.
- Click Line up, then pick the middles, so the hole sits in the centre.
- Pick just the hole, and set its Z lift to 2.5. This lifts it up 2.5 mm off the plate.
Why lift it? If the hole started at the plate, it would cut right through the bottom and your pencils would fall out! Lifting it leaves a floor 2.5 mm thick.
Look inside. Your box is hollow!
Walls and floors
The outside is 60 wide and the hole is 55 wide. So there is 5 mm of plastic left over: 2.5 mm on each side. That's the wall.
| Part | How thick | Why |
|---|---|---|
| Walls | 2.5 mm | Strong enough not to crack |
| Floor | 2.5 mm | Holds the pencils in |
Step 3: Put your name on the front
- Add Text. In Words, type your name or "PENS".
- Set Letter size to 13 and Thickness to 2.
- The text is lying flat. To stand it up on the front, click ↻ 90° next to X under Turn.
- Move the text to the front of the pot, so the letters stick out from the front wall. They should touch the wall, a little bit inside it.
- Lift it with the blue arrow until it sits in the middle of the front.
Pick a bright colour for the letters so they pop!
Step 4: Check and export
- Give your build a name and click Save.
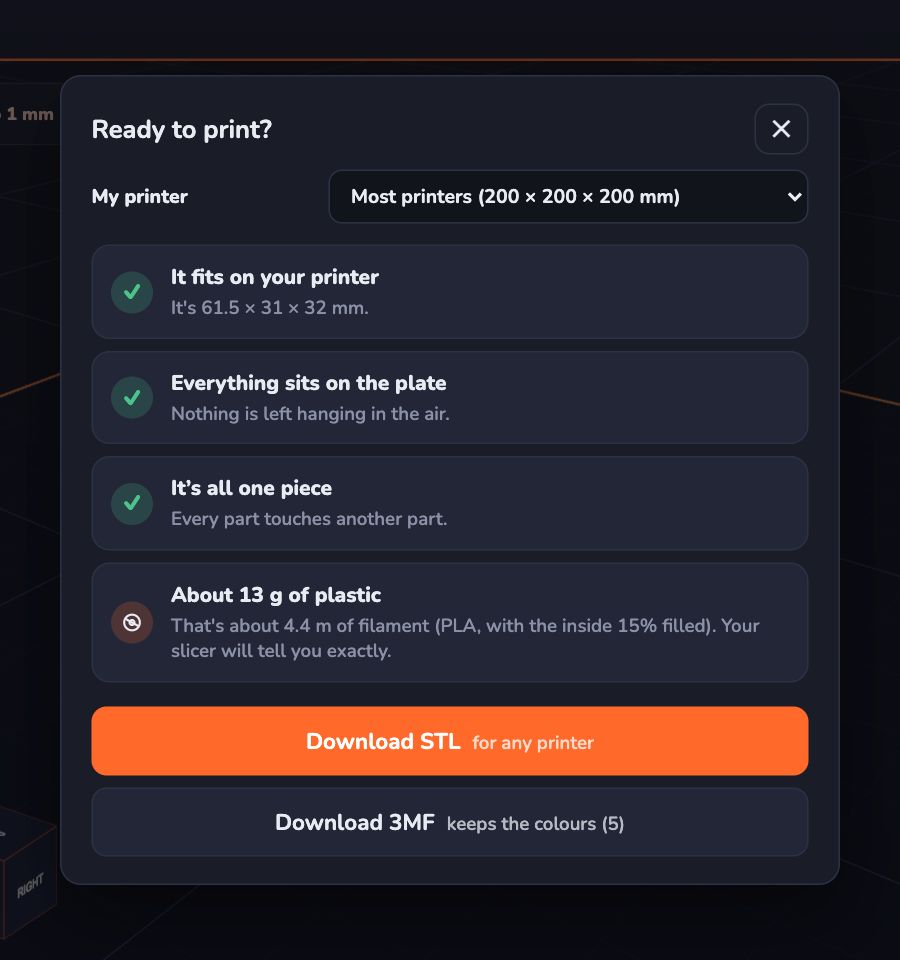
- Click Export. Look at the checks in Ready to print?
- Look at grams of plastic. A pen pot is bigger than a keychain, so it uses more plastic and takes longer to print.
- Click Download STL, or Download 3MF to keep the colours.
Make it your own
- A round pot: use a Cylinder 60 wide, with a Cylinder hole 55 wide.
- A tube pot: the Tube shape is already hollow! Set Wall to 2.5. You only need to add a floor: a thin cylinder under it.
- A pot with two rooms: add a thin box wall inside the hole, from front to back. Now there's a side for pencils and a side for pens.
- A hexagon pot: use a Hexagon with a smaller Hexagon hole. It looks like a honeycomb!
- A pot that leans: put a Ramp under it, so the pencils tip towards you.
Common mistakes
- The hole goes through the bottom. Lift the hole with Z lift to leave a floor.
- The hole isn't in the middle. Use Line up to centre it. Otherwise one wall is thick and one is thin.
- The walls are too thin. Make the hole smaller, so the walls are at least 2 mm.
- The letters are floating in front of the pot. Push them back until they touch the front wall.
- It's too tall for the printer. Pick your printer in Ready to print? to check it fits.
Questions kids ask
Can I print it without the hole and cut it later?
No. A printer makes exactly what you design. If there's no hole in the design, the pot comes out solid!
Why does the hole need soft edges too?
The outside corners are round, so the inside corners should be round too. Then the wall is the same thickness all the way around.
Will it hold heavy things?
It will hold pencils, pens and crayons. It's plastic, so don't stand on it!
How long will it take to print?
A pot this size can take a few hours. The slicer tells you the exact time. Try a small test version first, only 30 mm tall, to check your design.
For grown-ups
The pen pot teaches "hollowing" with a subtracted shape, and it makes wall thickness concrete: children can calculate it from two numbers they typed. Ask them to predict the wall thickness before they check it. The measuring step matters too: design around the real object, then add room. Some children will want a design that fits one specific marker; that's a great chance to talk about clearance. For a bigger challenge, try designing a holder with holes sized exactly for coloured pencils. See How Holes Work for pockets, dents and through-holes.
Keep reading
 Choosing a First 3D Printer for Your Family
What to look for in a first 3D printer for a family with kids — size, safety, ease of use and plastic — explained in plain words, with questions to ask before you buy.
6 min read
Choosing a First 3D Printer for Your Family
What to look for in a first 3D printer for a family with kids — size, safety, ease of use and plastic — explained in plain words, with questions to ask before you buy.
6 min read
 Is 3D Printing Safe for Kids?
A clear, calm guide to 3D printing safety for families and classrooms — hot parts, moving parts, fumes, small pieces and food — and simple rules that keep kids safe.
5 min read
Is 3D Printing Safe for Kids?
A clear, calm guide to 3D printing safety for families and classrooms — hot parts, moving parts, fumes, small pieces and food — and simple rules that keep kids safe.
5 min read
 3D Design Lesson Plans for Grades 3 to 5
Five ready-to-use 3D design lessons for grades 3 to 5 with Kids 3D Lab — shapes, measuring, holes, symmetry and a design challenge — with goals, steps and ideas for checking learning.
7 min read
3D Design Lesson Plans for Grades 3 to 5
Five ready-to-use 3D design lessons for grades 3 to 5 with Kids 3D Lab — shapes, measuring, holes, symmetry and a design challenge — with goals, steps and ideas for checking learning.
7 min read